
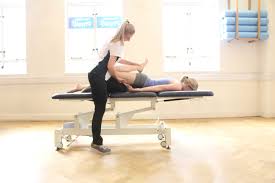
Shoulder pain holding you back? Whether it’s a rotator cuff tear or tendinopathy, the right physiotherapy can make all the difference. In this blog, we’ll unpack the key differences, how each condition affects recovery, and how rotator cuff physiotherapy helps you get back to doing what you love — faster.
Understanding the Rotator Cuff
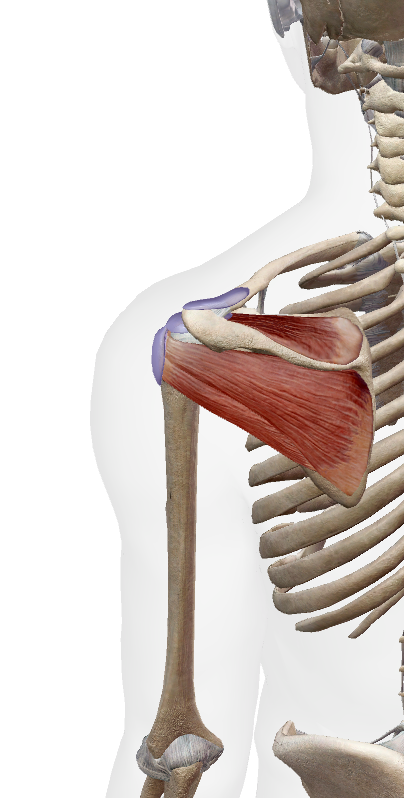
The rotator cuff is a group of four muscles and tendons that stabilise your shoulder joint — the supraspinatus, infraspinatus, teres minor, and subscapularis. Together, they help lift, rotate, and control your arm. Because the shoulder is such a mobile joint, it’s also prone to injury — especially from overuse, repetitive strain, or sudden trauma.
Rotator Cuff Tear vs Tendinopathy: What’s the Difference?
Both conditions can cause pain and weakness, but they’re not the same injury. Understanding the difference is essential for choosing the right physiotherapy treatment.
Rotator Cuff Tear
A rotator cuff tear occurs when one or more of the tendons partially or completely detaches from the bone. Tears can result from:
- A traumatic event (like falling on an outstretched arm)
- Repetitive overuse from activities like tennis, painting, or gym workouts
- Age-related degeneration, where the tendon gradually frays over time
Symptoms may include:
- Sharp pain during lifting or reaching overhead
- Weakness when raising the arm
- Clicking or popping sounds
- Difficulty sleeping on the affected shoulder
Tears can range from partial-thickness (a fray or small split) to full-thickness (a complete tear through the tendon).
Rotator Cuff Tendinopathy
Rotator cuff tendinopathy, on the other hand, is a chronic overuse injury. It happens when the tendon becomes irritated or thickened due to repeated micro-trauma. Instead of a tear, the tendon shows degenerative changes that lead to pain and stiffness.
Common causes include:
- Poor posture (rounded shoulders or forward head position)
- Repetitive overhead movement (swimming, throwing, trades work)
- Weakness or imbalance in the shoulder and scapular muscles
- Poor shoulder blade control
Symptoms may include:
- Gradual onset of shoulder pain
- Pain when lifting or lowering the arm
- Morning stiffness
- Dull ache after activity
While both conditions cause pain, tendinopathy is usually gradual, while tears often follow a sudden event.

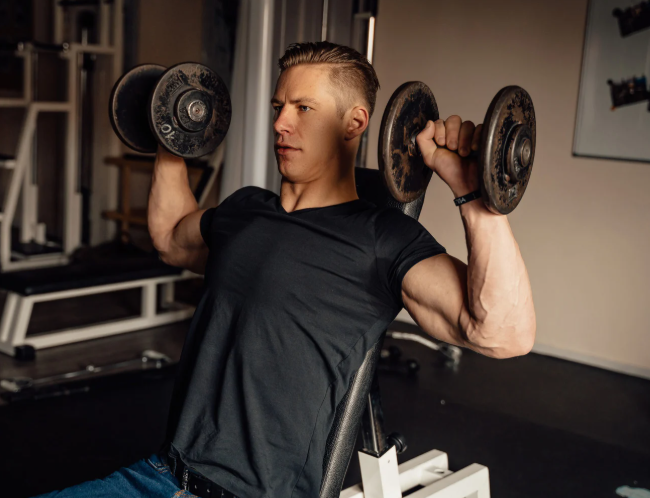
How Physiotherapy Helps Shoulder Recovery
Whether it’s a tear or tendinopathy, rotator cuff physiotherapy plays a crucial role in recovery. The goal is to reduce pain, restore movement, strengthen the shoulder, and prevent recurrence.
1. Accurate Assessment and Diagnosis
Physiotherapists perform a thorough clinical assessment — checking range of motion, strength, and joint stability. We’ll also determine whether the issue is more likely a tear or tendinopathy. If necessary, we may refer you for imaging (like an ultrasound or MRI) for confirmation.
This ensures your treatment plan is targeted and effective from day one.
2. Early Pain Relief and Inflammation Control
In the early stages, physiotherapy focuses on reducing inflammation and pain. Treatment may include:
- Ice therapy
- Gentle manual therapy and soft tissue release
- Dry needling
- Taping or support techniques to offload the tendon
For rotator cuff tears, early movement within a pain-free range is essential to prevent stiffness (especially adhesive capsulitis or “frozen shoulder”).
3. Restoring Mobility and Posture
Once pain begins to settle, we focus on restoring range of motion and correcting postural issues that may have contributed to the injury.
Common exercises may include:
- Pendulum exercises
- Shoulder blade squeezes
- Thoracic mobility drills
Good posture reduces tension on the rotator cuff and helps the shoulder move more freely during daily activities.
4. Strengthening and Stability Training
Building strength is the cornerstone of long-term recovery.
Your physio will prescribe a progressive exercise program that targets:
- Rotator cuff muscles for stability
- Scapular (shoulder blade) muscles for control
- Core and postural muscles for better biomechanics
This phase is essential for both tendinopathy and tears, helping restore shoulder function and preventing re-injury.
5. Gradual Return to Sport or Work
As strength and control improve, physiotherapy transitions into sport- or work-specific exercises. This ensures you can safely return to overhead movements like throwing, swimming, or lifting.
For tradies or gym-goers, we’ll simulate work or exercise demands so you regain confidence before returning fully.
Example from Our Clinic – Local Success Story
Recently, we treated Mark, a 48-year-old electrician from Belrose, who came to our Frenchs Forest clinic with ongoing right shoulder pain. He’d been struggling for months — unable to work overhead or sleep comfortably.
After assessment, we found he had rotator cuff tendinopathy from years of repetitive overhead work. We started with gentle manual therapy, postural retraining, and a home exercise program focused on shoulder blade control.
Over six weeks, Mark noticed major improvements — pain reduced, strength returned, and he was back to working full days without discomfort. With continued rotator cuff physiotherapy, he avoided the need for injections or surgery and now maintains his results with a tailored exercise plan.
How Long Does Recovery Take?
Recovery time varies depending on the severity of the injury, but here’s a general guide:
| Condition | Typical Recovery Time | Notes |
|---|---|---|
| Mild tendinopathy | 4–6 weeks | Responds well to early physiotherapy and load management |
| Moderate tendinopathy | 6–12 weeks | May require progressive strengthening and ergonomic adjustments |
| Partial rotator cuff tear | 8–16 weeks | Requires structured rehab and gradual return to overhead activity |
| Full-thickness tear (non-surgical) | 3–6 months | Focus on strength and compensation control |
| Post-surgical repair | 6–12 months | Follows surgeon’s protocol under physio supervision |
Consistency is key — following your physiotherapy plan closely leads to better, faster outcomes.
When is Surgery Needed?
Not every tear requires surgery. In fact, many partial tears and degenerative cases respond extremely well to physiotherapy.
Surgery may be considered if:
- The tear is full-thickness and large
- There’s significant weakness or loss of function
- You’ve tried physiotherapy for 3–6 months without improvement
Even if surgery is required, pre- and post-operative physiotherapy dramatically improves recovery and long-term shoulder function.
To learn about the rehabilitation required post surgery, CLICK HERE
Preventing Rotator Cuff Injuries
Prevention is often easier than cure. Here are a few tips to protect your shoulders:
- Warm up properly before sport or gym sessions
- Maintain good posture, especially when sitting at a desk
- Strengthen the rotator cuff and scapular muscles regularly
- Avoid sudden spikes in activity (like going heavy at the gym after time off)
- Listen to your body — early shoulder pain is a warning sign
Regular rotator cuff physiotherapy exercises can help keep your shoulders strong, mobile, and pain-free.
FAQs About Rotator Cuff Physiotherapy
1. What’s the difference between a rotator cuff tear and tendinopathy?
A tear involves structural damage to the tendon, while tendinopathy is a chronic overuse injury where the tendon becomes irritated or degenerated. Both can cause pain and weakness but respond well to targeted physiotherapy.
2. How long does it take to recover with physiotherapy?
Mild cases may improve in 4–6 weeks, while more severe tears or tendinopathy can take several months. The key is consistent treatment and progressive exercise under the guidance of your physio.
3. Can physiotherapy heal a rotator cuff tear without surgery?
Yes — many partial tears and age-related tears heal successfully through physiotherapy alone. The goal is to strengthen surrounding muscles and restore movement to reduce pain and improve shoulder function.
4. Should I rest completely if I have shoulder pain?
No. Prolonged rest can actually slow recovery. Your physio will guide you on safe movements and gentle exercises to maintain mobility while your shoulder heals.
5. Do I need a referral to see a physiotherapist?
No referral is needed! You can book directly with X Physio for a full assessment and start your rotator cuff physiotherapy right away.
Get Expert Help Today
If shoulder pain is affecting your work, sport, or sleep — don’t wait for it to get worse. Our experienced physiotherapists at X Physio in Frenchs Forest can assess your shoulder, design a tailored recovery plan, and guide you every step of the way.
Give us a call today on 9806 3077, or book online — just CLICK HERE.
References
- Shoulder Pain and Rotator Cuff Disorders – HealthDirect Australia
- Rotator Cuff Tears – The Royal Australian College of Generaal Practitioners
- Physiotherapy for Rotator Cuff Injuries – Physiopedia
- Tendinopathy Rehabilitation – Sports Medicine Australia
Worried your child’s feet look “flat”? You’re not alone — many parents notice their child’s arches look low and wonder if something’s wrong. The good news is, not all flat feet need treatment! In this blog, we’ll break down when to relax, when to act, and how physiotherapy can help kids develop strong, pain-free feet.
What Are Paediatric Flat Feet?
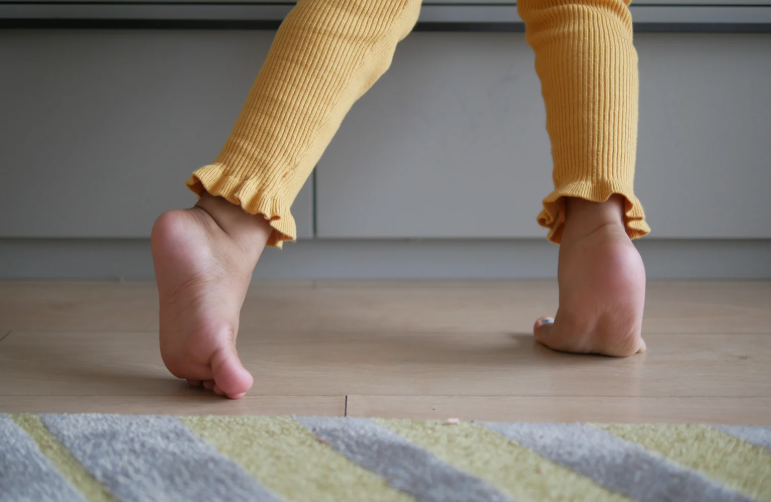
Paediatric flat feet — also known as pes planus — occur when the arch of the foot appears collapsed or very low when standing. It’s extremely common in children, especially under the age of seven, as their bones, joints, and ligaments are still developing.
Flat feet can be:
- Flexible flat feet: the most common type, where the arch appears when your child stands on tiptoes. Usually harmless and improves with age.
- Rigid flat feet: less common and may indicate a structural or neurological issue that needs assessment.
Why Do Some Kids Have Flat Feet?
Several factors contribute to flat feet in children, including:
- Genetics: often runs in families.
- Joint hypermobility: overly flexible ligaments can cause the arch to collapse.
- Muscle weakness: particularly in the calves, intrinsic foot muscles, or glutes.
- Poor footwear: shoes lacking arch support can contribute to alignment issues.
- Rapid growth: as kids grow quickly, their muscles and ligaments can temporarily struggle to keep up.
It’s important to remember — flat feet alone aren’t a problem. It’s only when they cause pain, fatigue, balance issues, or altered walking patterns that treatment may be needed.
When Should You Worry About Flat Feet?
You should consider a physiotherapy assessment if your child:
- Complains of foot, knee, or leg pain
- Walks with their feet turned in or out
- Seems clumsy or trips often
- Avoids running or physical play
- Wears out shoes unevenly
- Has visible collapse of the arch or ankles rolling inwards
If you notice these symptoms, it’s time to get checked by a paediatric physiotherapist who understands how growing bodies develop.
How Physiotherapy Helps Kids with Flat Feet
Physiotherapy plays a huge role in managing symptomatic or persistent flat feet. A physio doesn’t just focus on the feet — they assess the whole lower limb chain, including hips, knees, and posture.
1. Strengthening the right muscles
Targeted exercises help strengthen:
- Intrinsic foot muscles
- Calf muscles
- Hip stabilisers and glutes
Stronger muscles mean better arch support and balance during walking or running.
2. Improving flexibility and alignment
Tight calf muscles and Achilles tendons can worsen flat feet. Physiotherapists prescribe stretches and mobility work to restore healthy movement.
3. Gait retraining
Physios analyse how your child walks and runs using video gait analysis or simple observation, then coach proper foot placement and movement control.
4. Footwear and orthotics advice
Your physio will recommend the right footwear for your child’s activity level and foot shape. In some cases, temporary orthotics or heel wedges may help relieve strain.
5. Play-based exercises
Paediatric physio isn’t about boring drills — it’s fun and engaging! Balance games, obstacle courses, and tiptoe walking challenges are used to build strength and control.
Real-Life Example: Helping a Young Patient from Dee Why
Recently, we saw Emily, a seven-year-old from Dee Why, whose parents noticed her feet rolling inwards and her shoes wearing unevenly. Emily also complained of sore legs after sports days at school.
After a full assessment at X Physio in Frenchs Forest, we found mild muscle weakness in her arches and glutes. Through a six-week physiotherapy program — including balance games, calf stretches, and strengthening exercises — her symptoms improved dramatically. She now runs and jumps pain-free and proudly shows off her “strong arches” to her parents!
Can Flat Feet Go Away on Their Own?
Yes, for many children, flat feet naturally resolve as they grow. The arches usually start developing between ages 5 and 10. However, if flat feet are still present and causing discomfort by around age 10–12, it’s worth reassessing with your physio.
When Physiotherapy Is Most Effective
Early intervention is key. Physiotherapy is most effective when:
- Flat feet are symptomatic
- The child is active or athletic
- There’s pain, poor balance, or fatigue
- Other biomechanical issues (e.g., knock knees or pronation) are present
Treatment focuses on long-term function rather than quick fixes — helping your child build strong foundations for healthy movement into adulthood.

Home Tips for Parents
Here are simple ways to support your child’s foot health at home:
- Encourage barefoot play on safe surfaces (grass, sand) to build intrinsic muscles.
- Check their shoes regularly — kids outgrow them faster than you think!
- Limit overly soft shoes that don’t provide adequate support.
- Promote active play like skipping, climbing, and balance games.
- Stretch calves daily if your child’s heels tend to lift early when walking.
When to See a Specialist
Your physiotherapist may refer you to a podiatrist or orthopaedic specialist if:
- Flat feet are rigid or painful
- The arch doesn’t form on tiptoes
- There’s swelling or stiffness in the joints
- Pain persists despite physiotherapy
These cases may require imaging or specialised orthotic support.
Why Choose X Physio in Frenchs Forest
At X Physio, we take a holistic approach to paediatric care. Our physiotherapists understand how growing bodies move and adapt. We combine clinical expertise with playful, child-friendly exercises to make rehab both effective and enjoyable.
We also work closely with local schools, sports clubs, and healthcare providers in surrounding suburbs like Belrose, Forestville, and Davidson — ensuring each child gets the best care possible.
Final Thoughts
Paediatric flat feet are common — and in most cases, they’re nothing to worry about. But if your child is in pain, tiring easily, or struggling to keep up with their friends, a physiotherapy assessment can make a world of difference.
Our team at X Physio in Frenchs Forest is here to help your child move confidently and comfortably again. Find out more about us by CLICKING HERE
Give us a call today on (02) 9806 3077, or book online — just CLICK HERE.
FAQs About Paediatric Flat Feet
1. Are flat feet normal in children?
Yes — it’s completely normal for young kids to have flat feet. Most develop arches naturally by around age 10.
2. When should I see a physiotherapist for my child’s flat feet?
If your child complains of pain, gets tired easily, or walks awkwardly, it’s worth booking an assessment.
3. Can physiotherapy fix flat feet permanently?
Physiotherapy helps strengthen muscles, improve posture, and support better foot mechanics. While not all cases are “fixed,” most children see big improvements in comfort and movement.
4. Will my child need orthotics?
Not always. Physiotherapists usually try exercise-based treatment first, but may recommend short-term orthotics for comfort or support.
5. What age should I worry if my child’s flat feet haven’t improved?
If your child is around 10–12 years old and their arches haven’t developed — or if they’re still experiencing symptoms — it’s time for a professional review.
References:
- Raising Children Network – Flat Feet in Children
- Better Health Channel – Foot Problems in Children
- Australian Physiotherapy Association – Paediatric Care
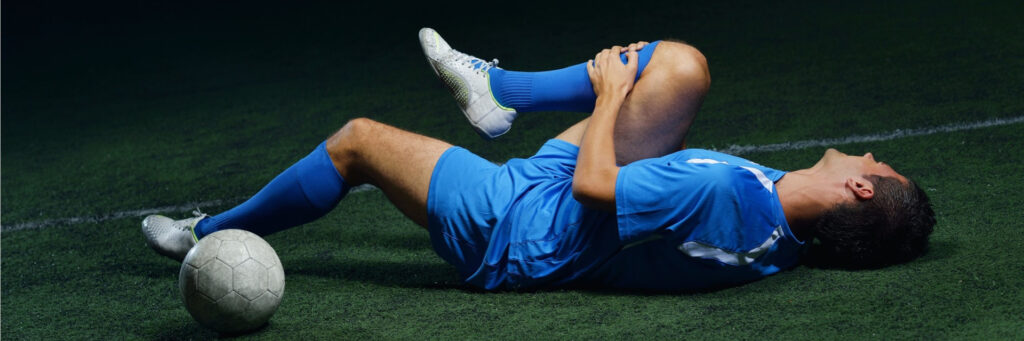
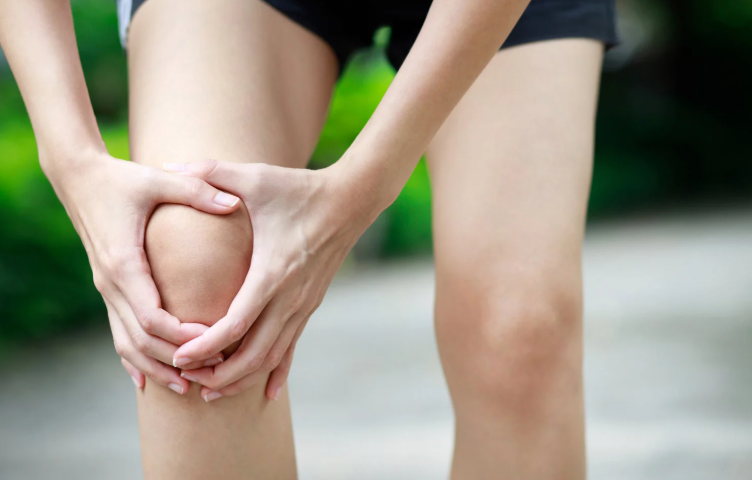
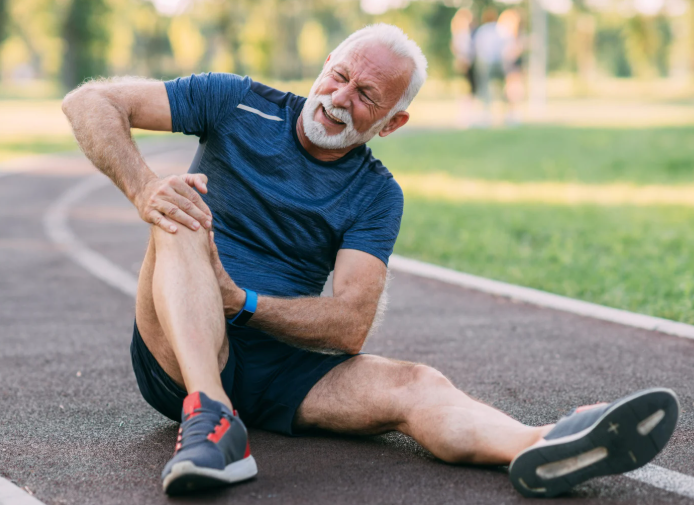
Suffered a quadriceps strain and not sure what to do next? You’re not alone. This common thigh injury can be painful and frustrating — but with the right physiotherapy plan, recovery is smoother than you think. In this blog, we’ll break down causes, treatment options, and how our team in Frenchs Forest can help.
What Is a Quadriceps Strain?
Your quadriceps are the four powerful muscles at the front of your thigh that help you straighten your knee, run, jump, and kick. A quadriceps strain — sometimes called a quad tear or quad injury — happens when these muscles are overstretched or partially torn.
It’s a common issue among runners, football players, and gym enthusiasts, but it can happen to anyone during sudden movements or slips.
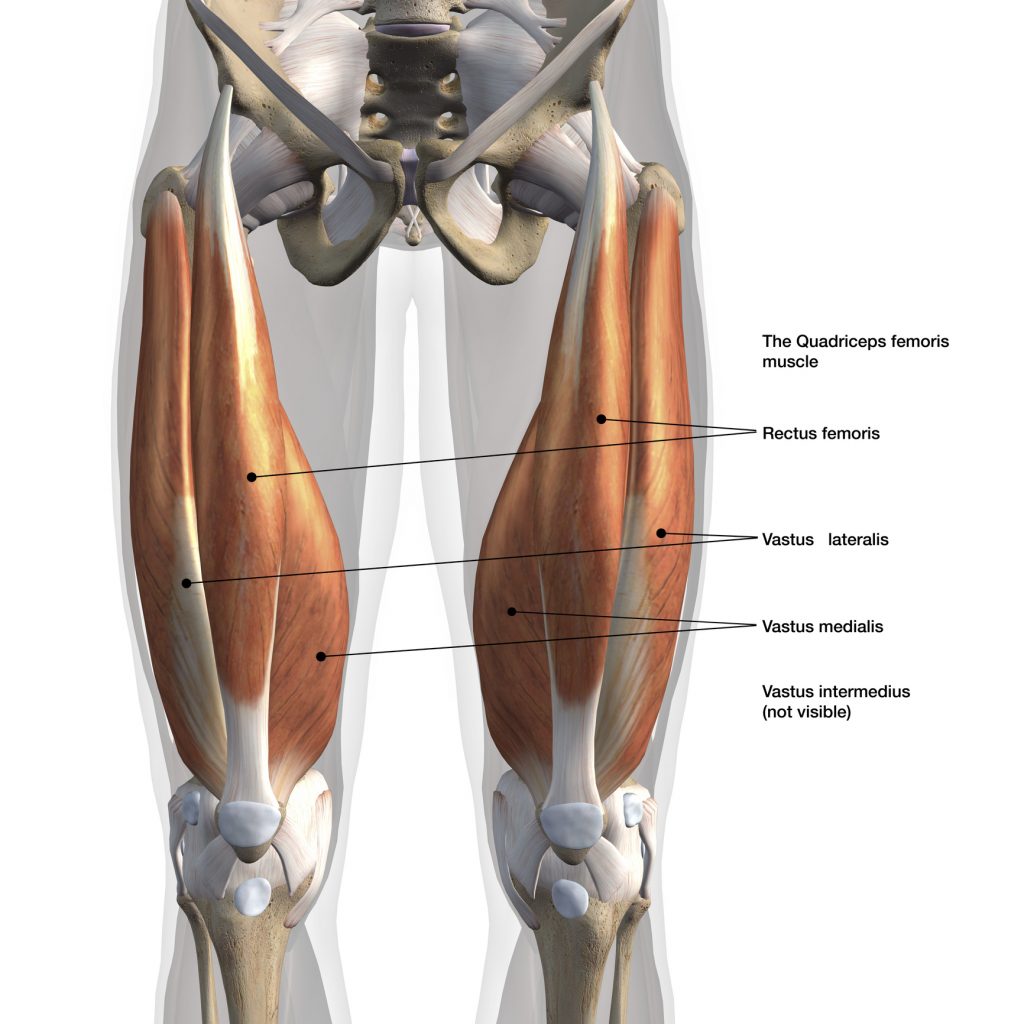
The Quadriceps Muscles Include:
- Rectus femoris – most often injured; used in kicking and sprinting
- Vastus lateralis – outer thigh
- Vastus medialis – inner thigh
- Vastus intermedius – sits deep between them
When one or more of these muscles are overloaded or fatigued, a strain can easily occur.
Types of Quadriceps Strains
Physiotherapists classify quadriceps injuries into three grades based on severity.
Grade 1 – Mild
- Minor overstretching of a few muscle fibres
- Mild discomfort or tightness
- Often no bruising, but tenderness the next day
Grade 2 – Moderate
- Partial tearing of the muscle fibres
- Sharp pain and swelling
- Walking or squatting may be painful
Grade 3 – Severe
- Complete tear or rupture
- Intense pain, swelling, and visible bruising
- Significant weakness or inability to straighten the knee
Even if symptoms seem mild, getting early physiotherapy for your quadriceps strain can dramatically speed up healing and prevent complications.
Common Causes of a Quadriceps Strain
Most quad strains happen during high-speed or forceful contractions, such as:
- Sprinting or kicking
- Jumping and landing awkwardly
- Heavy lifting or squatting
- Sudden changes in direction
Other contributing factors include:
- Skipping a warm-up
- Poor flexibility
- Muscle imbalance (weak hamstrings compared to strong quads)
- Returning to sport too early after a previous injury
Symptoms of a Quadriceps Strain
Typical signs include:
- Sudden pain or “pulling” sensation at the front of the thigh
- Tightness or tenderness when walking
- Swelling or bruising developing within 24 hours
- Pain when straightening the knee or lifting the leg
- Weakness or stiffness
If you feel a sharp pain during exercise or sport, stop immediately and book a physiotherapy assessment. Early diagnosis is key for a quicker recovery.
Quadriceps Strain Physiotherapy: How Treatment Works
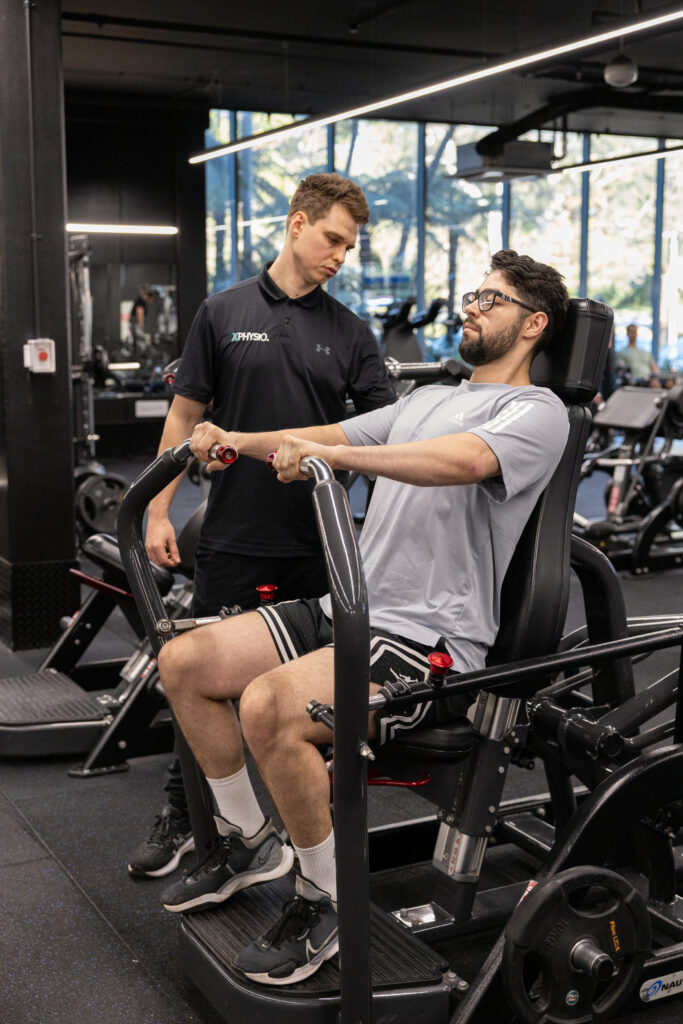
Physiotherapy plays a major role in healing and preventing re-injury. At X Physio Frenchs Forest, we create individualised treatment plans that target pain, rebuild strength, and restore full function safely.
1. Assessment and Diagnosis
Your physiotherapist will examine your thigh, test muscle strength, and identify the exact site and grade of injury. We may refer for an ultrasound if a severe tear is suspected.
2. Early Stage – Calm and Protect
The first 3–5 days focus on:
- Reducing pain and swelling
- Applying ice and compression
- Using gentle range-of-motion exercises
- Hands-on soft tissue therapy
We’ll also teach you how to move safely while protecting the healing muscle.
3. Mid Stage – Strength and Control
Once pain subsides, we move on to:
- Progressive strengthening (e.g. isometric holds, mini squats, step-ups)
- Gentle stretching to restore mobility
- Dry needling and massage to aid recovery
- Core and hip strengthening to support lower limb control
Our focus here is restoring balance and preventing compensations.
4. Final Stage – Power and Return to Sport
Before you get back to sport or gym training, we’ll guide you through:
- Running and jumping drills
- Plyometric and eccentric exercises
- Functional testing to ensure symmetry and confidence
We never guess — we test. This ensures your leg is ready for full return to activity without setbacks.
Case Study: Local Athlete Success
Recently, we treated a 32-year-old soccer player from Forestville, just around the corner from Frenchs Forest. He felt a sharp pain in his thigh mid-sprint during training and came in the next day.
Diagnosis: Grade 2 quadriceps strain.
Treatment: soft tissue therapy, dry needling, progressive strength rehab, and return-to-run program.
Within three weeks, he was pain-free and jogging again. By week six, he was back to full training — stronger and more confident than before.
This is the kind of result we see regularly with early, targeted quadriceps strain physiotherapy.
At-Home Recovery Tips
- Apply ice for 15–20 minutes every few hours during the first 48 hours.
- Avoid aggressive stretching early on — it can worsen the tear.
- Stay mobile – gentle walking helps circulation.
- Eat nutritious foods to support muscle repair.
- Follow your physio’s program closely for the best long-term results.
How Long Does Recovery Take?
Every quadriceps injury heals differently, but here’s a guide:
| Grade | Typical Recovery Time | Rehab Focus |
|---|---|---|
| Grade 1 | 1–2 weeks | Light exercise, mobility |
| Grade 2 | 3–6 weeks | Strength, stability, control |
| Grade 3 | 8–12+ weeks | Gradual reloading and return to sport |
The earlier you start physiotherapy, the shorter your overall downtime tends to be.
Preventing Future Quadriceps Strains
To reduce the risk of re-injury:
- Always warm up before training.
- Include eccentric (slow-lowering) exercises in your strength routine.
- Keep flexibility in check.
- Balance quad and hamstring strength.
- Maintain consistent physio check-ins during training phases.
Why Choose X Physio in Frenchs Forest
At X Physio, we’re passionate about helping athletes and active locals recover quickly from injuries like quadriceps strains.
We combine:
- Hands-on physiotherapy
- Personalised exercise programs
- Cutting-edge strength testing and video analysis
Our patients come from Forestville, Allambie, Oxford Falls, and the wider Northern Beaches, trusting us for expert care and long-term results.
Frequently Asked Questions (FAQs)
1. What’s the difference between a quadriceps strain and tear?
They’re the same injury type — a “strain” simply describes muscle fibres being overstretched or torn. The term “tear” is often used for more severe grades.
2. How do I know if I have a quadriceps strain or just muscle soreness?
If pain occurs suddenly during activity and is focused in one spot, it’s likely a strain. Soreness usually affects both thighs equally and builds up gradually after exercise.
3. Should I use ice or heat for a quadriceps injury?
Use ice during the first 48–72 hours to reduce inflammation. After that, heat can help relax the muscle and increase circulation.
4. Can I still exercise with a quadriceps strain?
You should avoid painful movements until assessed by your physio. Training through pain can cause further tearing and delay recovery.
5. How long until I can return to sport?
Mild strains recover within 1–2 weeks, while more serious tears may take 8–12 weeks. Your physiotherapist will test strength and control before clearing you to return.
References
- Sports Medicine Australia – Quadriceps Strain
- Physiopedia – Quadriceps Strain
- Better Health Channel – Muscle Injuries
Start Your Recovery Today
Don’t let a quadriceps strain slow you down. Physiotherapy is the fastest and safest way to get back on your feet.
Give us a call today on 9806 3077, or book online – just CLICK HERE.
🏃♂️ Related Reading
Looking to learn more about injury recovery and physiotherapy? Check out these helpful blogs from our team:
- Hamstring Strain Physiotherapy: Rehab Tips and Recovery Timeline
Learn how to recover from a hamstring strain safely and return to sport faster with targeted physiotherapy. - MCL Injury Physiotherapy: Treatment and Return-to-Play Plan
Discover the key stages of MCL injury rehab and how physiotherapy restores knee strength and stability.
An MCL injury (medial collateral ligament) can sideline your knee stability and mobility — but most recover well with guided physiotherapy. In this blog we break down the 3 grades of MCL injury, outline tailored treatment plans for each, and share a real patient story from nearby Frenchs Forest. Read on to see how we fix knees.
Imagine doing a side step, hearing a pop, and feeling your knee wobble sideways. That inner-knee ache after the game? That might be your MCL (medial collateral ligament) asking for help. But don’t panic — with the right plan, you can bounce back stronger.
Before we dive in: if you’re reading this because your knee hurts today, keep reading — you’ll find a roadmap for recovery and a concrete path back to your sport or daily life.
What is the MCL, and how does it get injured?
The MCL is a strong band of ligament on the inside (medial side) of your knee. Its job is to resist sideways force (valgus) pushing your knee inward, and to help with rotational stability. When you get a blow to the outer side of the knee, or twist while your foot is planted, the injury can get overstretched, torn partially, or torn completely.
Symptoms often include:
- Pain and tenderness along the inner knee
- Swelling or bruising
- Stiffness / reduced motion
- Instability (“my knee gives way”) in more serious cases
- Difficulty bearing weight
Diagnosis is made via clinical testing (valgus stress tests) plus, in some cases, imaging such as MRI or ultrasound to check the extent and whether other structures (e.g. meniscus, ACL) are also injured.
If you don’t think your MCL is the cause of your pain, read this blog to determine what else it could be:
The 3 Grades of MCL Injury
We commonly classify MCL injury ‘s into Grade I, II, and III. Each grade indicates severity, and changes how we treat.
| Grade | What’s happening | Symptoms / signs | Usual recovery time* |
|---|---|---|---|
| Grade I (mild sprain / micro-tear) | Some fibers are stretched or minimally torn; ligament continuity is largely intact | Mild pain, local tenderness, minimal swelling, stability largely preserved | ~1–2 weeks (for daily tasks), up to 3 weeks for full return to sport |
| Grade II (moderate / partial tear) | More fibers are torn, ligament is somewhat lax | More pain, swelling, some instability especially with cutting or pivoting | ~4–8 weeks, depending on demands |
| Grade III (complete tear / rupture) | Ligament is fully torn (or mostly so), sometimes detaching from bone | Severe pain, swelling, significant instability, often difficulty weightbearing | 8–12+ weeks (or more if surgery / associated injuries) |
* These are approximate timelines; healing depends on age, general health, compliance with rehab, and whether there are co-injuries.
In many cases, Grade I and II injuries are managed non-surgically with physiotherapy, bracing, and guided loading. Grade III may sometimes require surgical consultation — especially if other knee ligaments are involved — but an isolated MCL injury tears heal well with conservative care.
Treatment Plan by Grade: What We Do at the Clinic
Below is a laddered approach to care based on injury severity. Every patient will differ, so your physio adapts to your pain, swelling, and response.
Grade I (mild sprain)
Goals
- Control pain and swelling
- Restore knee range of motion (ROM)
- Begin muscle activation, particularly quads and hamstrings
- Gradually reintroduce load
Typical plan
- Acute / protection phase (days 1–3 or until pain allows)
- Rest (avoid aggravating activities)
- Ice, compression, elevation
- Gentle passive / active assisted knee flexion/extension (within tolerance)
- Quadriceps sets (isometric contraction)
- Straight leg raises if pain allows
- Early rehab (week 1–2)
- Progress ROM (heel slides, wall slides)
- Light closed-chain loading (mini squats)
- Gentle hamstring activation
- Begin balance / proprioception (e.g. single leg stance, wobble board)
- Progressive loading (week 2–3)
- Increase intensity of squats, step-ups
- Lunges (within pain limits)
- More challenging balance drills
- Light sport-specific drills (if relevant)
- Return to full activity
- Test strength versus uninjured side
- Do change-of-direction drills
- Make sure knee is stable under dynamic loading
With a Grade I injury, many patients return to normal activity (depending on sport) in 1–3 weeks.
Grade II (moderate / partial tear)
Goals
- Protect the injured ligament while beginning controlled movement
- Restore ROM
- Strengthen surrounding muscles
- Rebuild stability through proprioception
- Safely progress back to daily/sport use
Typical plan
- Protection / acute phase (first 1–2 weeks)
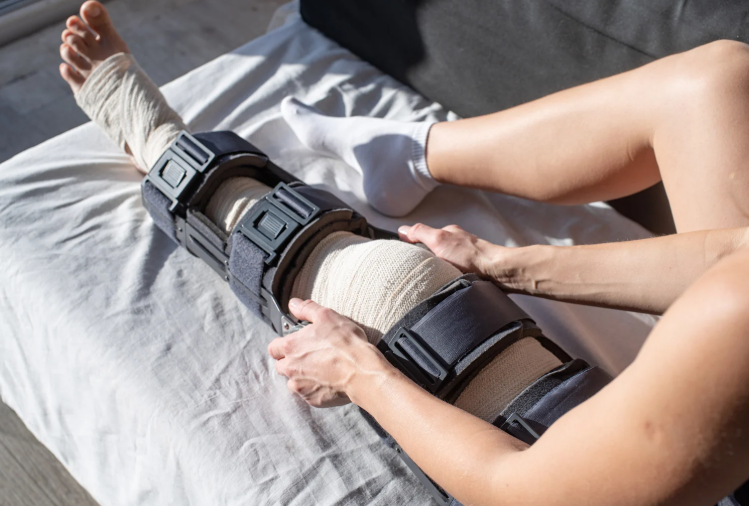
- Use of a hinged knee brace (locked or limited motion) to protect the knee during early healing
- Crutches if needed (offload to reduce pain)
- Ice, compression, elevation
- Pain-free ROM exercises (within brace limits)
- Gentle muscle activation (quads, hamstrings)
- Early rehab (weeks 2–4)
- Gradually unlock the brace to allow controlled ROM
- Continue strengthening: seated knee extensions, hamstring curls, calf raises
- Closed-chain work (mini squats, partial lunges)
- Proprioceptive drills (balance, single leg stance, wobble pad)
- Manual therapy / soft tissue techniques on tight muscles
- Intermediate / loading phase (weeks 4–6 or more)
- Increase resistance of strength exercises
- Dynamic stability (lateral steps, single leg squats)
- Light jogging when pain and stability allow
- Sport- or activity-specific drills (cutting, pivoting)
- Return to sport / full activity (weeks 6–8+)
- Strength and hop testing (≥90 % of uninjured side)
- Agility, plyometrics, side steps
- Monitor for symptoms of instability
- Gradual full return
Typically, a Grade II case can take 4–8 weeks to recover, though more demanding sports may require more time. (Sources: Peak Physio; Anystage Physio; Jubilees)
Grade III (complete tear / rupture)
Goals
- Protect the injured ligament
- Prevent further injury while promoting safe healing
- Gradually regain motion, strength, and stability
- Decide whether surgical opinion is needed
- Aim for full return, or managed return depending on associated injuries
Typical plan (conservative approach when no surgical repair needed)
- Immobilisation / protection (weeks 0–2 or longer)
- Hinged brace, often locked initially
- Crutches to offload
- Ice, compression, elevation
- Gentle isometric muscle activation (quad/hamstring sets)
- Gradual mobilising phase (weeks 2–6)
- Begin unlocking brace gradually to allow controlled motion
- Continue passive / assisted ROM, progressing as tolerated
- Strengthening exercises within the brace limits
- Gentle closed chain loading as pain allows
- Ongoing soft tissue and joint mobilisation by physio
- Rehabilitation phase (weeks 6–12+)
- Increase resistance in strength training
- Dynamic balance, proprioception drills
- Begin jogging, then progress to cutting and pivoting (very cautiously)
- Emphasise control, landing mechanics, neuromuscular training
- Return to sport / full function (after ~3 months or more)
- Strength, hop tests, agility drills
- Sport-specific simulation
- Monitor for instability, pain, swelling
- In some cases, surgical repair or reconstruction may be needed (especially if associated ACL, meniscus, or multiple ligament injuries)
If a Grade III injury is part of a multi-ligament injury, surgery + rehab is often required. But many isolated MCL injury tears — especially femoral-side ones — heal well without surgery. (Sources: Perth Knee Injury; Jubilees; Sydney Physio)
Recovery can take 8–12+ weeks (and in complex cases, months).
A Real Clinic Success Story
Let me tell you about “Sam”, who came to us from Belrose, near Frenchs Forest NSW. Sam is an avid weekend soccer player, and during a match he was tackled from the outside and felt a sharp pain along the inside of his knee. He came into our Frenchs Forest clinic two days later with a Grade II MCL injury confirmed by clinical testing and an MRI.
Here’s how Sam’s journey went:
- In the first week, we fitted him with a hinged knee brace (limited motion initially) and gave him a home program focused on pain control, gentle activation, and range of motion within limits.
- Weeks 2–4, we progressed strength exercises (mini squats, hamstring work), added proprioceptive drills (balance pads, single leg holds), and began light closed-chain loading.
- By week 5, Sam was doing jogging and light change-of-direction drills, under supervision.
- At week 7, he passed strength and hop testing (≥ 95% of unaffected side) and began full soccer training gradually.
- At week 8, he was back playing in non-contact drills, and by week 10 he was back in full competition, pain free.
The key was consistent rehab, avoiding rushing things too early, and building control before return. Sam’s knee is stable, he’s confident, and last week he came back to us for a check and said “best I’ve felt in years.”
This is what we aim for every patient — tailored, progressive, confident recovery.
Tips & Mistakes to Avoid
- Don’t skip early rehab — even mild injuries benefit from guided loading.
- Don’t rush return — instability is a risk if you return too early.
- Monitor swelling, pain flare ups, and signs of giving way.
- Use bracing or external support early on when needed, but wean off as strength improves.
- Always include neuromuscular / proprioception work — that’s what protects your knee long term.
- If there are signs of other ligament damage, meniscal injury, or instability, refer to an orthopaedic surgeon early.
Summary
An MCL injury doesn’t mean the end of your sport or active life — it just means you need a smart, phased roadmap. By understanding your injury grade and working through a structured rehabilitative plan, you maximise your chance of a full return — stronger and safer.
If you’re in or near Frenchs Forest, or anywhere in the Northern Beaches, and you’ve just had that tell-tale inner knee pain or wobble — don’t wait for it to get worse. Give us a call today on 9806 3077, or book online, just CLICK HERE. Let’s assess your knee, map your recovery, and help you get moving again.
FAQs
FAQ
Q: Can an MCL injury heal without surgery?
A: Yes — most isolated MCL injury ‘s (Grades I and II, and many Grade III) heal well with conservative (non-surgical) care, such as bracing and physiotherapy.
Q: How long does an MCL injury take to heal?
A: It depends on the grade — mild sprains may heal in 1–3 weeks; moderate tears in 4–8 weeks; severe tears may take 8–12+ weeks (or more) depending on rehabilitation and any associated injuries.
Q: When can I return to sport after an MCL Injury?
A: Return depends on strength, stability, lack of symptoms, and passing functional tests. For Grade I/II, often within 4–8 weeks; for Grade III, sometimes 3+ months is needed.
Q: Do I need a knee brace for an MCL injury?
A: A hinged brace can protect the joint during early healing (especially in Grade II/III) and is often used early, but we typically wean off as strength and stability return.
Q: What if I still feel instability or pain after rehab?
A: If symptoms persist, further assessment is needed. There may be associated ligament or meniscus damage. An orthopaedic consult or further imaging may be required.
References & Further Reading
- Anystage Physio — Medial Collateral Ligament Injury Classification & Treatment
- Peak Physio — Medial Collateral Ligament Sprains
- Jubilees Sports Physiotherapy — Dealing with Medial Collateral Ligament Injuries
- Perth Knee Injury — MCL Injury Treatment
- Melbourne Sports Physio Experts — MCL Injury Rehab
- PhysioWorks — Effective MCL Sprain Treatment & Prevention
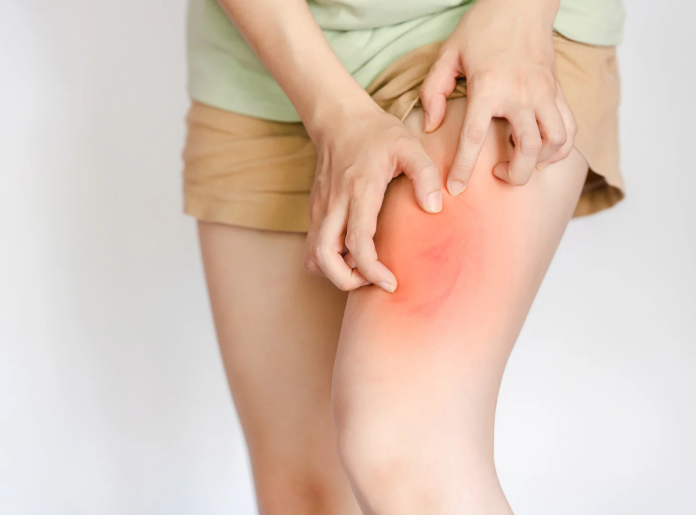
ITB friction syndrome is a common overuse injury causing sharp pain on the outside of the knee, often sidelining runners and active Aussies. The good news? With tailored physiotherapy — from hands-on care to strengthening and running technique — recovery is very achievable. Stick with us for expert advice, real stories, and proven tips
Don’t Let Knee Pain Stop You
Whether you’re training for your first half marathon, hitting the local trails, or just enjoying weekend jogs, ITB friction syndrome can feel like the ultimate setback. But it doesn’t have to be the end of your running story. This blog offers a step-by-step guide on recovery, prevention, and resilience — so you can get back to running stronger and smarter.
What is ITB Friction Syndrome?
The iliotibial band (ITB) is a thick strip of connective tissue running from the hip down to the shin, helping stabilise your knee. ITB friction syndrome occurs when repetitive movement (like running or cycling) causes the ITB to rub against the outside of the knee joint, leading to irritation and pain.
Common Symptoms
- Sharp or burning pain on the outside of the knee
- Pain that worsens with running, especially downhill or after 10–20 minutes
- Tenderness over the lateral knee joint
- Occasional clicking or snapping sensations
- Relief when resting, but quick flare when resuming activity
Who Gets It?
- Long-distance runners (especially those increasing mileage too quickly)
- Cyclists, hikers, and athletes doing repetitive leg movements
- People with poor hip strength or biomechanics
- Those running mostly on cambered roads or uneven surfaces
Why Does ITB Friction Syndrome Happen?
The main issue is overload plus poor biomechanics. Contributing factors include:
- Weak glute and hip muscles (causing poor control of thigh alignment)
- Excessive mileage or sudden training spikes
- Downhill running — increases knee flexion angles where ITB is compressed
- Poor footwear or old shoes lacking support
- Running form issues — overstriding, knee collapsing inward
- Tight muscles around hips and thighs
If your pain is closer to the knee cap, this could be linked to the ITB however due to knee cap maltracking. Read more HERE to understand this injury.

Why Physiotherapy Works Best
Unlike rest or anti-inflammatories (which only treat symptoms), physiotherapy tackles the root cause. It focuses on:
- Relieving immediate pain and inflammation
- Correcting biomechanics
- Strengthening hip and glute muscles
- Improving running technique
- Building long-term resilience so pain doesn’t return
Step-by-Step Physiotherapy Management
1. Assessment
A physio will take a detailed history, assess your running style, test hip/knee strength, flexibility, and look for movement dysfunctions.
2. Early Pain Relief
- Relative rest (short break from aggravating runs)
- Ice or cold therapy post-exercise
- Soft tissue release of ITB, quads, glutes
- Taping or strapping for temporary pain reduction
- Gentle stretches for lateral thigh and hips
3. Strengthening Program
This is the core of recovery. Exercises often include:
- Side-lying leg raises and clams
- Hip thrusts and bridges
- Single-leg squats and step-downs
- Resistance band lateral walks
- Core stability training
4. Running Technique & Load Management
- Gradual reintroduction of running — starting shorter, flatter runs
- Correcting stride length, cadence, and posture
- Advising on footwear and surfaces
- Avoiding sudden jumps in training load
5. Manual Therapy & Adjuncts
- Deep tissue massage for tight glutes/hips
- Joint mobilisation if stiffness present
- Dry needling for trigger points
- Education on foam rolling and recovery routines
6. Long-Term Prevention
- Structured warm-ups and cool-downs
- Regular hip/glute strengthening
- Careful progression of training
- Monitoring running form regularly
- Cross-training to balance loading
Patient Story: “James from Belrose”
James, a 34-year-old recreational runner from Belrose, came to our Frenchs Forest clinic with stabbing knee pain every time he ran beyond 5 km. He was frustrated after resting for weeks, only to flare up as soon as he tried again.
On assessment, we found weak glutes and hip stabilisers, plus a running stride that caused his knees to collapse inward. His ITB was overloaded every time he ran longer distances.
We began with pain relief strategies, soft tissue release, and activity modification. Then, we introduced a progressive strengthening program targeting his glutes and hip control, combined with running technique retraining. Within 8 weeks, James went from struggling with 5 km to comfortably running 15 km, pain-free.
Six months later, he’s still running regularly — and he even completed the Sydney Half Marathon without any flare-ups.
Common Mistakes in ITB Rehab
- Relying only on foam rolling without strengthening
- Jumping back into long runs too soon
- Ignoring footwear or running surface
- Skipping hip and glute strengthening once pain improves
- Hoping rest alone will “cure” it
Sample Exercises
| Exercise | Instructions | Benefit |
|---|---|---|
| Clamshells | Lie on side, knees bent, lift top knee up while feet stay together | Strengthens glute medius |
| Hip thrusts | Back on bench, thrust hips upward with weight | Improves glute power |
| Single-leg squats | Slow controlled squats on one leg | Builds knee control |
| Side band walks | Step sideways against band resistance | Improves hip stability |
| Foam rolling | Roll outer thigh/hip area gently | Relieves tension in ITB and surrounding muscles |
Recovery Timeline
- 2–4 weeks: Pain relief and early strength work
- 4–8 weeks: Progressive strengthening, short runs reintroduced
- 8–12 weeks: Full return to regular running and sport
- 3–6 months: Building resilience, maintaining strength, preventing relapse
Key Takeaways
- ITB friction syndrome is common in runners and athletes — but highly treatable with physiotherapy.
- The key is strengthening hips and glutes, correcting running form, and progressing training smartly.
- Don’t just rest and hope — active rehab prevents recurrence.
- With the right plan, you can return to full training pain-free.
👉 Ready to take control of your ITB pain? Give us a call today on 9806 3077, or book online — just CLICK HERE.
References & Further Reading
- Physiopedia: Iliotibial Band Friction Syndrome physio-pedia.com
- Healthline: IT Band Syndrome Overview healthline.com
- Runner’s World: How to Treat IT Band Syndrome runnersworld.com
- PhysioWorks: ITB Syndrome Management physioworks.com.au
- Cleveland Clinic: IT Band Syndrome Guide my.clevelandclinic.org
- Sport Medicine Australia: Overuse Injuries sma.org.au
That’s your complete guide to ITB friction syndrome and recovery. Don’t let knee pain hold you back — give us a call today on 9806 3077, or book online, just CLICK HERE.
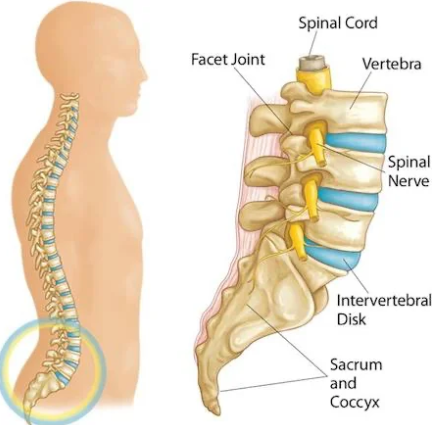
Facet joint injuries occur when the small joints between vertebrae become irritated, damaged or stiff, causing pain, limited movement and sometimes referred pain into other areas. Physiotherapy provides hands-on treatment, posture correction and strengthening to calm inflammation and restore function. Read on to discover how you can recover fully—and fast
What Are Facet Joints & Why They Matter
Facet joints (also called zygapophyseal or “Z-joints”) are pairs of small joints at the back of each vertebra. They help your spine move (twist, flex, extend) and stabilise it so the vertebrae don’t slide. When they’re happy, you can bend, turn your neck or back without pain. When injured, though, they can be a major source of agony.
What Causes a Facet Joint Injury
Facet joint injuries stem from a variety of causes:
- Sudden trauma (whiplash, falls) that overstretches or compresses the joint.
- Repetitive strain or overuse (e.g. frequent twisting, poor lifting technique) that causes micro-trauma over time.
- Degeneration (arthritis, cartilage wear) leading to stiffness, inflammation and pain.
- Poor posture that overloads facets, especially with prolonged sitting or standing.
Symptoms You Might Notice
If a facet joint is injured, you may experience:
- Localised pain (neck, mid-back, or lower back) that worsens with movement, bending backwards, twisting.
- Stiffness, especially after rest or first thing in the morning.
- Pain referred to nearby areas: buttocks, hips, thighs, shoulders depending on the joint involved.
- Reduced range of motion and sometimes muscle spasms / guarding around the joint.
If your symptoms don’t match up, it could be the disc. Read more HERE
How Physiotherapy Helps: What You Can Expect
Physiotherapy is one of the best non-surgical treatments for facet joint injuries. It works at multiple levels:
- Hands-on manual therapy – mobilisations or joint release techniques to reduce stiffness, improve joint glides, relieve pain.
- Targeted exercise programs – to strengthen the core and stabiliser muscles of the spine; improve flexibility of surrounding tissues; retrain movement patterns.
- Posture education & ergonomic advice – changing how you sit, sleep, lift, work can reduce ongoing stress on facet joints.
- Pain relief modalities – heat/cold therapy, taping, possibly soft-tissue massage to reduce inflammation, muscle spasm and improve comfort.
- Dry Needling – Some cases require a deeper release of muscle tone and dry needling can help with this
- Gradual progression – from gentle movement to more challenging functional activities so that you can return to daily tasks, sports or work.
Evidence & Best Practice
- Facet joint injuries / facet joint syndrome account for a significant portion of chronic back pain (lumbar facet joints especially), with estimates varying around 15-40% depending on the population studied.
- Systematic reviews show that physiotherapy (manual therapy + exercise) helps reduce pain and improve function in acute, sub-acute and chronic phases.
- Some interventional procedures (e.g. injections, radiofrequency ablation) are options when conservative management fails, but physiotherapy remains the foundation.
Case Study: Real Patient from Our Clinic
Let me tell you about Dave, who came to our clinic from a surrounding suburb near Frenchs Forest, NSW. Dave is in his mid-40s, works in landscaping, and developed sharp lower back pain that got significantly worse when he twisted or leaning backwards. He also had stiffness first thing in the morning, and occasional referral down into his buttocks.
After assessment, we determined the issue was a lumbar facet joint injury — one side more affected. Our treatment plan included:
- Gentle mobilisation of the lumbar facet joint (manual therapy)
- Core and glute strength exercises, hip mobility work
- Posture and lifting technique coaching
- Heat + soft-tissue work for muscle spasm
Within 4 weeks Dave reported a 70-80% reduction in pain, improved ability to bend and twist with less discomfort, and by 8 weeks he was back doing most of his landscaping tasks with confidence. By week 12, he was almost pain-free doing gym, lifting and daily duties.
This example shows that with the right approach, consistent physiotherapy yields outcomes sooner than many expect.
Treatment Timeline: What to Expect Week by Week
| Phase | Typical Goals | What Physiotherapy Does |
|---|---|---|
| Weeks 1–2 (Acute) | Reduce pain and inflammation, protect the joint, reduce spasm | Rest, gentle manual therapy, pain relief modalities, teaching safe movement, minimising aggravating postures. |
| Weeks 3–6 (Sub-acute) | Restore range of motion, begin gentle strengthening | More mobility exercises, core/glute/hip control work, gradual loading, more manual therapy to unlock stiff joints. |
| Weeks 7–12+ (Recovery / Long-term) | Return to full activity, prevent recurrence | Functional exercises, sport/work-specific training, maintenance program, ongoing postural / ergonomic guidance. |
Tips You Can Use Today to Help Your Facet Joint
- Take breaks from sitting; move frequently and avoid sustained awkward postures.
- Use heat to ease stiffness before activity, cold after high pain flares if swollen.
- Practice core-activation (pelvic tilts, gentle bridging) to support spine.
- Sleep positions: side-lying with a pillow between knees helps lumbar facet stress; use lumbar support in seating.
- Avoid extreme extension/backwards bending until the joint feels more stable.
Potential Ideas When Standard Physio Isn’t Enough
If after around 8-12 weeks of good physiotherapy you still have significant pain / disability, your clinician might consider:
- Diagnostic facet joint blocks to confirm the pain source. Pain Physician+1
- Medial branch blocks or radiofrequency ablation to reduce pain signalling. Pain Physician+2SpringerLink+2
- Intra-articular steroid injections (depending on cases). ScienceDirect+1
Prevention: Keeping Facet Joints Healthy
- Strong core and stabiliser muscles around spine and pelvis.
- Regular mobility work for hips, thoracic spine (mid back) so lumbar or cervical facets aren’t overloaded.
- Good ergonomics at work and home (sitting, standing, lifting).
- Avoid carrying heavy loads on one side, twisting awkwardly.
- Maintain healthy weight; obesity increases load on spinal joints.
Strong Hook & Why You Need to Act Now
Neglecting a facet joint injury can lead to chronic stiffness, reduced motion, and persistent pain that limits work, play and daily life. The sooner you get proper assessment and physiotherapy, the faster you reclaim your mobility and reduce risk of recurring flare-ups.
Call to Action
Ready to get relief and restore strength in your spine? Don’t wait for the pain to worsen— give us a call today on 9806 3077 or book online, just CLICK HERE and let’s start your journey to feeling better.
References & Further Reading
- Physiopedia. “Facet Joint Syndrome” – overview of symptoms, anatomy and treatment options. Physiopedia
- Vitalis Physiotherapy. “Facet Joint Pain” – causes, treatments, posture ideas. vitalisphysiotherapy.com.au
- The Pain Physician Journal – Guidelines for facet joint interventions. Pain Physician
- PhysioWorks! “Facet Joint Arthropathy” – descriptions of hypomobility and hypermobility and how physio helps.
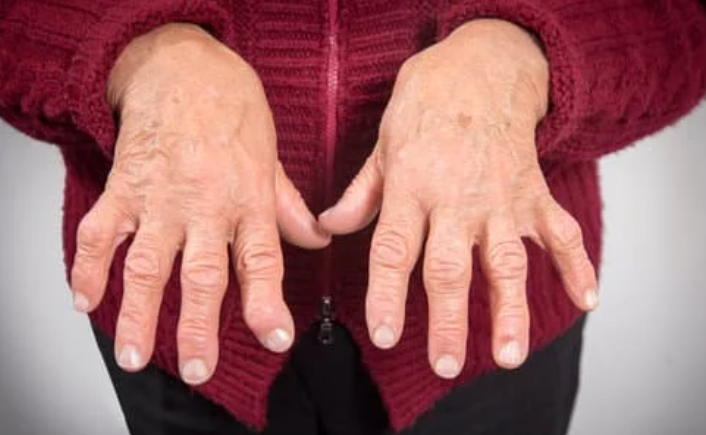
Arthritis physiotherapy helps reduce pain, stiffness and improves joint movement by using tailored strength, flexibility and mobility work — all without needing surgery or heavy meds. This blog digs into the best exercises, techniques, and real-life wins, plus what you can start doing now to feel better.
What Is Arthritis & Why It Causes Stiffness
Arthritis isn’t a one-size-fits‐all issue. It’s a broad term for over 100 joint conditions — the most common being osteoarthritis (wear and tear) and rheumatoid arthritis (autoimmune-driven inflammation). (Reference: CSP+2Total Health Clinics+2)
Stiffness happens because:
- Cartilage wears down, bones and soft tissue rub.
- Inflammation causes swelling.
- Muscles around the joint get weak due to less movement.
- People avoid using stiff joints, which leads to more stiffness.
The New View on Osteoarthritis
It’s no longer seen as just “wear and tear.” Research now shows osteoarthritis also has a metabolic and inflammatory side. Carrying extra weight, poor diet, smoking and inactivity can drive low-grade inflammation that speeds up cartilage breakdown and slows repair. This means lifestyle changes and physio — strengthening muscles, improving mobility and keeping you active — can directly reduce both joint load and inflammatory stress, giving you better results than exercise or medication alone.
Why Rheumatoid and Other Autoimmune Types Develop
Unlike osteoarthritis, which is mainly mechanical and metabolic, rheumatoid arthritis and other autoimmune types occur when the immune system misfires. Instead of protecting you, it mistakenly attacks the lining of your joints (the synovium), triggering chronic inflammation, swelling and pain. Over time this can damage cartilage, bone and ligaments. The exact cause isn’t fully understood, but a mix of genetics, hormonal changes, infections and environmental triggers (like smoking) can set it off. Early diagnosis, medical care and physiotherapy together can help control symptoms, protect joints and maintain function.
How Arthritis Physiotherapy Helps
Here’s what physio actually does and why it works naturally:
- Personalised Assessment
Physios assess joint range of motion, strength, alignment, daily habits. From there, they build a treatment plan that suits you. Arthritis Foundation+1 - Strength & Muscle Support
Weak muscles mean more load on joints. Strengthening exercises reduce pain and improve stability. Physio Ed.+2The Physio Box+2 - Increasing Flexibility & Mobility
Gentle stretching, joint mobilisation, range of motion work helps ease stiffness and lets you move more freely. Versus+2Physio Ed.+2 - Pain Management Techniques
Using heat or cold packs, massage, manual therapy, TENS (nerve stimulation), possibly aquatic therapy. All good for reducing pain and inflammation. Spectrum Health+3Versus +3Wikipedia+3 - Education & Self-Management
Teaching you things like joint protection, pacing, posture, how to modify daily tasks so you minimise flare-ups. This helps you take control. CSP+2Spectrum Health+2 - Long-Term Maintenance & Prevention
The aim isn’t just “feel better now” — it’s keeping joints as mobile as possible, reducing further damage, improving quality of life. Spectrum Health+1
Techniques & Exercises That Actually Work
Here are tried-and-tested physiotherapy methods to ease stiffness in arthritis:
| Approach | What It Involves / Example | Benefits |
|---|---|---|
| Strength Training | Using resistance bands, body-weight or machines focused around hips, knees, shoulders etc. | Improves joint stability, takes load off sore joints. |
| Range of Motion (ROM) & Stretching | Gentle stretching, yoga‐like movements, weighted or passive motions done regularly. | Keeps joints from locking up, reduces morning stiffness. |
| Low Impact Aerobic Exercise | Swimming, walking, cycling or aquatic therapy in warm water. | Improves cardiovascular health without overloading joints. Warm water soothes stiffness. Wikipedia+2Southgate Physio+2 |
| Manual Therapy | Joint mobilisation, soft tissue massage to improve movement and reduce pain. | Directly targets stiffness, helps tissues relax. |
| Pain Relief Modalities | Heat packs, cold therapy, TENS units, ultrasound. | Reduces inflammation, calms flare‐ups. |
| Functional Training | Doing movements you actually need: stairs, standing up from chairs, reaching overhead. | Makes daily life easier, retrains body for what you actually do. |
Lifestyle Factors That Influence Arthritis
While you can’t change your age or genetics, there’s a lot you can do to influence how arthritis feels day to day. Carrying extra body weight puts more load on your hips, knees and ankles, speeding up wear and tear. Smoking and poor diet may worsen inflammation, while regular low-impact movement helps lubricate joints and keep muscles strong. Pairing lifestyle tweaks with physio can make your results faster and longer lasting.

How Physiotherapists Assess Arthritis
Your first session isn’t just a quick chat and a stretch. We take a full history of your symptoms, previous injuries, medical conditions and lifestyle. Then we check your posture, walking pattern, joint range of motion and muscle strength. This comprehensive assessment means your physio plan is truly tailored to you — no cookie-cutter routines here.
Home Strategies Between Appointments
What you do between sessions is just as important as what happens in the clinic. Simple habits like using heat or ice packs at the right times, wearing supportive footwear, pacing your activities and doing your prescribed stretches all help you progress. We’ll give you a clear home plan so you know exactly what to do when you’re not with your physio.
When Arthritis Needs More Than Physiotherapy
Physiotherapy is incredibly effective for most people, but sometimes arthritis requires extra help. If you have sudden swelling, severe pain, a new deformity or symptoms that aren’t improving, we’ll liaise with your GP and refer you to a rheumatologist or orthopaedic specialist if needed. This team approach means you get the right care at the right time, without delays.
Real Patient Example from Frenchs Forest NSW Area
I’m seeing lots of people from suburbs around Frenchs Forest, NSW, and one patient stands out:
“Margaret, from Forestville, came in complaining of hip and knee stiffness first thing in the morning, so bad she avoided walks and couldn’t tie her shoelaces without pain.”
After a full physio assessment, we customised her physio plan: daily stretches for hip flexors and hamstrings, strengthening glutes and quads, aquatic therapy sessions twice a week, plus some manual hip mobilisation and advice on posture and joint protection.
Outcomes after 8 weeks:
- Morning stiffness reduced by ~60%.
- Pain dropped from 7/10 to 3/10 most days.
- She could walk 30-minutes around her block without needing to stop.
- Picking up dropped items no longer made her wince.
That’s the power of consistent physio + doing the homework.
Tips to Maximise Your Progress
To get the most out of physiotherapy:
- Be consistent — those exercises you do at home count.
- Start slow and gradually increase intensity. Don’t overdo it.
- Listen to your body — pain is different from discomfort. Sharp, worsening pain is a signal to pull back.
- Keep moving — even small amounts matter (walking, gentle movement).
- Adjust your environment — use supportive footwear, ergonomic setups, aids if needed.
- Stay in touch with your physio — periodic check-ins help adjust things as you improve or if something changes.
When to See a Physiotherapist
You should consider seeking physiotherapy if:
- You’ve noticed persistent joint stiffness lasting more than 30-60 minutes after rest.
- Your joints are painful when moving or weight bearing.
- Stiffness or pain are stopping you doing things you enjoy.
- You notice changes in gait, balance, or do things differently to avoid pain.
- Over the counter meds, rest or heat aren’t helping much.
Benefits vs Other Treatments
Compared to surgery or heavy medication, physio
- Is non-invasive.
- Has fewer side effects.
- Can often reduce the dose or need for certain pain medications.
- Helps with long-term joint health and function, not just temporary relief.
That said, physio often works best in combination with medical care for some types of arthritis—especially inflammatory types or when damage is advanced.
If you have already had a replacement and need help after the operation, CLICK HERE
Summary
If joint stiffness is stopping you from playing with grandkids, doing your job, or enjoying walks, arthritis physiotherapy could be your best natural route. Through tailored exercises, manual therapy, and ongoing support, it’s possible to regain movement, reduce pain, and feel more like yourself again.
Don’t just accept stiffness as “part of ageing.” Make a change.
Give us a call today on 9806 3077, or book online, just CLICK HERE.
References & Further Reading
- Versus Arthritis – Physio Benefits and how it can help Versus Arthritis
- The Chartered Society of Physio – Arthritis condition overview CSP
- PhysioEd – Beyond Pain Relief: The Benefits of Physical Therapy for Arthritis Physio Ed.
- Total Health Clinics Blog – How Physio Can Help Manage Arthritis Total Health Clinics
Give us a call today on 9806 3077, or book online, just CLICK HERE
Elbow injuries might not be the first type of injury that comes to mind, but this joint works hard for you every day. From lifting groceries to typing away at your desk, your elbows are constantly in action. But what happens when things go wrong? Let’s dive into the world of common elbow injuries, explore why they happen, and talk about how physiotherapy can help you get back on track.
Why is the Elbow So Susceptible to Injury?
The elbow is a complex joint. It’s a hinge joint (like your knee) but with a twist—literally. The elbow allows for both bending and rotating your forearm. This range of motion is thanks to the coordination of three bones: the humerus (upper arm bone), the ulna, and the radius (forearm bones), along with a network of muscles, tendons, and ligaments.
Because of its complexity and regular use, the elbow injuries can be common. Overuse, poor technique during sports, or even something as simple as a slip and fall can lead to trouble. The good news? Physiotherapy can often work wonders in helping you recover.

Common Elbow Injuries
Let’s take a look at some of the most frequent elbow problems people face:
1. Tennis Elbow (Lateral Epicondylitis)
Don’t be fooled by the name—you don’t need to pick up a racquet to get tennis elbow. This condition is caused by repetitive stress on the tendons that attach to the lateral (outer) part of your elbow. Typing, gardening, or even holding a paintbrush can lead to this painful overuse injury. I would say this is the most common elbow injury to present in our clinic.
Symptoms:
- Pain or burning on the outside of the elbow
- Weak grip strength
- Pain that worsens with repetitive movements
How Physiotherapy Helps:
A physio will assess the cause of your pain and tailor a treatment plan. Common approaches include:
- Manual therapy: Techniques to improve blood flow and reduce tension in the affected area.
- Stretching and strengthening exercises: To ease strain on the tendons and improve their resilience.
- Ergonomic advice: Modifications to your work or daily activities to prevent further load.
2. Golfer’s Elbow (Medial Epicondylitis)
Similar to tennis elbow, golfer’s elbow affects the tendons—but this time on the inner side of your elbow. You don’t have to be a golfer to experience it; any repetitive wrist or finger motion can put you at risk. As the tendon does not have a great blood supply, this elbow injury can take weeks, if not months to resolve.
Symptoms:
- Pain and tenderness on the inside of the elbow
- Weakness in the wrist or hand
- Stiffness or discomfort when gripping objects
How Physiotherapy Helps:
Your physio might use:
- Dry needling: To relieve pain and improve circulation.
- Gradual loading exercises: To strengthen the tendons and improve flexibility.
- Activity modifications: Guidance on how to reduce strain during repetitive tasks.
3. Elbow Sprains and Ligament Injuries
Ligaments hold the elbow joint together and keep it stable. A sprain occurs when these ligaments are overstretched or torn, often due to trauma like a fall or a sudden twisting motion.
Symptoms:
- Swelling and bruising around the elbow
- Pain when moving the joint
- A feeling of instability in the elbow
How Physiotherapy Helps:
Treatment will depend on the severity of the sprain but might include:
- Immobilisation: Using a brace or sling to allow healing.
- Controlled exercises: To restore range of motion and strength gradually.
- Proprioception training: To help your elbow regain its sense of position and stability.
4. Fractures
Elbow fractures are most commonly caused by falls or direct impact. They can affect any of the three bones in the joint and often require immobilisation or even surgery to heal properly. It is important that a correct diagnosis is made for this elbow injury.
Symptoms:
- Severe pain and swelling
- Difficulty or inability to move the elbow
- Obvious deformity (in some cases)
How Physiotherapy Helps:
Once the fracture has been treated and stabilised, physio plays a crucial role in recovery:
- Restoration of movement: Exercises to regain flexibility and reduce stiffness.
- Strength rebuilding: Gradual progression to strengthen the muscles around the joint.
- Scar tissue management: Techniques to minimise stiffness from surgery or immobilisation.
5. Bursitis
The elbow has a small, fluid-filled sac called a bursa that cushions the joint. Bursitis occurs when this sac becomes inflamed, often due to prolonged pressure (like leaning on your elbows for too long) or repetitive motion.This elbow injury tends to cause pain at the back of your elbow.
Symptoms:
- Swelling at the back of the elbow
- Pain when touching or moving the elbow
- Warmth or redness around the joint (if infected)
How Physiotherapy Helps:
A physio might recommend:
- Ice and compression therapy: To reduce inflammation.
- Gentle exercises: To maintain joint mobility without aggravating the bursa.
- Postural advice: Tips to avoid pressure or repetitive actions that irritate the area.
6. Ulnar Nerve Entrapment (Cubital Tunnel Syndrome)
The ulnar nerve runs through a narrow tunnel on the inside of your elbow. When compressed or irritated, it can cause numbness, tingling, or weakness in your hand and fingers.This elbow injury can be caused by a range of factors and often requires a scan to further investigate the cause.
Symptoms:
- Tingling or numbness in the ring and little fingers
- Weak grip strength
- Pain or aching on the inside of the elbow
How Physiotherapy Helps:
Treatment might include:
- Nerve gliding exercises: To help the ulnar nerve move more freely.
- Splinting: To keep the elbow in a position that reduces pressure on the nerve.
- Postural adjustments: Advice on avoiding prolonged elbow flexion or other aggravating positions.
How to Prevent Elbow Injuries
Prevention is always better than cure! Here are some practical tips to prevent an elbow injury:
- Warm up properly: Before any physical activity, ensure your muscles and tendons are ready to go.
- Use correct technique: Whether you’re lifting weights or typing, proper form can reduce strain on your joints.
- Take breaks: Avoid repetitive motions for long periods; stretch and rest regularly.
- Strengthen your forearms: Stronger forearm muscles provide better support for your elbow.
- Be mindful of posture: Avoid slouching or leaning on your elbows for extended periods.

Why Physiotherapy is Key
Physiotherapy isn’t just about exercises—it’s about a holistic approach to recovery. Your physio will consider your lifestyle, goals, and the underlying cause of your injury to create a personalised treatment plan. Here’s why physio makes such a difference:
- Accurate diagnosis: Your physio can identify the root cause of your elbow pain and address it effectively. Often this can be done with a clinical assessment only which will not require a scan, therefore saving time and money.
- Hands-on techniques: From massage to joint mobilisation, physios use a range of manual therapies to aid recovery.
- Education: You’ll learn about your injury, how to prevent it in the future, and how to make lasting changes.
- Progressive exercises: A step-by-step plan ensures you regain strength, mobility, and confidence without overdoing it.
Final Thoughts
Elbow injuries don’t have to hold you back. Whether it’s a niggling ache from too much computer work or a more serious condition, physiotherapy offers effective solutions to help you recover. By understanding your injury and working with a physio, you’ll be on your way to stronger, pain-free elbows in no time.
So, if your elbow is giving you grief, don’t ignore it. Reach out to XPhysio today and take the first step towards recovery. Your elbows will thank you!