

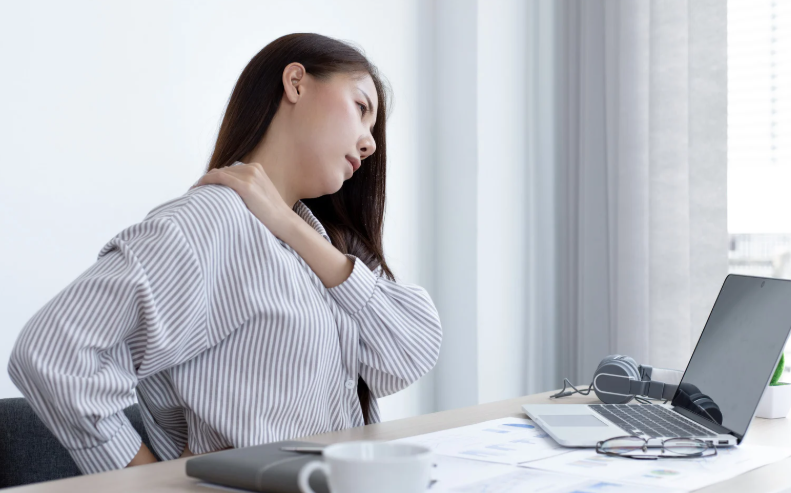
Neck and shoulder pain is one of the most common issues we see in office workers—usually caused by long hours at the desk, stress, and poor posture. The good news? Physiotherapy can ease tension quickly and help prevent it from creeping back. In this blog, we’ll unpack the real causes, the best treatments, and what actually works long-term.

The Modern Office Worker Problem: Why Neck and Shoulder Pain Happens
If you work at a desk, you’ve probably felt that familiar tightness creeping up your shoulders by mid-afternoon—or the stubborn knot at the base of your neck that just never goes away. You’re not alone. Neck and shoulder pain is now a leading musculoskeletal complaint among Australians working in corporate, healthcare, education, tech and hybrid roles.
The root cause? Usually a combination of these factors:
1. Prolonged sitting
Sitting still for hours causes upper back and neck muscles to fatigue. When they tire, the smaller muscles around the neck overwork and tighten.
2. Poor desk setup
A laptop placed too low or a monitor set too far away forces your head forward, placing huge stress on the cervical spine.
3. Stress and tension
Many office workers subconsciously “shrug” their shoulders when they’re stressed, which causes the upper trapezius muscles to stay switched on all day.
4. Forward-head posture
For every 2–3cm your head moves forward, the load on the neck muscles can double. Over time, this becomes chronic pain, stiffness and even headaches.
5. Reduced movement variety
Even if you have a “perfect” ergonomic setup, staying still too long is the real enemy. Movement is what keeps the muscles happy.
The good news? Physiotherapy directly targets each of these root causes and gives you real, lasting relief.
How Physiotherapy Helps Neck and Shoulder Pain
At X Physio in Frenchs Forest, we take a structured approach to reducing pain, improving mobility, and building long-term resilience. Here’s how physio helps:
1. Hands-on treatment for immediate relief
Manual therapy is one of the fastest ways to reduce tension and restore mobility. We commonly use:
- Soft tissue release
- Trigger point therapy
- Joint mobilisation
- Dry needling (when appropriate)
These hands-on techniques reduce muscle guarding, improve circulation, and help the nervous system down-regulate its pain response.
2. Restoring movement and mobility
When the neck and shoulders stop moving well, everything stiffens up. Physiotherapy helps restore:
- Cervical rotation (turning the head)
- Thoracic extension (straightening the upper back)
- Scapular (shoulder blade) movement
- Rib mobility
Even small mobility improvements can dramatically reduce daily pain levels.
3. Strengthening the right muscles
Tight muscles are often weak muscles simply working overtime. Strengthening key areas reduces load on irritated tissues:
- Deep neck flexors
- Lower trapezius
- Serratus anterior
- Rotator cuff
- Thoracic extensors
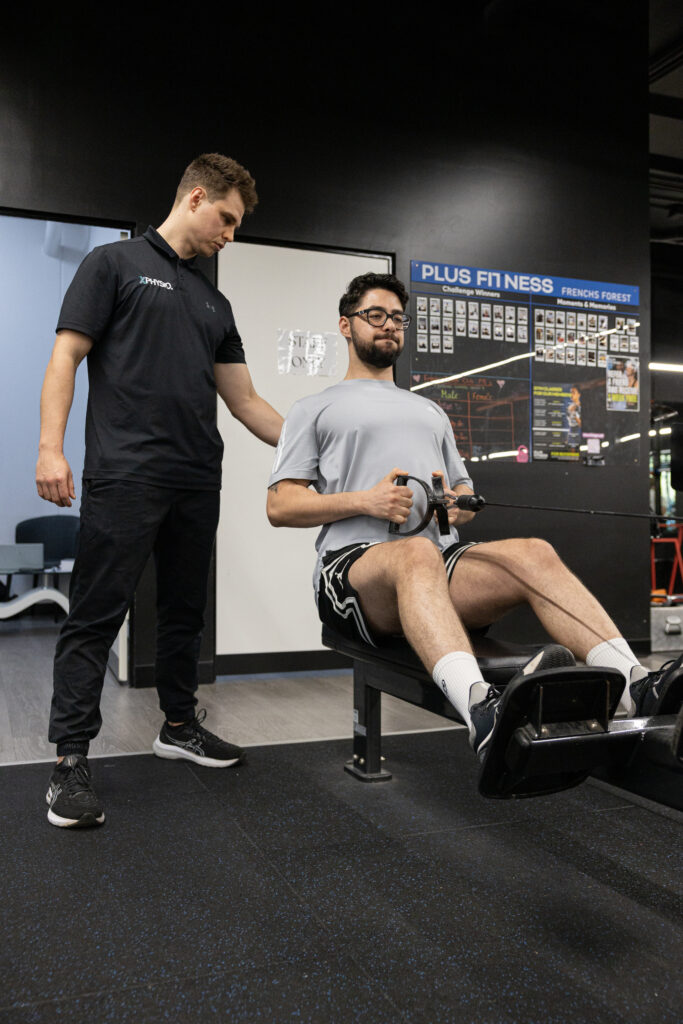
You don’t need a gym for this—most exercises are simple, low-load movements perfect for home or the office.
4. Posture coaching (but not the outdated kind)
Posture is not about sitting “perfectly straight”—it’s about staying adaptable. We help you:
- Adjust your workstation ergonomics
- Learn micro-break strategies
- Understand what “good movement variety” looks like
- Reduce tension habits (like shrugging or clenching)
Our goal is to help you move more, not sit still in a rigid position.
5. Stress and tension management strategies
Many cases of neck and shoulder pain are linked to stress. We integrate simple, practical strategies such as:
- Breathing control
- Relaxation techniques
- Gentle mobility routines you can use between meetings
These help calm the nervous system so it stops amplifying your pain signals.
6. Preventing flare-ups
One of the strongest benefits of physiotherapy is learning how to stop pain coming back.
We work with you to:
- Identify your individual triggers
- Build strength and mobility in weak links
- Create a personalised home plan
- Gradually increase your tolerance to sitting, work and exercise
Long-term success is all about consistency—not perfection.
A Real Example: Patient Success Story from a Nearby Suburb
Recently, we treated Courtney, a 37-year-old accountant from Dee Why, who came in with persistent neck and shoulder pain that had been bothering her for almost 18 months. She worked mostly from home and noticed the pain was worst during busy periods when she barely left her desk.
She reported:
- Tightness across the top of both shoulders
- Frequent tension headaches
- A pulling sensation when she turned her head
- Pain when lifting her children into the car
- Difficulty concentrating by the afternoon
After a detailed assessment, we identified:
- Reduced cervical rotation
- Overactive upper trapezius muscles
- Weak deep neck flexors
- Limited thoracic mobility
- A poorly adjusted home office setup
Her Treatment Plan Included:
- Hands-on release to her upper traps and neck muscles
- Thoracic joint mobilisation
- Dry needling to reduce stubborn muscle guarding
- A personalised strengthening program
- A few simple ergonomic changes
- A “2-minute mobility break” routine for work days
The Result?
By the third session, her pain had reduced by 60%.
By week four, she reported her first “completely pain-free workday in over a year”.
By week six, she was confidently exercising again and hadn’t experienced another headache.
This is a typical outcome when treatment is targeted, consistent, and based on the root cause—not just the symptoms.
The Link Between Neck Pain, Shoulder Pain and Headaches
Many office workers don’t realise that their headaches are often coming from their neck. This is called cervicogenic headache, and it happens when tightened cervical muscles refer pain upwards.
Signs your headaches are neck-related include:
- Pain that starts in the neck or base of the skull
- Headaches triggered by work or sitting
- Soreness when pressing along the neck muscles
- Reduced neck movement
- Pain on one side of the head
Physiotherapy is extremely effective at treating this type of headache because it treats the source—not just the pain.

Best Exercises for Neck and Shoulder Tension
Here are a few office-friendly exercises that help reduce pain and tightness. These should be performed gently and consistently:
1. Chin tucks (deep neck flexor activation)
Strengthens the muscles that support the neck and improve alignment.
2. Scapular retraction
Helps balance the overactive shoulder muscles.
3. Thoracic extension over a rolled towel
Releases stiffness in the upper back.
4. Upper trapezius and levator scapulae stretches
Relieves the most common tension areas.
5. Shoulder external rotation strengthening
Supports shoulder blade control and reduces load on the neck.
We provide personalised exercise programs based on your specific assessment—not generic templates.

How Long Does It Take to Improve Neck and Shoulder Pain?
Most patients feel noticeably better within 2–3 sessions, especially with the right combination of hands-on treatment and tailored exercises.
Chronic cases may require 12 weeks to fully restore strength, mobility, and postural control.
The key factor in long-term success is consistency with your exercises and movement habits.
Should You See a Physiotherapist or Just Stretch?
Stretching feels good—but it rarely solves the underlying issue on its own.
If your pain:
- Keeps returning
- Affects your sleep
- Causes headaches
- Limits your movement
- Interferes with work or gym
- Has lasted more than 2 weeks
…it’s time for a proper physiotherapy assessment.
A physio can pinpoint the exact structure causing your pain and tailor your treatment properly.
When Neck and Shoulder Pain Becomes More Serious
While most cases are mechanical and easily treatable, seek assessment if you experience:
- Numbness or tingling into the arms
- Weakness in the hands
- Severe pain that appears suddenly
- Pain following an accident
- Persistent headaches or dizziness
These symptoms may indicate nerve involvement or other conditions requiring targeted care.

FAQs About Neck and Shoulder Pain (with Schema Markup Below)
1. What causes neck and shoulder pain in office workers?
Neck and shoulder pain is often caused by poor posture, prolonged sitting, muscle fatigue, stress, and reduced movement. Over time these factors overload the neck and upper back muscles, leading to stiffness and pain.
2. How can physiotherapy help with neck and shoulder tension?
Physiotherapy helps by reducing muscle tightness, restoring movement, improving posture, and strengthening the muscles that support your neck and shoulders. Treatment includes hands-on therapy, exercises, ergonomic advice and strategies to prevent recurrence.
3. How long does it take to see results from physio?
Most patients feel improvement within 1–3 sessions, depending on the severity of the issue. Chronic or long-standing pain may take several weeks to fully resolve.
4. Can office ergonomics really make a difference?
Yes. A properly set-up workstation can significantly reduce stress on your neck and shoulders. Even small adjustments to monitor height, chair support, or keyboard position can reduce tension.
5. Do I need imaging for neck and shoulder pain?
Not usually. Most office-related neck and shoulder pain is mechanical and responds well to physiotherapy without the need for scans.
References
- X Physio Blog – https://xphysio.com.au/blog/
- Australian Physiotherapy Association
- https://ergonomics.org.au/Ergonomics Australia
Ready to Fix Your Neck and Shoulder Pain?
Don’t let daily tension or office stress control your life.
Give us a call today on 9806 3077, or book online — just CLICK HERE:
https://x-physio.au4.cliniko.com/bookings#service
{
“@context”: “https://schema.org”,
“@type”: “FAQPage”,
“mainEntity”: [
{
“@type”: “Question”,
“name”: “What causes neck and shoulder pain in office workers?”,
“acceptedAnswer”: {
“@type”: “Answer”,
“text”: “Neck and shoulder pain is usually caused by poor posture, prolonged sitting, muscle fatigue, stress, and limited movement, which overload the neck and upper back muscles.”
}
},
{
“@type”: “Question”,
“name”: “How can physiotherapy help with neck and shoulder tension?”,
“acceptedAnswer”: {
“@type”: “Answer”,
“text”: “Physiotherapy helps reduce muscle tightness, restore mobility, improve posture and strengthen supporting muscles through hands-on treatment, exercises and ergonomic advice.”
}
},
{
“@type”: “Question”,
“name”: “How long does it take to see results from physio?”,
“acceptedAnswer”: {
“@type”: “Answer”,
“text”: “Most patients feel improvement within 1–3 sessions, while chronic cases may take several weeks depending on the severity and contributing factors.”
}
},
{
“@type”: “Question”,
“name”: “Can office ergonomics really make a difference?”,
“acceptedAnswer”: {
“@type”: “Answer”,
“text”: “Yes. Correct ergonomic setup reduces strain on the neck and shoulders by improving posture and decreasing muscle fatigue.”
}
},
{
“@type”: “Question”,
“name”: “Do I need imaging for neck and shoulder pain?”,
“acceptedAnswer”: {
“@type”: “Answer”,
“text”: “In most cases, no. Office-related neck and shoulder pain typically responds well to physiotherapy without the need for scans.”
}
}
]
}
Feeling a sharp ache or burning pain on the outside of your knee after a run? You might be dealing with IT Band Syndrome — one of the most common overuse injuries in runners. The good news? With the right IT band syndrome physiotherapy, you can get back to running pain-free faster than you think. Let’s break down what causes it, how physio helps, and what a real recovery looks like.
What Is IT Band Syndrome?
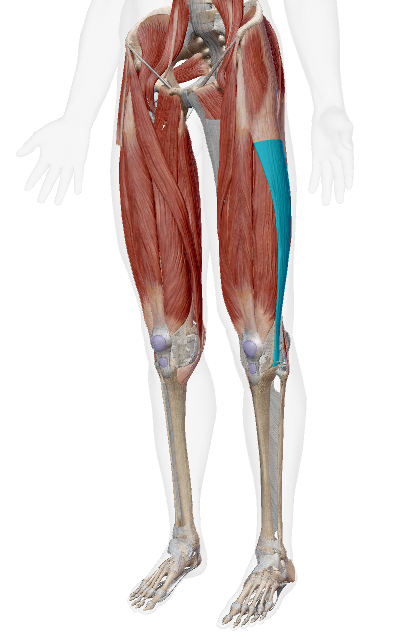
The Iliotibial (IT) Band is a thick band of connective tissue that runs along the outer thigh from the hip to the knee. It plays a key role in stabilising your knee during movement, especially when running or cycling.
IT Band Syndrome (ITBS) happens when this band becomes irritated or inflamed as it rubs repeatedly against the outside of the femur near the knee. The result? Pain that starts subtly and worsens the more you train — particularly during long runs, downhill running, or after increasing your mileage too quickly.
Common Symptoms of IT Band Syndrome
Typical signs of IT band irritation include:
- Sharp or burning pain on the outside of the knee, especially after a few kilometres into your run
- Pain that worsens with downhill or repetitive knee bending
- Tenderness or a “snapping” feeling along the outer knee
- Mild swelling or tightness around the hip or thigh
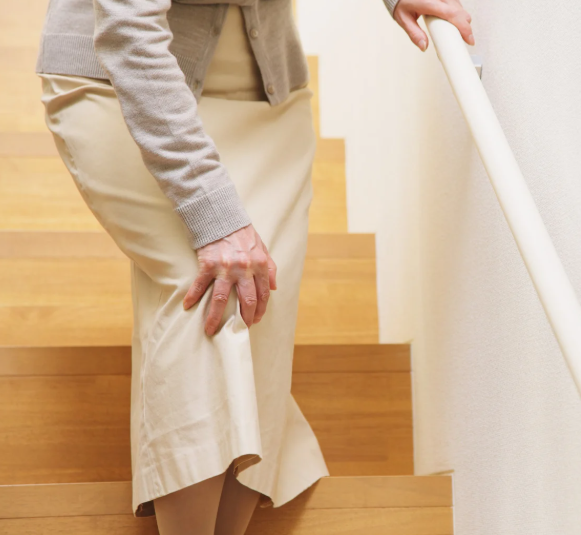
- Discomfort when going up or down stairs
Left untreated, it can develop into a chronic issue, sidelining your running and daily activities for weeks or even months.
What Causes IT Band Syndrome?
Contrary to popular belief, ITBS isn’t just about “tightness.” It’s usually a result of biomechanical imbalances and training errors that cause excessive strain on the IT band.
Here are the most common causes we see at X Physio Frenchs Forest:
1. Weak Glutes and Hips
When the gluteus medius and other hip stabilisers aren’t doing their job, the IT band picks up the slack — increasing friction and irritation along the knee.
2. Poor Running Form
Over-striding, inward knee collapse (valgus), and running with excessive hip drop all contribute to increased IT band tension.
3. Sudden Training Load Increases
Jumping from 5km runs to 10km overnight, or adding extra hill sessions, can quickly overload the IT band.
4. Muscle Imbalances
Tightness in the tensor fasciae latae (TFL) and quadriceps, combined with weak hamstrings or glutes, creates a perfect storm for IT band irritation.
5. Footwear & Surface Changes
Old running shoes, hard surfaces, or constantly running on cambered roads can all change your lower limb biomechanics, leading to ITBS.

How Physiotherapy Helps IT Band Syndrome
At X Physio, our approach to IT band syndrome physiotherapy goes beyond treating symptoms. We focus on identifying why the problem started, fixing those root causes, and guiding you back to safe, pain-free running.
Here’s what your treatment may include:
1. Comprehensive Assessment
Your physiotherapist will start by assessing your:
- Running gait and biomechanics
- Hip, knee and ankle alignment
- Strength and flexibility of key muscle groups
- Training history and footwear habits
This helps pinpoint whether your IT band pain is truly ITBS or something else, such as:
- Lateral meniscus irritation
- Biceps femoris tendinopathy
- Lateral collateral ligament (LCL) strain
Correct diagnosis is key — and that’s where expert physiotherapy makes all the difference.
2. Hands-On Manual Therapy
Early treatment often includes manual techniques to reduce pain and tension, such as:
- Soft tissue release and deep massage to the TFL, glutes and IT band
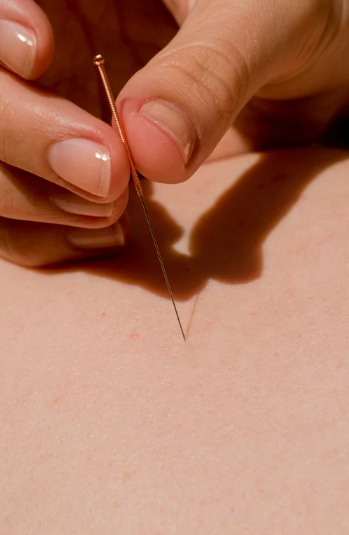
- Dry needling or trigger point therapy
- Joint mobilisation to restore proper knee and hip movement
These methods improve mobility, circulation, and reduce inflammation in the irritated tissue.
3. Targeted Strengthening Program
Your physio will prescribe tailored exercises to build hip and glute strength, improve stability, and correct imbalances.
Examples might include:
- Clamshells and side-lying leg raises for glute activation
- Single-leg squats and step-downs for knee control
- Hip bridge variations to stabilise the pelvis
We focus on quality of movement rather than just reps — ensuring the right muscles are doing the work.
4. Running Technique Coaching
Small changes to your running technique can make a huge difference. Our physiotherapists assess your gait and may recommend:
- Increasing your cadence (steps per minute) slightly
- Avoiding over-striding
- Strengthening your core to control hip movement
We often use video gait analysis to show you exactly what’s happening during your stride.
5. Load Management and Recovery Planning
Your recovery plan includes guidance on:
- When it’s safe to return to running
- How to cross-train (cycling, swimming, elliptical)
- Progressing mileage and intensity safely
- Using foam rolling and stretching effectively
We work closely with you to ensure you maintain fitness while allowing your IT band to heal properly.
Example: How Physio Helped a Local Runner from Dee Why
Recently, we saw Sarah, a 34-year-old recreational runner from Dee Why, who came to X Physio Frenchs Forest after developing sharp outer knee pain during her half-marathon training.
She’d tried rest and foam rolling without success — every time she hit the 7km mark, the pain returned. After a thorough biomechanical assessment, we discovered hip weakness and over-striding were the main culprits.
Over six weeks of IT band syndrome physiotherapy, including dry needling, glute strengthening, and minor gait tweaks, Sarah was back running pain-free. She completed her half-marathon comfortably — and now includes glute activation exercises in her regular warm-up to prevent flare-ups.
How Long Does IT Band Syndrome Take to Heal?
Recovery time depends on the severity of your symptoms and how early you start physiotherapy.
- Mild cases: 2–4 weeks with consistent rehab
- Moderate cases: 4–6 weeks with strengthening and gait correction
- Chronic cases: 8+ weeks if inflammation and muscle imbalance are significant
The earlier you address it, the faster you’ll return to your normal running routine.
Can You Keep Running With IT Band Pain?
Running through pain might seem harmless at first, but it can worsen inflammation and delay recovery. Instead, focus on low-impact cross-training (swimming, cycling, or elliptical) while following your physiotherapist’s advice.
Once your pain settles and you’ve rebuilt strength, we’ll guide you through a graded return-to-run program to get you safely back on track.
Why Choose X Physio for IT Band Syndrome Treatment
At X Physio Frenchs Forest, we take a holistic approach that focuses on recovery and prevention. You’ll get:
✅ A clear diagnosis and treatment plan
✅ Hands-on therapy to relieve pain fast
✅ Strength and stability training tailored to your body
✅ Running and load management coaching
✅ Ongoing support to stop ITBS from coming back
Our physios have extensive experience helping runners from Frenchs Forest, Dee Why, Belrose, and the Northern Beaches overcome IT band syndrome and keep running strong.
Takeaway
IT band syndrome physiotherapy works — when it targets the cause, not just the symptoms. Whether you’re chasing a PB or simply love your morning run, physiotherapy can help you recover faster, build strength, and keep pain away for good.
Don’t wait for it to become a chronic issue.
Give us a call today on 9806 3077, or book online, just CLICK HERE.
References
- Running Physio – Understanding IT Band Syndrome
- Physiopedia – Iliotibial Band Syndrome
- X Physio Blog – Running Injuries and How Physiotherapy Can Help
FAQs
Q1: What is the fastest way to heal IT band syndrome?
A combination of rest, manual therapy, and targeted strengthening is the fastest way to recover. Physiotherapy helps address the root cause and prevent flare-ups.
Q2: Should I foam roll my IT band?
Foam rolling the IT band itself can be uncomfortable and not very effective. Instead, roll around the glutes, hips, and quads to relieve tension in the surrounding muscles.
Q3: Can IT band syndrome go away on its own?
Mild cases might improve with rest, but without addressing muscle imbalances or running form, it’s likely to return. Physiotherapy ensures long-term recovery.
Q4: How do I know if I have IT band syndrome or something else?
Outer knee pain can come from other conditions like lateral meniscus issues or hamstring tendinopathy. A physiotherapist can perform specific tests to confirm the diagnosis.
Q5: When can I start running again after IT band syndrome?
You can return to running once you can walk and squat pain-free, and have completed basic strength and control exercises without irritation. Your physio will guide your progression safely.
Hip labral tears can cause deep groin pain, clicking, or instability that slows you down — whether you’re running, training, or just moving through daily life. The good news? Physiotherapy can help restore your hip’s stability, strength and movement. Keep reading to discover proven treatment options and how to recover faster.
What Exactly Is a Hip Labral Tear?
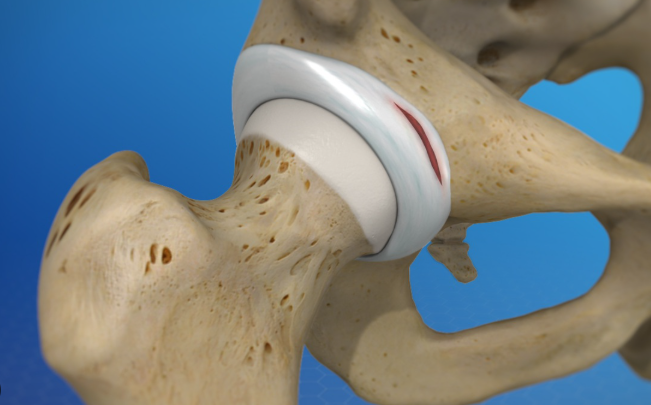
The hip labrum is a ring of cartilage that lines the rim of your hip socket (acetabulum). It acts like a seal — keeping the joint stable, lubricated and cushioned. When the labrum tears, it can lead to pain, catching sensations, and feelings of instability or “giving way.”
A hip labral tear can happen due to:
- Repetitive stress or overuse, common in runners, footballers, and dancers.
- Structural issues like femoroacetabular impingement (FAI).
- Trauma or injury, such as a fall or twist.
- Degeneration from age or osteoarthritis.
These tears often cause vague groin or hip pain that worsens with sitting, twisting, or bending — and sometimes radiate to the thigh or buttock.
Common Symptoms of a Hip Labral Tear
You might experience:
- Deep groin pain or aching around the hip joint.
- Clicking, locking, or catching when moving the hip.
- A sense of instability, weakness, or “giving way.”
- Pain when standing up from sitting or after exercise.
- Reduced range of motion or stiffness.
If these sound familiar, it’s important to get assessed by a physiotherapist trained in hip conditions — as early diagnosis can prevent further joint damage and help you avoid surgery.

How Physiotherapy Helps with Hip Labral Tears
Physiotherapy plays a central role in non-surgical management of hip labral tears. Treatment aims to restore the hip’s natural movement, strengthen surrounding muscles, and reduce the excessive load placed on the injured labrum.
At X Physio in Frenchs Forest, our approach focuses on four key goals:
- Reduce pain and inflammation
Early treatment may include manual therapy, soft tissue release, and gentle mobility exercises. Modalities like dry needling or shockwave therapy may also be used depending on your condition. - Restore range of motion
Stiffness around the hip capsule and glutes is common. Your physio will prescribe tailored mobility drills and joint techniques to improve flexibility safely. - Strengthen hip stabilisers
Targeting muscles like the gluteus medius, deep rotators, and core muscles reduces joint stress and provides long-term support. Strength work is progressive — from floor-based exercises to single-leg stability and sport-specific drills. - Optimise movement patterns
Many patients with labral tears have underlying biomechanical issues — like pelvic tilt or poor hip control. Correcting these patterns is key to preventing recurrence and improving athletic performance.
Do Hip Labral Tears Heal on Their Own?
While cartilage itself has limited blood supply (meaning the labrum doesn’t “heal” easily), many people recover well with physiotherapy. The goal is to stabilise the joint, unload the damaged tissue, and allow you to return to pain-free activity without surgery.
In cases where the tear is large or associated with significant impingement, your physio may work closely with an orthopaedic specialist to plan your next steps.
Real Patient Example: Sarah from Forestville
Sarah, a 34-year-old recreational runner from Forestville NSW, came to X Physio Frenchs Forest after months of groin pain and clicking whenever she ran or climbed stairs. An MRI confirmed a small anterior labral tear and mild impingement.
Through a structured physiotherapy program — focusing on hip mobility, gluteal strengthening, and movement retraining — Sarah’s pain reduced within four weeks. By week eight, she was jogging comfortably again. Today, she’s back to running 10km pain-free and continues her maintenance exercises to prevent recurrence.
Her story is a great example of how hip labral tear physiotherapy can help patients regain confidence and return to what they love — without invasive surgery.
Your Physiotherapy Treatment Plan at X Physio
When you visit X Physio in Frenchs Forest, your treatment will typically include:
1. Comprehensive Assessment
We’ll review your injury history, training habits, and biomechanics. We may perform specific movement and strength tests to pinpoint muscle imbalances and contributing factors.
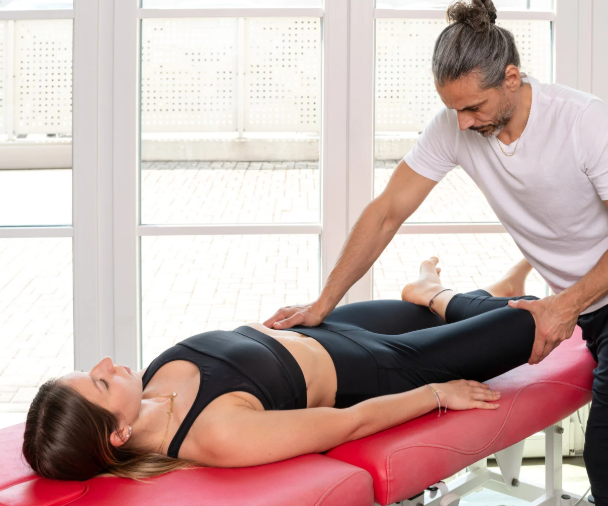
2. Manual Therapy
Joint mobilisation, soft tissue release, and trigger point therapy help relieve tightness in surrounding muscles such as the hip flexors, glutes, and TFL.
3. Individualised Exercise Program
We’ll develop a progressive rehabilitation plan tailored to your goals. This may include:
- Gluteal activation drills (e.g., clams, bridges)
- Hip stability and balance exercises
- Core strengthening
- Movement re-education to correct compensations
4. Return-to-Sport Guidance
For athletes, we incorporate sport-specific training and controlled load progression to ensure safe return to running, gym training, or team sport.
5. Education and Prevention
You’ll learn how to manage load, improve posture, and avoid movements that irritate the labrum. We may also discuss footwear, stretching routines, and strength maintenance programs.
When Surgery Might Be Needed
If pain persists despite several months of consistent physiotherapy, your physio may refer you for arthroscopic surgery. This minimally invasive procedure can repair or trim the torn labrum and correct any bone impingement.
Post-operative physiotherapy is essential for recovery — restoring strength, mobility, and function after surgery. Our team has extensive experience guiding patients through successful rehab following labral repair.
How Long Does Recovery Take?
Recovery depends on the tear’s severity, your overall health, and how consistently you follow your rehab plan.
- Mild tears: noticeable improvement in 6–8 weeks
- Moderate tears: 3–6 months of physiotherapy
- Post-surgery rehab: up to 6–9 months for full return to sport
Consistency is key — patients who stay active and commit to their home exercise program achieve faster, longer-lasting results.
Can I Exercise with a Hip Labral Tear?
Yes — but the right type of exercise matters. Your physio will guide you through safe, low-impact activities that build strength without aggravating the joint, such as:
- Swimming or cycling
- Pilates or clinical strength training
- Resistance band exercises
- Targeted glute and core work
Avoid repetitive high-impact movements like sprinting, jumping, or deep squats until cleared by your physio.
Prevention Tips for Hip Labral Tears
- Warm up properly before workouts.
- Improve hip and core strength to support joint stability.
- Work on mobility to maintain smooth hip movement.
- Avoid overtraining — balance rest and activity.
- Address early signs of pain before they worsen.
Regular check-ups with your physiotherapist can catch issues early and reduce your risk of future tears.
When to See a Physiotherapist
If you’re experiencing hip or groin pain, clicking, or stiffness that doesn’t settle after a few days, book an appointment. Early physiotherapy intervention can significantly reduce your recovery time and help you avoid surgery.
At X Physio Frenchs Forest, we treat patients from across the Northern Beaches — including Forestville, Belrose, Davidson, and Allambie Heights.
Give us a call today on 9806 3077, or book online — just CLICK HERE to start your recovery journey.
FAQs About Hip Labral Tear Physiotherapy
1. What are the first signs of a hip labral tear?
Pain in the groin, clicking, or a feeling of hip instability are often the first signs. You might also notice discomfort with sitting, twisting, or getting out of the car.
2. Can physiotherapy fix a hip labral tear without surgery?
Yes. Physiotherapy can’t “repair” the cartilage itself but can effectively reduce pain, improve stability, and restore function by strengthening and retraining the hip and core muscles.
3. How long does it take to recover with physiotherapy?
Most mild to moderate labral tears improve within 6–12 weeks of consistent physiotherapy. More complex cases can take longer depending on severity and lifestyle factors.
4. Should I stop exercising if I have a labral tear?
Not necessarily. Your physiotherapist will modify your training so you can stay active safely, focusing on low-impact and strengthening exercises while avoiding aggravating movements.
5. Can a hip labral tear cause long-term problems?
If left untreated, it can lead to chronic hip pain and increase the risk of early arthritis. Early assessment and guided physiotherapy help prevent long-term joint damage.
References
- X Physio Blog – Hip & Groin Pain: What You Need to Know
- Physiopedia – Labral tear
- Harvard Health – Hip Impingement and Labral Tears
- Better Health Channel – Hip Injuries and Physiotherapy
Elbow pain can be confusing — is it Elbow Bursitis or Tennis Elbow? Both cause discomfort around the joint but have very different causes and treatments. This blog unpacks the key differences, early signs to look for, and how physiotherapy for elbow bursitis can help you recover faster and avoid long-term issues.
If elbow pain is slowing you down, don’t wait — book your assessment today.
What Exactly Is Elbow Bursitis?
Elbow bursitis, also called olecranon bursitis, occurs when the small fluid-filled sac (the bursa) at the back of your elbow becomes irritated or inflamed. Normally, this bursa cushions the tip of your elbow to reduce friction during movement.
When it becomes swollen, you may notice:
- A visible lump or puffiness at the back of the elbow
- Tenderness when leaning or pressing on it
- Warmth or redness over the area
- Occasionally, reduced elbow motion
Unlike muscle or tendon injuries, bursitis usually affects the pointy tip of your elbow rather than the outer side.

What Causes Elbow Bursitis?
The condition can develop for a variety of reasons, such as:
- Repetitive pressure: Resting your elbows on hard surfaces (like desks) for long periods
- Direct trauma: A fall or bump to the elbow
- Repetitive strain: Overuse through manual work or sport
- Infection: When bacteria enter through a small cut or scrape
- Medical conditions: Such as gout or rheumatoid arthritis
Some people develop bursitis gradually, while others notice sudden swelling overnight — especially after an injury.

What Is Tennis Elbow?
Tennis Elbow, or Lateral Epicondylitis, is a different problem altogether. It’s not about swelling at the tip of the elbow, but pain on the outer side — where the forearm tendons attach to the bone.
It’s a classic overuse injury caused by repetitive gripping, twisting, or lifting movements that strain the tendons.
Common symptoms include:
- Pain or burning on the outer elbow
- Weakness when gripping or lifting objects
- Stiffness in the morning
- Pain that worsens when using tools, shaking hands, or holding a coffee cup
You don’t need to play tennis to get it — many office workers, tradies, and gym-goers develop the condition from repetitive arm use.
To learn more about tennis elbow, CLICK HERE

How to Tell the Difference Between Elbow Bursitis and Tennis Elbow
| Feature | Elbow Bursitis | Tennis Elbow |
|---|---|---|
| Pain location | Tip of the elbow | Outer elbow |
| Appearance | Swollen lump visible at the back of the elbow | Usually no visible swelling |
| Pain trigger | Direct pressure or leaning on the elbow | Lifting, gripping, or twisting |
| Cause | Inflammation of the bursa | Tendon overload or microtears |
| Movement | Pain with deep bending of the elbow | Pain when extending wrist or fingers |
| Infection risk | Possible (bursa can become infected) | Very rare |
If you notice swelling or warmth, bursitis is more likely.
If your pain worsens with gripping or wrist movement, it’s likely tennis elbow.

When to See a Physiotherapist
If your elbow pain has lasted longer than a week, is affecting your daily activities, or has visible swelling — it’s time to see a physiotherapist.
Physios can assess which structure is irritated, identify contributing factors (like posture or work habits), and provide a clear recovery plan.
You should seek help urgently if:
- The swelling is red, hot, or increasing quickly (possible infection)
- You have limited elbow movement
- Pain persists despite rest or self-care
- You rely on your arms for work, sport, or parenting duties
At X Physio Frenchs Forest, our physiotherapists treat both elbow bursitis and tennis elbow with a tailored approach to reduce inflammation, restore mobility, and prevent recurrence.
Physiotherapy Treatment for Elbow Bursitis
Early physiotherapy can help control swelling, improve elbow mobility, and address the cause of irritation.
Treatment may include:
1. Accurate Diagnosis and Education
Your physio will assess whether the swelling is due to trauma, overuse, or infection. Understanding the cause helps you manage it effectively and avoid making it worse.
2. Swelling Management
- Rest and avoiding pressure on the elbow
- Use of a padded elbow sleeve
- Ice therapy to reduce inflammation
- Gentle compression if appropriate
3. Manual Therapy and Taping
Gentle mobilisation and soft tissue massage may help improve joint mobility and circulation. Kinesiology taping can also help offload pressure on the inflamed bursa.
4. Strengthening and Posture Exercises
Once swelling settles, your physio will guide you through exercises to strengthen the surrounding muscles — especially the triceps, forearm, and shoulder — to reduce stress on the elbow.
5. Activity Modification
Your physio may suggest ergonomic changes, like avoiding leaning on your elbows or adjusting your workstation setup.
6. Return to Sport or Work
Gradual return plans ensure you rebuild strength safely without flare-ups.

Physiotherapy Treatment for Tennis Elbow
If your pain is diagnosed as tennis elbow instead, treatment focuses on reducing tendon irritation and rebuilding tendon capacity:
- Manual therapy: Deep tissue release, dry needling, and joint mobilisation
- Strengthening exercises: Progressive loading of the wrist and forearm
- Shockwave therapy: Can accelerate tendon healing in chronic cases
- Bracing: Counterforce braces to offload the painful tendon
- Education: Avoiding aggravating grips and improving technique
Both conditions benefit from a guided exercise plan — the key is targeting the right structure early.
Real Patient Example – Success Story from a Nearby Suburb
Recently, a 46-year-old carpenter from Belrose, just a few minutes from Frenchs Forest, came to X Physio with swelling and pain over the back of his elbow after weeks of leaning on his workbench. Initially, he thought it was tennis elbow, but our assessment confirmed olecranon bursitis.
After two weeks of rest, targeted physiotherapy, and use of a protective elbow pad, the swelling significantly reduced.
We introduced light strengthening and posture exercises to prevent recurrence, and within four weeks, he was back to full duties — pain-free and more aware of how to protect his elbows on site.
How Long Does Recovery Take?
- Mild elbow bursitis: 1–3 weeks
- Moderate bursitis (without infection): 3–6 weeks
- Chronic or recurrent bursitis: 6–10 weeks or more
Recovery depends on how long you’ve had the problem and whether infection or repeated pressure is involved.
Physiotherapy helps ensure the swelling resolves fully and doesn’t come back.
Self-Care Tips While Waiting for Your Physio Appointment
- Avoid leaning on your elbows — even soft surfaces can aggravate the bursa.
- Apply ice for 10–15 minutes a few times per day.
- Use an elbow pad if you must rest your arm on hard surfaces.
- Keep your elbow moving gently — don’t let stiffness set in.
- Avoid anti-inflammatory creams or tablets without professional advice if infection is suspected.
Can Elbow Bursitis Come Back?
Unfortunately, yes — especially if the cause isn’t addressed. People who rest their elbows frequently on desks, workbenches, or armrests often find it returns.
Your physio can help identify the underlying habits or strength imbalances contributing to recurrence and teach prevention strategies.
When Is Elbow Bursitis Serious?
If the swelling is hot, red, and accompanied by fever or severe pain, seek medical attention immediately.
This could indicate septic bursitis, which may need antibiotics or drainage.
Your physiotherapist will recognise this and refer you to a GP promptly if infection is suspected.
Takeaway: Don’t Ignore Elbow Pain
Whether it’s a bursa or a tendon, early diagnosis and proper care are key. Ignoring elbow pain can turn a small irritation into a long-term problem.
Physiotherapy offers hands-on treatment, education, and exercises to get you moving comfortably again — and keep it that way.
Give us a call today on 9806 3077, or book online — just CLICK HERE.
FAQs About Elbow Bursitis and Tennis Elbow
1. Can I treat elbow bursitis at home?
Mild cases may improve with rest, ice, and avoiding pressure. But if swelling persists beyond a few days or gets worse, see a physiotherapist for proper management.
2. How do I know if it’s elbow bursitis or tennis elbow?
Bursitis causes swelling at the tip of the elbow, while tennis elbow causes pain on the outside of the elbow — usually without visible swelling.
3. Can physiotherapy fix elbow bursitis?
Yes. Physiotherapy reduces inflammation, restores mobility, and prevents recurrence by addressing the cause of irritation.
4. How long does elbow bursitis take to heal?
With early physiotherapy, most cases improve within 3–6 weeks. Chronic or infected bursitis may take longer.
5. Is it safe to exercise with elbow bursitis?
Gentle movement is encouraged, but avoid direct pressure or heavy loading until cleared by your physiotherapist.
References
- Australian Physiotherapy Association – Elbow Pain
- Better Health Channel – Bursitis
- Healthdirect – Tennis Elbow
Waking up with a stiff lower back? You’re not alone. Morning stiffness is one of the most common complaints we see in our clinic — but it’s also one of the most treatable. In this blog, we’ll explore why your back feels tight when you wake up and the physiotherapy solutions that actually work to fix it for good.
Why Does Lower Back Stiffness Happen in the Morning?
Lower back stiffness can creep up slowly, especially after long periods of inactivity — like sleeping. Overnight, the joints and muscles around your spine can stiffen due to reduced movement and blood flow. When you finally get up, your body takes a few minutes to “wake up” too.
Some common causes include:
- Poor sleeping posture or unsupportive mattress
- Weak core muscles or lack of spinal stability
- Sedentary lifestyle or long hours sitting at work
- Osteoarthritis or age-related stiffness
- Previous Lower back stiffness related injuries or muscle imbalances
If your stiffness lasts longer than 30 minutes each morning, or you feel restricted bending or twisting, it’s time to get checked by a physiotherapist.
How Physiotherapy Helps Lower Back Stiffness
At X Physio, our lower back stiffness physiotherapy treatment focuses on uncovering the root cause — not just treating the symptoms. Our approach usually involves three key steps:
1. Assessment and Diagnosis
We start with a thorough assessment — analysing your posture, movement patterns, and muscle strength. This helps identify whether your stiffness comes from joint restriction, muscle tightness, or an underlying spinal condition.
2. Hands-On Treatment
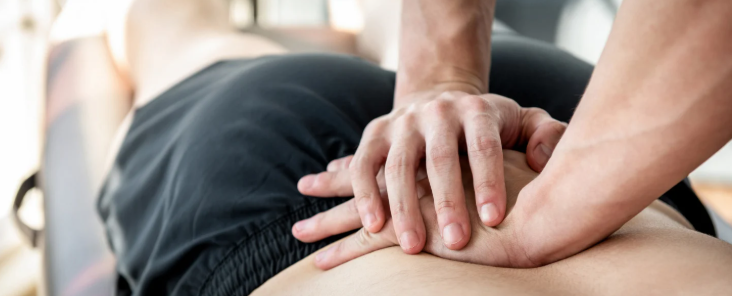
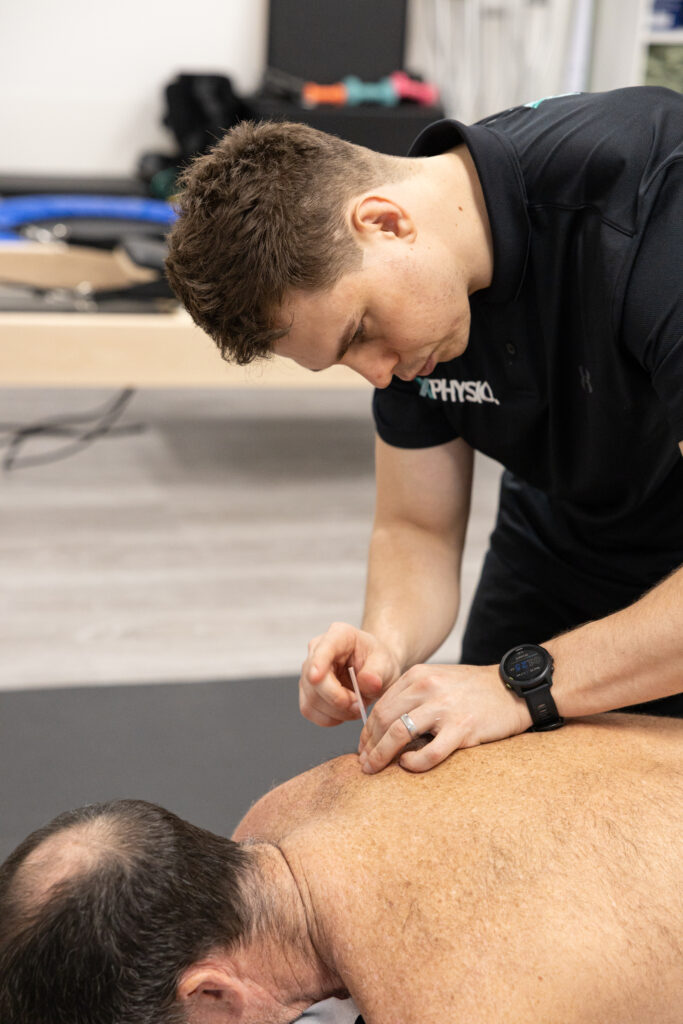
Techniques such as joint mobilisation, soft tissue release, dry needling, and spinal manipulation can help improve flexibility and reduce tension. The goal is to restore normal joint movement and relieve pressure in the lower back.
3. Rehabilitation and Exercise
Targeted exercises are the long-term solution. Your physio will prescribe mobility drills, stretching routines, and strengthening exercises designed to stabilise your spine and prevent recurrence.
Read more about how we treat lower back disc injuries: CLICK HERE
Real-Life Example: Sarah’s Story from Forestville
Sarah, a 42-year-old office worker from Forestville NSW, came to X Physio complaining of severe lower back stiffness every morning. She struggled to get out of bed without pain and often had to stretch for 20 minutes before feeling mobile.
After a detailed assessment, we found her stiffness was due to facet joint tightness and weak gluteal muscles from prolonged sitting. Over four physiotherapy sessions, we used manual therapy to loosen the spinal joints and introduced a tailored home exercise plan focusing on glute activation and lumbar mobility.
Within three weeks, Sarah reported waking up without stiffness for the first time in months. She’s now maintaining her results with a short daily mobility routine and continues to check in every few months for progress reviews.
Common Physiotherapy Treatments for Morning Lower Back Stiffness
Here are the most effective physiotherapy treatments for lower back stiffness:
1. Spinal Mobilisation
Gentle, controlled movements that restore normal motion in stiff vertebral joints. Great for easing early morning stiffness and improving flexibility.
2. Soft Tissue Massage
Targets tight muscles, particularly around the lumbar spine, glutes, and hip flexors — improving circulation and reducing muscle tension.
3. Dry Needling
Helps release muscle knots and improve blood flow to restricted areas, speeding up recovery.
4. Stretching and Mobility Drills
Dynamic stretches such as the cat-cow, child’s pose, or knee-to-chest movements can help loosen your spine before you start your day.
5. Core Strengthening Exercises
A strong core stabilises your spine, reducing the strain on your lower back muscles. Your physio may prescribe exercises like dead bugs, bridges, or bird dogs.
6. Posture and Ergonomic Advice
If your job involves long hours of sitting, small changes — like adjusting your chair height or using a lumbar roll — can make a massive difference.
Why It’s Important Not to Ignore Morning Stiffness
Ignoring your symptoms may allow small restrictions to turn into chronic pain. Persistent stiffness can also indicate early signs of arthritis or spinal degeneration.
Early physiotherapy intervention not only reduces discomfort but also prevents long-term complications — keeping you moving freely and confidently.
At-Home Tips to Ease Lower Back Stiffness
Here are a few physiotherapist-approved ways to ease stiffness between sessions:
- Move before you get up: Try gentle knee-to-chest or pelvic tilt movements while lying in bed.
- Warm shower: Heat increases blood flow and relaxes tight muscles.
- Keep active during the day: Sitting for long periods? Set reminders to stand or walk every 30 minutes.
- Stretch before bed: Five minutes of gentle stretching can reduce overnight stiffness.
- Invest in your mattress and pillow: Supportive bedding maintains spinal alignment overnight.

When to See a Physiotherapist
If you experience:
- Persistent stiffness lasting longer than a few weeks
- Numbness, tingling, or weakness in your legs
- Pain that interrupts sleep or limits movement
…then it’s best to book an assessment. Physiotherapists can rule out serious conditions and provide a treatment plan tailored to your needs.
Book Your Appointment
Don’t let morning stiffness slow you down. Physiotherapy can help you move freely again, reduce your pain, and improve your quality of life.
Give us a call today on 9806 3077, or book online, just CLICK HERE
Frequently Asked Questions (FAQs)
1. Why do I feel stiff in my lower back every morning?
Morning stiffness often occurs due to reduced overnight movement, causing your muscles and joints to tighten. Poor posture, lack of exercise, or underlying joint issues can also contribute.
2. Can physiotherapy really help lower back stiffness?
Absolutely. Physiotherapy targets the underlying causes — such as joint restriction, weak muscles, or poor movement control — helping restore flexibility and prevent recurrence.
3. How long does it take to feel better with physiotherapy?
Most people start noticing improvement within two to four sessions, depending on the cause and severity of stiffness. Ongoing exercises help maintain long-term results.
4. What’s the best exercise for morning lower back stiffness?
Gentle mobility exercises like pelvic tilts, bridges, and cat-cow movements are excellent for reducing stiffness and improving flexibility.
5. Should I see a physio or a chiropractor for back stiffness?
Both can help, but physiotherapists take a holistic approach — combining hands-on treatment, exercise therapy, and posture correction to address both pain and prevention.
References
- Better Health Channel – Lower Back Pain
- Physiotherapy Australia – Managing Back Pain
- NHS – Lower Back Pain Overview
{
“@context”: “https://schema.org”,
“@type”: “FAQPage”,
“mainEntity”: [
{
“@type”: “Question”,
“name”: “Why do I feel stiff in my lower back every morning?”,
“acceptedAnswer”: {
“@type”: “Answer”,
“text”: “Morning stiffness often occurs due to reduced overnight movement, causing your muscles and joints to tighten. Poor posture, lack of exercise, or underlying joint issues can also contribute.”
}
},
{
“@type”: “Question”,
“name”: “Can physiotherapy really help lower back stiffness?”,
“acceptedAnswer”: {
“@type”: “Answer”,
“text”: “Absolutely. Physiotherapy targets the underlying causes — such as joint restriction, weak muscles, or poor movement control — helping restore flexibility and prevent recurrence.”
}
},
{
“@type”: “Question”,
“name”: “How long does it take to feel better with physiotherapy?”,
“acceptedAnswer”: {
“@type”: “Answer”,
“text”: “Most people start noticing improvement within two to four sessions, depending on the cause and severity of stiffness. Ongoing exercises help maintain long-term results.”
}
},
{
“@type”: “Question”,
“name”: “What’s the best exercise for morning back stiffness?”,
“acceptedAnswer”: {
“@type”: “Answer”,
“text”: “Gentle mobility exercises like pelvic tilts, bridges, and cat-cow movements are excellent for reducing stiffness and improving flexibility.”
}
},
{
“@type”: “Question”,
“name”: “Should I see a physio or a chiropractor for lower back stiffness?”,
“acceptedAnswer”: {
“@type”: “Answer”,
“text”: “Both can help, but physiotherapists take a holistic approach — combining hands-on treatment, exercise therapy, and posture correction to address both pain and prevention.”
}
}
]
}
Shoulder pain holding you back? Whether it’s a rotator cuff tear or tendinopathy, the right physiotherapy can make all the difference. In this blog, we’ll unpack the key differences, how each condition affects recovery, and how rotator cuff physiotherapy helps you get back to doing what you love — faster.
Understanding the Rotator Cuff
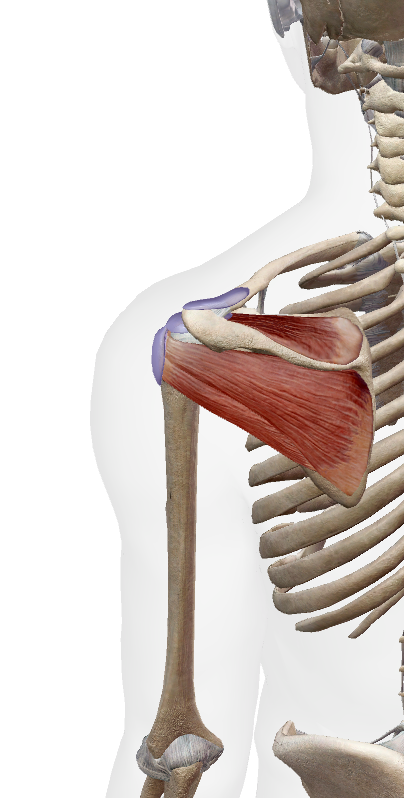
The rotator cuff is a group of four muscles and tendons that stabilise your shoulder joint — the supraspinatus, infraspinatus, teres minor, and subscapularis. Together, they help lift, rotate, and control your arm. Because the shoulder is such a mobile joint, it’s also prone to injury — especially from overuse, repetitive strain, or sudden trauma.
Rotator Cuff Tear vs Tendinopathy: What’s the Difference?
Both conditions can cause pain and weakness, but they’re not the same injury. Understanding the difference is essential for choosing the right physiotherapy treatment.
Rotator Cuff Tear
A rotator cuff tear occurs when one or more of the tendons partially or completely detaches from the bone. Tears can result from:
- A traumatic event (like falling on an outstretched arm)
- Repetitive overuse from activities like tennis, painting, or gym workouts
- Age-related degeneration, where the tendon gradually frays over time
Symptoms may include:
- Sharp pain during lifting or reaching overhead
- Weakness when raising the arm
- Clicking or popping sounds
- Difficulty sleeping on the affected shoulder
Tears can range from partial-thickness (a fray or small split) to full-thickness (a complete tear through the tendon).
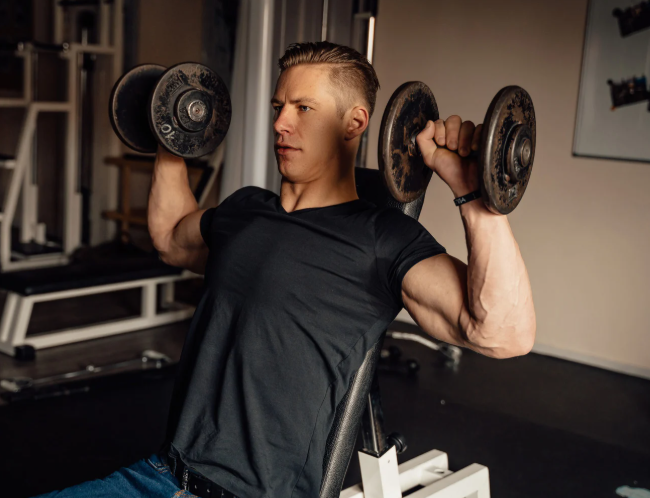
Rotator Cuff Tendinopathy
Rotator cuff tendinopathy, on the other hand, is a chronic overuse injury. It happens when the tendon becomes irritated or thickened due to repeated micro-trauma. Instead of a tear, the tendon shows degenerative changes that lead to pain and stiffness.
Common causes include:
- Poor posture (rounded shoulders or forward head position)
- Repetitive overhead movement (swimming, throwing, trades work)
- Weakness or imbalance in the shoulder and scapular muscles
- Poor shoulder blade control
Symptoms may include:
- Gradual onset of shoulder pain
- Pain when lifting or lowering the arm
- Morning stiffness
- Dull ache after activity
While both conditions cause pain, tendinopathy is usually gradual, while tears often follow a sudden event.

How Physiotherapy Helps Shoulder Recovery
Whether it’s a tear or tendinopathy, rotator cuff physiotherapy plays a crucial role in recovery. The goal is to reduce pain, restore movement, strengthen the shoulder, and prevent recurrence.
1. Accurate Assessment and Diagnosis
Physiotherapists perform a thorough clinical assessment — checking range of motion, strength, and joint stability. We’ll also determine whether the issue is more likely a tear or tendinopathy. If necessary, we may refer you for imaging (like an ultrasound or MRI) for confirmation.
This ensures your treatment plan is targeted and effective from day one.
2. Early Pain Relief and Inflammation Control
In the early stages, physiotherapy focuses on reducing inflammation and pain. Treatment may include:
- Ice therapy
- Gentle manual therapy and soft tissue release
- Dry needling
- Taping or support techniques to offload the tendon
For rotator cuff tears, early movement within a pain-free range is essential to prevent stiffness (especially adhesive capsulitis or “frozen shoulder”).
3. Restoring Mobility and Posture
Once pain begins to settle, we focus on restoring range of motion and correcting postural issues that may have contributed to the injury.
Common exercises may include:
- Pendulum exercises
- Shoulder blade squeezes
- Thoracic mobility drills
Good posture reduces tension on the rotator cuff and helps the shoulder move more freely during daily activities.
4. Strengthening and Stability Training
Building strength is the cornerstone of long-term recovery.
Your physio will prescribe a progressive exercise program that targets:
- Rotator cuff muscles for stability
- Scapular (shoulder blade) muscles for control
- Core and postural muscles for better biomechanics
This phase is essential for both tendinopathy and tears, helping restore shoulder function and preventing re-injury.
5. Gradual Return to Sport or Work
As strength and control improve, physiotherapy transitions into sport- or work-specific exercises. This ensures you can safely return to overhead movements like throwing, swimming, or lifting.
For tradies or gym-goers, we’ll simulate work or exercise demands so you regain confidence before returning fully.
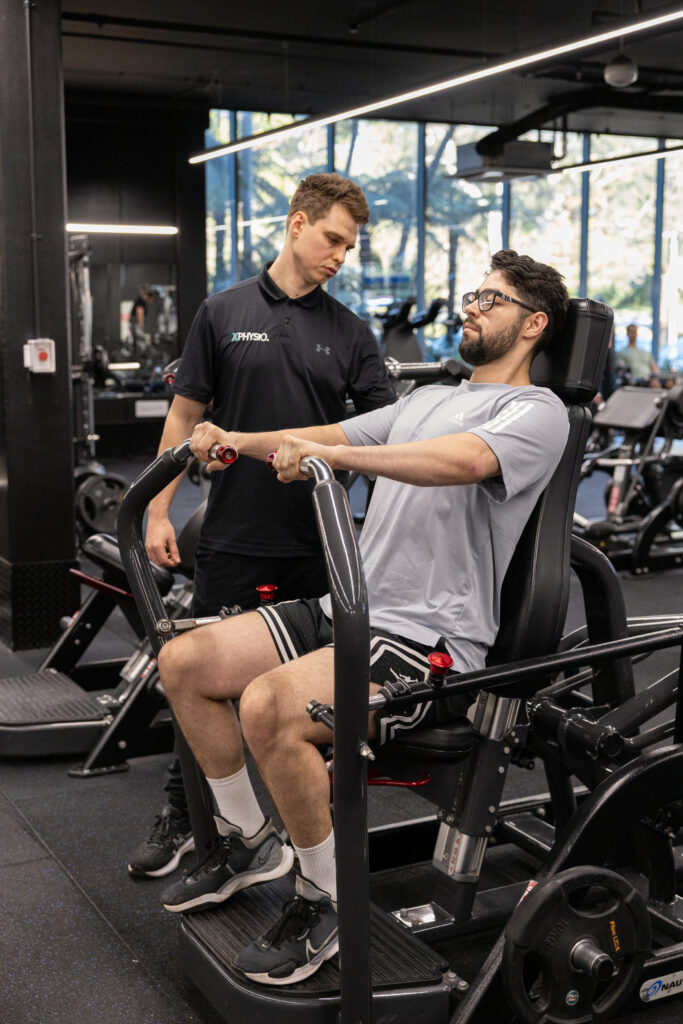
Example from Our Clinic – Local Success Story
Recently, we treated Mark, a 48-year-old electrician from Belrose, who came to our Frenchs Forest clinic with ongoing right shoulder pain. He’d been struggling for months — unable to work overhead or sleep comfortably.
After assessment, we found he had rotator cuff tendinopathy from years of repetitive overhead work. We started with gentle manual therapy, postural retraining, and a home exercise program focused on shoulder blade control.
Over six weeks, Mark noticed major improvements — pain reduced, strength returned, and he was back to working full days without discomfort. With continued rotator cuff physiotherapy, he avoided the need for injections or surgery and now maintains his results with a tailored exercise plan.
How Long Does Recovery Take?
Recovery time varies depending on the severity of the injury, but here’s a general guide:
| Condition | Typical Recovery Time | Notes |
|---|---|---|
| Mild tendinopathy | 4–6 weeks | Responds well to early physiotherapy and load management |
| Moderate tendinopathy | 6–12 weeks | May require progressive strengthening and ergonomic adjustments |
| Partial rotator cuff tear | 8–16 weeks | Requires structured rehab and gradual return to overhead activity |
| Full-thickness tear (non-surgical) | 3–6 months | Focus on strength and compensation control |
| Post-surgical repair | 6–12 months | Follows surgeon’s protocol under physio supervision |
Consistency is key — following your physiotherapy plan closely leads to better, faster outcomes.
When is Surgery Needed?
Not every tear requires surgery. In fact, many partial tears and degenerative cases respond extremely well to physiotherapy.
Surgery may be considered if:
- The tear is full-thickness and large
- There’s significant weakness or loss of function
- You’ve tried physiotherapy for 3–6 months without improvement
Even if surgery is required, pre- and post-operative physiotherapy dramatically improves recovery and long-term shoulder function.
To learn about the rehabilitation required post surgery, CLICK HERE
Preventing Rotator Cuff Injuries
Prevention is often easier than cure. Here are a few tips to protect your shoulders:
- Warm up properly before sport or gym sessions
- Maintain good posture, especially when sitting at a desk
- Strengthen the rotator cuff and scapular muscles regularly
- Avoid sudden spikes in activity (like going heavy at the gym after time off)
- Listen to your body — early shoulder pain is a warning sign
Regular rotator cuff physiotherapy exercises can help keep your shoulders strong, mobile, and pain-free.
FAQs About Rotator Cuff Physiotherapy
1. What’s the difference between a rotator cuff tear and tendinopathy?
A tear involves structural damage to the tendon, while tendinopathy is a chronic overuse injury where the tendon becomes irritated or degenerated. Both can cause pain and weakness but respond well to targeted physiotherapy.
2. How long does it take to recover with physiotherapy?
Mild cases may improve in 4–6 weeks, while more severe tears or tendinopathy can take several months. The key is consistent treatment and progressive exercise under the guidance of your physio.
3. Can physiotherapy heal a rotator cuff tear without surgery?
Yes — many partial tears and age-related tears heal successfully through physiotherapy alone. The goal is to strengthen surrounding muscles and restore movement to reduce pain and improve shoulder function.
4. Should I rest completely if I have shoulder pain?
No. Prolonged rest can actually slow recovery. Your physio will guide you on safe movements and gentle exercises to maintain mobility while your shoulder heals.
5. Do I need a referral to see a physiotherapist?
No referral is needed! You can book directly with X Physio for a full assessment and start your rotator cuff physiotherapy right away.
Get Expert Help Today
If shoulder pain is affecting your work, sport, or sleep — don’t wait for it to get worse. Our experienced physiotherapists at X Physio in Frenchs Forest can assess your shoulder, design a tailored recovery plan, and guide you every step of the way.
Give us a call today on 9806 3077, or book online — just CLICK HERE.
References
- Shoulder Pain and Rotator Cuff Disorders – HealthDirect Australia
- Rotator Cuff Tears – The Royal Australian College of Generaal Practitioners
- Physiotherapy for Rotator Cuff Injuries – Physiopedia
- Tendinopathy Rehabilitation – Sports Medicine Australia
Worried your child’s feet look “flat”? You’re not alone — many parents notice their child’s arches look low and wonder if something’s wrong. The good news is, not all flat feet need treatment! In this blog, we’ll break down when to relax, when to act, and how physiotherapy can help kids develop strong, pain-free feet.
What Are Paediatric Flat Feet?
Paediatric flat feet — also known as pes planus — occur when the arch of the foot appears collapsed or very low when standing. It’s extremely common in children, especially under the age of seven, as their bones, joints, and ligaments are still developing.
Flat feet can be:
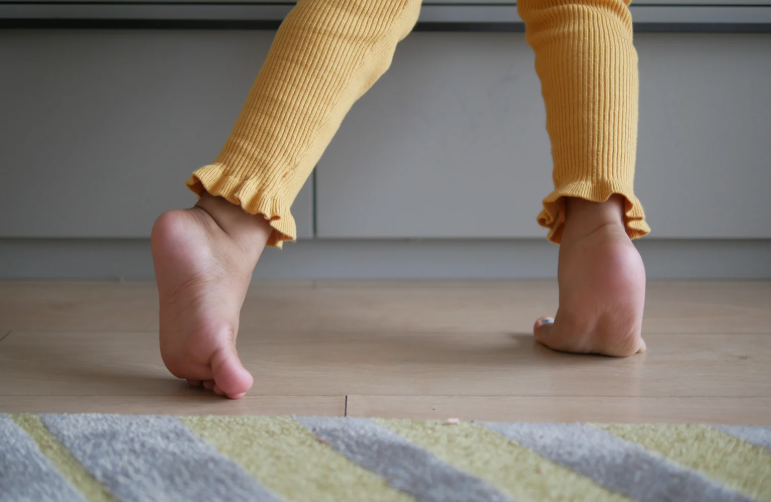
- Flexible flat feet: the most common type, where the arch appears when your child stands on tiptoes. Usually harmless and improves with age.
- Rigid flat feet: less common and may indicate a structural or neurological issue that needs assessment.
Why Do Some Kids Have Flat Feet?
Several factors contribute to flat feet in children, including:
- Genetics: often runs in families.
- Joint hypermobility: overly flexible ligaments can cause the arch to collapse.
- Muscle weakness: particularly in the calves, intrinsic foot muscles, or glutes.
- Poor footwear: shoes lacking arch support can contribute to alignment issues.
- Rapid growth: as kids grow quickly, their muscles and ligaments can temporarily struggle to keep up.
It’s important to remember — flat feet alone aren’t a problem. It’s only when they cause pain, fatigue, balance issues, or altered walking patterns that treatment may be needed.
When Should You Worry About Flat Feet?
You should consider a physiotherapy assessment if your child:
- Complains of foot, knee, or leg pain
- Walks with their feet turned in or out
- Seems clumsy or trips often
- Avoids running or physical play
- Wears out shoes unevenly
- Has visible collapse of the arch or ankles rolling inwards
If you notice these symptoms, it’s time to get checked by a paediatric physiotherapist who understands how growing bodies develop.
How Physiotherapy Helps Kids with Flat Feet
Physiotherapy plays a huge role in managing symptomatic or persistent flat feet. A physio doesn’t just focus on the feet — they assess the whole lower limb chain, including hips, knees, and posture.
1. Strengthening the right muscles
Targeted exercises help strengthen:
- Intrinsic foot muscles
- Calf muscles
- Hip stabilisers and glutes
Stronger muscles mean better arch support and balance during walking or running.
2. Improving flexibility and alignment
Tight calf muscles and Achilles tendons can worsen flat feet. Physiotherapists prescribe stretches and mobility work to restore healthy movement.
3. Gait retraining
Physios analyse how your child walks and runs using video gait analysis or simple observation, then coach proper foot placement and movement control.
4. Footwear and orthotics advice
Your physio will recommend the right footwear for your child’s activity level and foot shape. In some cases, temporary orthotics or heel wedges may help relieve strain.
5. Play-based exercises
Paediatric physio isn’t about boring drills — it’s fun and engaging! Balance games, obstacle courses, and tiptoe walking challenges are used to build strength and control.
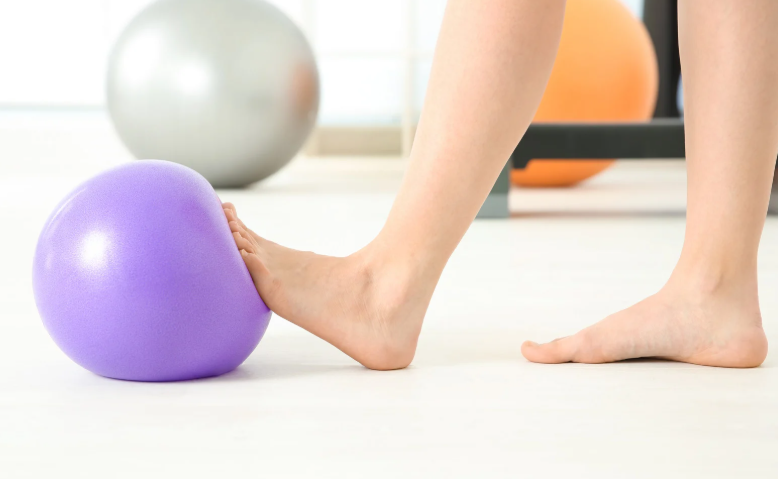
Real-Life Example: Helping a Young Patient from Dee Why
Recently, we saw Emily, a seven-year-old from Dee Why, whose parents noticed her feet rolling inwards and her shoes wearing unevenly. Emily also complained of sore legs after sports days at school.
After a full assessment at X Physio in Frenchs Forest, we found mild muscle weakness in her arches and glutes. Through a six-week physiotherapy program — including balance games, calf stretches, and strengthening exercises — her symptoms improved dramatically. She now runs and jumps pain-free and proudly shows off her “strong arches” to her parents!
Can Flat Feet Go Away on Their Own?
Yes, for many children, flat feet naturally resolve as they grow. The arches usually start developing between ages 5 and 10. However, if flat feet are still present and causing discomfort by around age 10–12, it’s worth reassessing with your physio.
When Physiotherapy Is Most Effective
Early intervention is key. Physiotherapy is most effective when:
- Flat feet are symptomatic
- The child is active or athletic
- There’s pain, poor balance, or fatigue
- Other biomechanical issues (e.g., knock knees or pronation) are present
Treatment focuses on long-term function rather than quick fixes — helping your child build strong foundations for healthy movement into adulthood.

Home Tips for Parents
Here are simple ways to support your child’s foot health at home:
- Encourage barefoot play on safe surfaces (grass, sand) to build intrinsic muscles.
- Check their shoes regularly — kids outgrow them faster than you think!
- Limit overly soft shoes that don’t provide adequate support.
- Promote active play like skipping, climbing, and balance games.
- Stretch calves daily if your child’s heels tend to lift early when walking.
When to See a Specialist
Your physiotherapist may refer you to a podiatrist or orthopaedic specialist if:
- Flat feet are rigid or painful
- The arch doesn’t form on tiptoes
- There’s swelling or stiffness in the joints
- Pain persists despite physiotherapy
These cases may require imaging or specialised orthotic support.
Why Choose X Physio in Frenchs Forest
At X Physio, we take a holistic approach to paediatric care. Our physiotherapists understand how growing bodies move and adapt. We combine clinical expertise with playful, child-friendly exercises to make rehab both effective and enjoyable.
We also work closely with local schools, sports clubs, and healthcare providers in surrounding suburbs like Belrose, Forestville, and Davidson — ensuring each child gets the best care possible.
Final Thoughts
Paediatric flat feet are common — and in most cases, they’re nothing to worry about. But if your child is in pain, tiring easily, or struggling to keep up with their friends, a physiotherapy assessment can make a world of difference.
Our team at X Physio in Frenchs Forest is here to help your child move confidently and comfortably again. Find out more about us by CLICKING HERE
Give us a call today on (02) 9806 3077, or book online — just CLICK HERE.
FAQs About Paediatric Flat Feet
1. Are flat feet normal in children?
Yes — it’s completely normal for young kids to have flat feet. Most develop arches naturally by around age 10.
2. When should I see a physiotherapist for my child’s flat feet?
If your child complains of pain, gets tired easily, or walks awkwardly, it’s worth booking an assessment.
3. Can physiotherapy fix flat feet permanently?
Physiotherapy helps strengthen muscles, improve posture, and support better foot mechanics. While not all cases are “fixed,” most children see big improvements in comfort and movement.
4. Will my child need orthotics?
Not always. Physiotherapists usually try exercise-based treatment first, but may recommend short-term orthotics for comfort or support.
5. What age should I worry if my child’s flat feet haven’t improved?
If your child is around 10–12 years old and their arches haven’t developed — or if they’re still experiencing symptoms — it’s time for a professional review.
References:
- Raising Children Network – Flat Feet in Children
- Better Health Channel – Foot Problems in Children
- Australian Physiotherapy Association – Paediatric Care
Suffered a quadriceps strain and not sure what to do next? You’re not alone. This common thigh injury can be painful and frustrating — but with the right physiotherapy plan, recovery is smoother than you think. In this blog, we’ll break down causes, treatment options, and how our team in Frenchs Forest can help.
What Is a Quadriceps Strain?
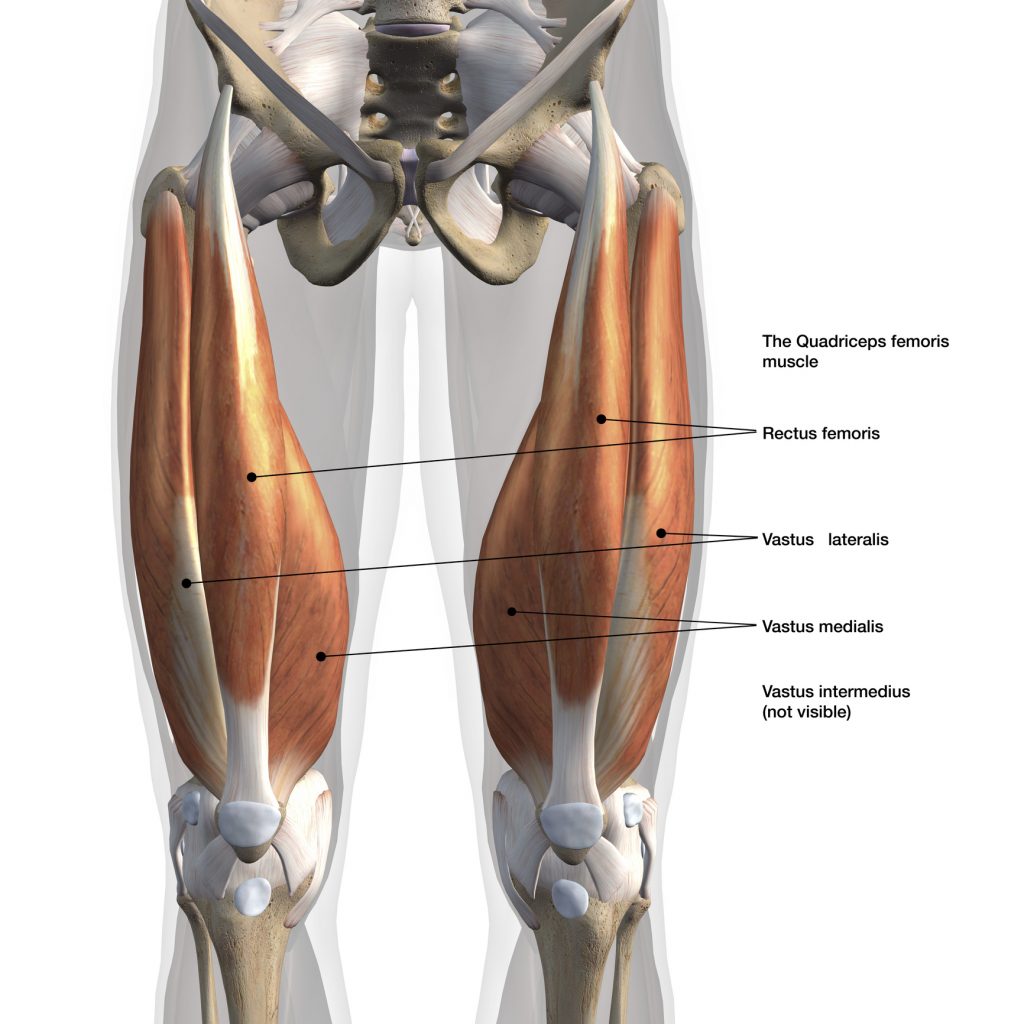
Your quadriceps are the four powerful muscles at the front of your thigh that help you straighten your knee, run, jump, and kick. A quadriceps strain — sometimes called a quad tear or quad injury — happens when these muscles are overstretched or partially torn.
It’s a common issue among runners, football players, and gym enthusiasts, but it can happen to anyone during sudden movements or slips.
The Quadriceps Muscles Include:
- Rectus femoris – most often injured; used in kicking and sprinting
- Vastus lateralis – outer thigh
- Vastus medialis – inner thigh
- Vastus intermedius – sits deep between them
When one or more of these muscles are overloaded or fatigued, a strain can easily occur.
Types of Quadriceps Strains
Physiotherapists classify quadriceps injuries into three grades based on severity.
Grade 1 – Mild
- Minor overstretching of a few muscle fibres
- Mild discomfort or tightness
- Often no bruising, but tenderness the next day
Grade 2 – Moderate
- Partial tearing of the muscle fibres
- Sharp pain and swelling
- Walking or squatting may be painful
Grade 3 – Severe
- Complete tear or rupture
- Intense pain, swelling, and visible bruising
- Significant weakness or inability to straighten the knee
Even if symptoms seem mild, getting early physiotherapy for your quadriceps strain can dramatically speed up healing and prevent complications.
Common Causes of a Quadriceps Strain
Most quad strains happen during high-speed or forceful contractions, such as:
- Sprinting or kicking
- Jumping and landing awkwardly
- Heavy lifting or squatting
- Sudden changes in direction
Other contributing factors include:
- Skipping a warm-up
- Poor flexibility
- Muscle imbalance (weak hamstrings compared to strong quads)
- Returning to sport too early after a previous injury
Symptoms of a Quadriceps Strain
Typical signs include:
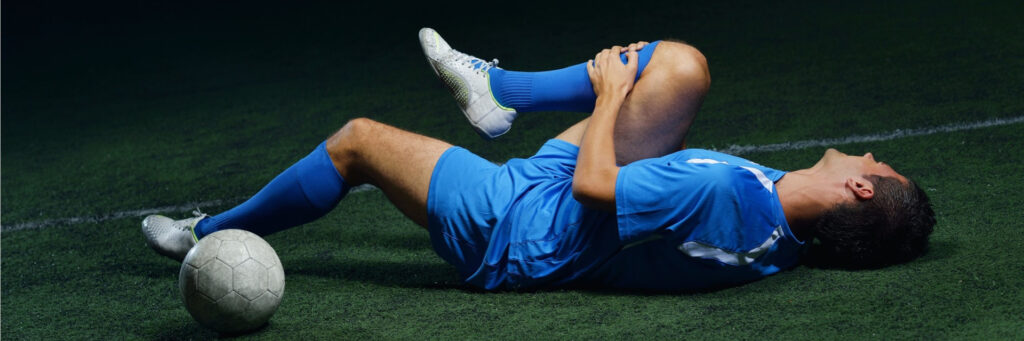
- Sudden pain or “pulling” sensation at the front of the thigh
- Tightness or tenderness when walking
- Swelling or bruising developing within 24 hours
- Pain when straightening the knee or lifting the leg
- Weakness or stiffness
If you feel a sharp pain during exercise or sport, stop immediately and book a physiotherapy assessment. Early diagnosis is key for a quicker recovery.
Quadriceps Strain Physiotherapy: How Treatment Works
Physiotherapy plays a major role in healing and preventing re-injury. At X Physio Frenchs Forest, we create individualised treatment plans that target pain, rebuild strength, and restore full function safely.
1. Assessment and Diagnosis
Your physiotherapist will examine your thigh, test muscle strength, and identify the exact site and grade of injury. We may refer for an ultrasound if a severe tear is suspected.
2. Early Stage – Calm and Protect
The first 3–5 days focus on:
- Reducing pain and swelling
- Applying ice and compression
- Using gentle range-of-motion exercises
- Hands-on soft tissue therapy
We’ll also teach you how to move safely while protecting the healing muscle.
3. Mid Stage – Strength and Control
Once pain subsides, we move on to:
- Progressive strengthening (e.g. isometric holds, mini squats, step-ups)
- Gentle stretching to restore mobility
- Dry needling and massage to aid recovery
- Core and hip strengthening to support lower limb control
Our focus here is restoring balance and preventing compensations.
4. Final Stage – Power and Return to Sport
Before you get back to sport or gym training, we’ll guide you through:
- Running and jumping drills
- Plyometric and eccentric exercises
- Functional testing to ensure symmetry and confidence
We never guess — we test. This ensures your leg is ready for full return to activity without setbacks.
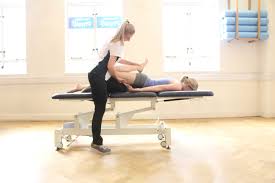
Case Study: Local Athlete Success
Recently, we treated a 32-year-old soccer player from Forestville, just around the corner from Frenchs Forest. He felt a sharp pain in his thigh mid-sprint during training and came in the next day.
Diagnosis: Grade 2 quadriceps strain.
Treatment: soft tissue therapy, dry needling, progressive strength rehab, and return-to-run program.
Within three weeks, he was pain-free and jogging again. By week six, he was back to full training — stronger and more confident than before.
This is the kind of result we see regularly with early, targeted quadriceps strain physiotherapy.
At-Home Recovery Tips
- Apply ice for 15–20 minutes every few hours during the first 48 hours.
- Avoid aggressive stretching early on — it can worsen the tear.
- Stay mobile – gentle walking helps circulation.
- Eat nutritious foods to support muscle repair.
- Follow your physio’s program closely for the best long-term results.
How Long Does Recovery Take?
Every quadriceps injury heals differently, but here’s a guide:
| Grade | Typical Recovery Time | Rehab Focus |
|---|---|---|
| Grade 1 | 1–2 weeks | Light exercise, mobility |
| Grade 2 | 3–6 weeks | Strength, stability, control |
| Grade 3 | 8–12+ weeks | Gradual reloading and return to sport |
The earlier you start physiotherapy, the shorter your overall downtime tends to be.
Preventing Future Quadriceps Strains
To reduce the risk of re-injury:
- Always warm up before training.
- Include eccentric (slow-lowering) exercises in your strength routine.
- Keep flexibility in check.
- Balance quad and hamstring strength.
- Maintain consistent physio check-ins during training phases.
Why Choose X Physio in Frenchs Forest
At X Physio, we’re passionate about helping athletes and active locals recover quickly from injuries like quadriceps strains.
We combine:
- Hands-on physiotherapy
- Personalised exercise programs
- Cutting-edge strength testing and video analysis
Our patients come from Forestville, Allambie, Oxford Falls, and the wider Northern Beaches, trusting us for expert care and long-term results.
Frequently Asked Questions (FAQs)
1. What’s the difference between a quadriceps strain and tear?
They’re the same injury type — a “strain” simply describes muscle fibres being overstretched or torn. The term “tear” is often used for more severe grades.
2. How do I know if I have a quadriceps strain or just muscle soreness?
If pain occurs suddenly during activity and is focused in one spot, it’s likely a strain. Soreness usually affects both thighs equally and builds up gradually after exercise.
3. Should I use ice or heat for a quadriceps injury?
Use ice during the first 48–72 hours to reduce inflammation. After that, heat can help relax the muscle and increase circulation.
4. Can I still exercise with a quadriceps strain?
You should avoid painful movements until assessed by your physio. Training through pain can cause further tearing and delay recovery.
5. How long until I can return to sport?
Mild strains recover within 1–2 weeks, while more serious tears may take 8–12 weeks. Your physiotherapist will test strength and control before clearing you to return.
References
- Sports Medicine Australia – Quadriceps Strain
- Physiopedia – Quadriceps Strain
- Better Health Channel – Muscle Injuries
Start Your Recovery Today
Don’t let a quadriceps strain slow you down. Physiotherapy is the fastest and safest way to get back on your feet.
Give us a call today on 9806 3077, or book online – just CLICK HERE.
🏃♂️ Related Reading
Looking to learn more about injury recovery and physiotherapy? Check out these helpful blogs from our team:
- Hamstring Strain Physiotherapy: Rehab Tips and Recovery Timeline
Learn how to recover from a hamstring strain safely and return to sport faster with targeted physiotherapy. - MCL Injury Physiotherapy: Treatment and Return-to-Play Plan
Discover the key stages of MCL injury rehab and how physiotherapy restores knee strength and stability.
An MCL injury (medial collateral ligament) can sideline your knee stability and mobility — but most recover well with guided physiotherapy. In this blog we break down the 3 grades of MCL injury, outline tailored treatment plans for each, and share a real patient story from nearby Frenchs Forest. Read on to see how we fix knees.
Imagine doing a side step, hearing a pop, and feeling your knee wobble sideways. That inner-knee ache after the game? That might be your MCL (medial collateral ligament) asking for help. But don’t panic — with the right plan, you can bounce back stronger.
Before we dive in: if you’re reading this because your knee hurts today, keep reading — you’ll find a roadmap for recovery and a concrete path back to your sport or daily life.
What is the MCL, and how does it get injured?
The MCL is a strong band of ligament on the inside (medial side) of your knee. Its job is to resist sideways force (valgus) pushing your knee inward, and to help with rotational stability. When you get a blow to the outer side of the knee, or twist while your foot is planted, the injury can get overstretched, torn partially, or torn completely.
Symptoms often include:
- Pain and tenderness along the inner knee
- Swelling or bruising
- Stiffness / reduced motion
- Instability (“my knee gives way”) in more serious cases
- Difficulty bearing weight
Diagnosis is made via clinical testing (valgus stress tests) plus, in some cases, imaging such as MRI or ultrasound to check the extent and whether other structures (e.g. meniscus, ACL) are also injured.
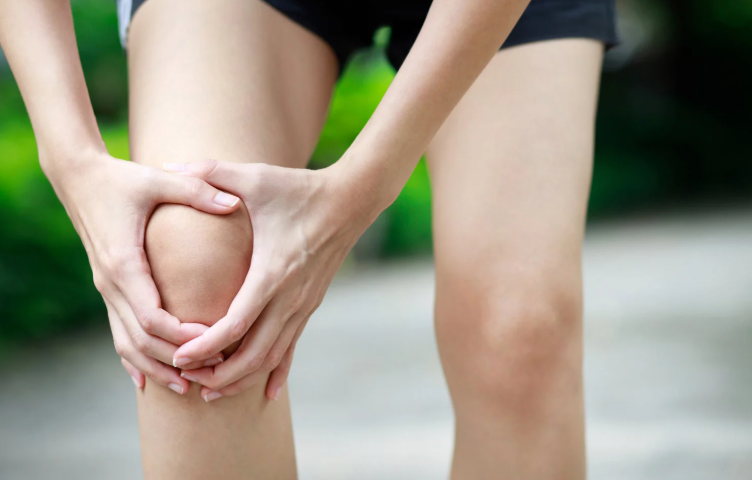
If you don’t think your MCL is the cause of your pain, read this blog to determine what else it could be:
The 3 Grades of MCL Injury
We commonly classify MCL injury ‘s into Grade I, II, and III. Each grade indicates severity, and changes how we treat.
| Grade | What’s happening | Symptoms / signs | Usual recovery time* |
|---|---|---|---|
| Grade I (mild sprain / micro-tear) | Some fibers are stretched or minimally torn; ligament continuity is largely intact | Mild pain, local tenderness, minimal swelling, stability largely preserved | ~1–2 weeks (for daily tasks), up to 3 weeks for full return to sport |
| Grade II (moderate / partial tear) | More fibers are torn, ligament is somewhat lax | More pain, swelling, some instability especially with cutting or pivoting | ~4–8 weeks, depending on demands |
| Grade III (complete tear / rupture) | Ligament is fully torn (or mostly so), sometimes detaching from bone | Severe pain, swelling, significant instability, often difficulty weightbearing | 8–12+ weeks (or more if surgery / associated injuries) |
* These are approximate timelines; healing depends on age, general health, compliance with rehab, and whether there are co-injuries.
In many cases, Grade I and II injuries are managed non-surgically with physiotherapy, bracing, and guided loading. Grade III may sometimes require surgical consultation — especially if other knee ligaments are involved — but an isolated MCL injury tears heal well with conservative care.
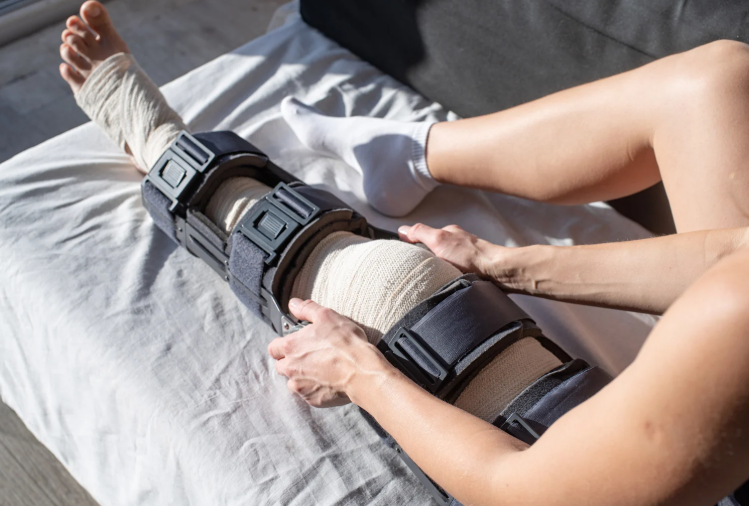
Treatment Plan by Grade: What We Do at the Clinic
Below is a laddered approach to care based on injury severity. Every patient will differ, so your physio adapts to your pain, swelling, and response.
Grade I (mild sprain)
Goals
- Control pain and swelling
- Restore knee range of motion (ROM)
- Begin muscle activation, particularly quads and hamstrings
- Gradually reintroduce load
Typical plan
- Acute / protection phase (days 1–3 or until pain allows)
- Rest (avoid aggravating activities)
- Ice, compression, elevation
- Gentle passive / active assisted knee flexion/extension (within tolerance)
- Quadriceps sets (isometric contraction)
- Straight leg raises if pain allows
- Early rehab (week 1–2)
- Progress ROM (heel slides, wall slides)
- Light closed-chain loading (mini squats)
- Gentle hamstring activation
- Begin balance / proprioception (e.g. single leg stance, wobble board)
- Progressive loading (week 2–3)
- Increase intensity of squats, step-ups
- Lunges (within pain limits)
- More challenging balance drills
- Light sport-specific drills (if relevant)
- Return to full activity
- Test strength versus uninjured side
- Do change-of-direction drills
- Make sure knee is stable under dynamic loading
With a Grade I injury, many patients return to normal activity (depending on sport) in 1–3 weeks.
Grade II (moderate / partial tear)
Goals
- Protect the injured ligament while beginning controlled movement
- Restore ROM
- Strengthen surrounding muscles
- Rebuild stability through proprioception
- Safely progress back to daily/sport use
Typical plan
- Protection / acute phase (first 1–2 weeks)
- Use of a hinged knee brace (locked or limited motion) to protect the knee during early healing
- Crutches if needed (offload to reduce pain)
- Ice, compression, elevation
- Pain-free ROM exercises (within brace limits)
- Gentle muscle activation (quads, hamstrings)
- Early rehab (weeks 2–4)
- Gradually unlock the brace to allow controlled ROM
- Continue strengthening: seated knee extensions, hamstring curls, calf raises
- Closed-chain work (mini squats, partial lunges)
- Proprioceptive drills (balance, single leg stance, wobble pad)
- Manual therapy / soft tissue techniques on tight muscles
- Intermediate / loading phase (weeks 4–6 or more)
- Increase resistance of strength exercises
- Dynamic stability (lateral steps, single leg squats)
- Light jogging when pain and stability allow
- Sport- or activity-specific drills (cutting, pivoting)
- Return to sport / full activity (weeks 6–8+)
- Strength and hop testing (≥90 % of uninjured side)
- Agility, plyometrics, side steps
- Monitor for symptoms of instability
- Gradual full return
Typically, a Grade II case can take 4–8 weeks to recover, though more demanding sports may require more time. (Sources: Peak Physio; Anystage Physio; Jubilees)
Grade III (complete tear / rupture)
Goals
- Protect the injured ligament
- Prevent further injury while promoting safe healing
- Gradually regain motion, strength, and stability
- Decide whether surgical opinion is needed
- Aim for full return, or managed return depending on associated injuries
Typical plan (conservative approach when no surgical repair needed)
- Immobilisation / protection (weeks 0–2 or longer)
- Hinged brace, often locked initially
- Crutches to offload
- Ice, compression, elevation
- Gentle isometric muscle activation (quad/hamstring sets)
- Gradual mobilising phase (weeks 2–6)
- Begin unlocking brace gradually to allow controlled motion
- Continue passive / assisted ROM, progressing as tolerated
- Strengthening exercises within the brace limits
- Gentle closed chain loading as pain allows
- Ongoing soft tissue and joint mobilisation by physio
- Rehabilitation phase (weeks 6–12+)
- Increase resistance in strength training
- Dynamic balance, proprioception drills
- Begin jogging, then progress to cutting and pivoting (very cautiously)
- Emphasise control, landing mechanics, neuromuscular training
- Return to sport / full function (after ~3 months or more)
- Strength, hop tests, agility drills
- Sport-specific simulation
- Monitor for instability, pain, swelling
- In some cases, surgical repair or reconstruction may be needed (especially if associated ACL, meniscus, or multiple ligament injuries)
If a Grade III injury is part of a multi-ligament injury, surgery + rehab is often required. But many isolated MCL injury tears — especially femoral-side ones — heal well without surgery. (Sources: Perth Knee Injury; Jubilees; Sydney Physio)
Recovery can take 8–12+ weeks (and in complex cases, months).
A Real Clinic Success Story
Let me tell you about “Sam”, who came to us from Belrose, near Frenchs Forest NSW. Sam is an avid weekend soccer player, and during a match he was tackled from the outside and felt a sharp pain along the inside of his knee. He came into our Frenchs Forest clinic two days later with a Grade II MCL injury confirmed by clinical testing and an MRI.
Here’s how Sam’s journey went:
- In the first week, we fitted him with a hinged knee brace (limited motion initially) and gave him a home program focused on pain control, gentle activation, and range of motion within limits.
- Weeks 2–4, we progressed strength exercises (mini squats, hamstring work), added proprioceptive drills (balance pads, single leg holds), and began light closed-chain loading.
- By week 5, Sam was doing jogging and light change-of-direction drills, under supervision.
- At week 7, he passed strength and hop testing (≥ 95% of unaffected side) and began full soccer training gradually.
- At week 8, he was back playing in non-contact drills, and by week 10 he was back in full competition, pain free.
The key was consistent rehab, avoiding rushing things too early, and building control before return. Sam’s knee is stable, he’s confident, and last week he came back to us for a check and said “best I’ve felt in years.”
This is what we aim for every patient — tailored, progressive, confident recovery.
Tips & Mistakes to Avoid
- Don’t skip early rehab — even mild injuries benefit from guided loading.
- Don’t rush return — instability is a risk if you return too early.
- Monitor swelling, pain flare ups, and signs of giving way.
- Use bracing or external support early on when needed, but wean off as strength improves.
- Always include neuromuscular / proprioception work — that’s what protects your knee long term.
- If there are signs of other ligament damage, meniscal injury, or instability, refer to an orthopaedic surgeon early.
Summary
An MCL injury doesn’t mean the end of your sport or active life — it just means you need a smart, phased roadmap. By understanding your injury grade and working through a structured rehabilitative plan, you maximise your chance of a full return — stronger and safer.
If you’re in or near Frenchs Forest, or anywhere in the Northern Beaches, and you’ve just had that tell-tale inner knee pain or wobble — don’t wait for it to get worse. Give us a call today on 9806 3077, or book online, just CLICK HERE. Let’s assess your knee, map your recovery, and help you get moving again.
FAQs
FAQ
Q: Can an MCL injury heal without surgery?
A: Yes — most isolated MCL injury ‘s (Grades I and II, and many Grade III) heal well with conservative (non-surgical) care, such as bracing and physiotherapy.
Q: How long does an MCL injury take to heal?
A: It depends on the grade — mild sprains may heal in 1–3 weeks; moderate tears in 4–8 weeks; severe tears may take 8–12+ weeks (or more) depending on rehabilitation and any associated injuries.
Q: When can I return to sport after an MCL Injury?
A: Return depends on strength, stability, lack of symptoms, and passing functional tests. For Grade I/II, often within 4–8 weeks; for Grade III, sometimes 3+ months is needed.
Q: Do I need a knee brace for an MCL injury?
A: A hinged brace can protect the joint during early healing (especially in Grade II/III) and is often used early, but we typically wean off as strength and stability return.
Q: What if I still feel instability or pain after rehab?
A: If symptoms persist, further assessment is needed. There may be associated ligament or meniscus damage. An orthopaedic consult or further imaging may be required.
References & Further Reading
- Anystage Physio — Medial Collateral Ligament Injury Classification & Treatment
- Peak Physio — Medial Collateral Ligament Sprains
- Jubilees Sports Physiotherapy — Dealing with Medial Collateral Ligament Injuries
- Perth Knee Injury — MCL Injury Treatment
- Melbourne Sports Physio Experts — MCL Injury Rehab
- PhysioWorks — Effective MCL Sprain Treatment & Prevention
A kneecap dislocation can be painful, frightening, and frustrating — especially if it stops you from enjoying sport or even walking comfortably. The good news? With the right physiotherapy treatment, recovery is absolutely achievable. In this blog, we’ll break down causes, treatment, recovery timelines, and share a real success story from our Frenchs Forest clinic.
The Shock Factor: What is a Kneecap Dislocation?
Your kneecap (patella) normally glides smoothly in a groove at the end of your thigh bone (femur). A dislocation happens when the kneecap is forced out of that groove — usually to the outside of the knee.
This can happen during sport, a sudden twist, a fall, or even a simple change of direction. While some kneecaps pop back in on their own, others require urgent medical care. Either way, proper physiotherapy afterwards is crucial to restore strength and prevent future dislocations.
Common Causes of Patella Dislocation
Kneecap dislocation isn’t random — it usually happens due to a mix of force and underlying risk factors:
- Sudden twisting or pivoting movements during sport
- Direct blow to the knee in contact sports
- Shallow or irregular patella groove (some people are born with higher risk anatomy)
- Weak quadriceps and hip muscles leading to poor patella tracking
- Previous dislocation — once it’s happened, the risk increases
- Loose ligaments (hypermobility), common in younger athletes and females
Symptoms You Shouldn’t Ignore
- Severe knee pain at the time of injury
- Visible deformity (kneecap sitting out of place)
- Swelling and bruising
- Difficulty walking or straightening the leg
- Instability or the feeling the knee might “give way” afterwards
The Role of Physiotherapy in Recovery
Physiotherapy is essential after a kneecap dislocation — even if the kneecap popped back into place without surgery. Without rehab, many patients are left with instability, weakness, or repeat dislocations.
Key Goals of Physiotherapy:
- Reduce pain and swelling
- Protect and stabilise the knee during early healing
- Restore movement of the joint
- Strengthen muscles around the knee and hips
- Retrain patella tracking to keep the kneecap moving correctly
- Return to sport safely with confidence

Step-by-Step Physio Treatment Plan
1. Acute Phase (0–2 weeks)
- RICE principles: rest, ice, compression, elevation
- Bracing: often after a dislocaiton, the patient is put into a zimmer splint which keeps their leg straight for two weeks
- Quadriceps activation (isometric quads sets)
- Manual therapy is focussed on keeping range of motion and swelling reduction
- Exercise therapy is used to keep surrounding muscles and the entire body strong
2. Early Rehabilitation (2–6 weeks)
- Gradual range-of-motion restoration
- Targeted strengthening of quads, hamstrings, and hips
- Balance and proprioception training
- Manual therapy for stiffness and swelling
3. Strength & Control Phase (6–12 weeks)
- Progress to functional strengthening: squats, step-downs, lunges
- Glute strengthening for knee alignment
- Patella tracking retraining with closed-chain exercises
- Controlled jogging (if pain-free and stable)
4. Sport-Specific Training (12+ weeks)
- Plyometrics (jumping, landing mechanics)
- Change of direction drills
- Sport simulations under physio guidance
- Preventive strategies for long-term knee stability
Do You Always Need Surgery?
Not always. Many first-time kneecap dislocations can be managed successfully with physiotherapy. Surgery is considered if:
- The kneecap fractures during dislocation
- There is severe cartilage damage
- The patient has repeated dislocations despite rehab
- Structural issues (very shallow patella groove)
Your physio will often work alongside your orthopaedic specialist to guide this decision.
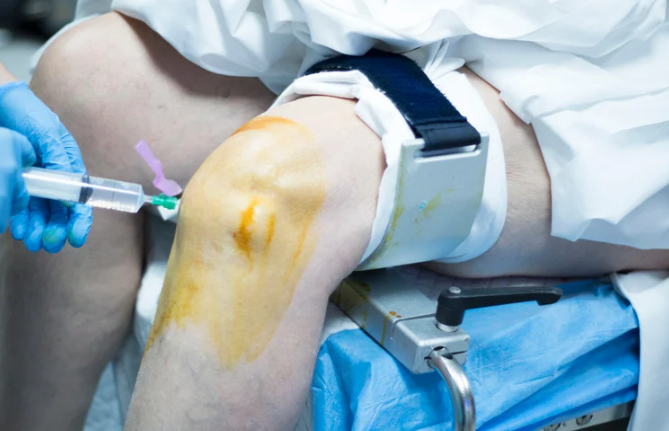
Patient Story: “Sophie from Elanora Heights”
Sophie, a 17-year-old netballer from Elanora Heights, came to our Frenchs Forest clinic after her kneecap dislocated during a sudden change of direction. She was devastated, fearing she’d miss the season.
Her initial scans showed no fractures, so we began with protective bracing and gentle activation work. Over the following weeks, we focused on quad and glute strengthening, improving her balance, and teaching her safe movement patterns.
Within 10 weeks, Sophie was jogging again, and by 16 weeks she was back on the netball court — pain-free and with stronger knees than before. She’s now playing confidently with no repeat dislocations.
Common Mistakes After a Kneecap Dislocation
- Returning to sport too quickly without proper rehab
- Relying only on rest — leading to weakness and instability
- Ignoring hip and glute strength (critical for knee control)
- Skipping proprioception training (essential for preventing recurrence)
- Not addressing underlying anatomical risks with tailored treatment
Sample Strengthening Exercises
| Exercise | How to Do It | Benefit |
|---|---|---|
| Quad sets | Sit with leg straight, tighten thigh muscle pushing knee down | Activates quads early |
| Clamshells | Lie on side, knees bent, lift top knee | Strengthens glutes for knee stability |
| Step-downs | Slowly lower one leg off step | Improves knee control |
| Side band walks | Step sideways against band | Strengthens hips |
| Single-leg balance | Stand on one leg, hold balance | Trains proprioception |
Recovery Timeline
- 0–2 weeks: Pain and swelling management, often immobilised
- 2–6 weeks: Mobility and basic strength return
- 6–12 weeks: Functional strengthening, jogging reintroduced
- 12–16 weeks: Return to training and sport-specific drills
- 4–6 months: Full recovery and return to competitive sport (if all rehab steps followed)
If you have ongoing pain around the knee cap, it could be due to maltracking. Read more about this in our blog:
Understanding And Managing Kneecap Pain
Key Takeaways
- Kneecap dislocations are painful but very treatable with physiotherapy
- Early rehab prevents long-term instability and repeat injuries
- Strengthening quads, hips, and retraining patella control are essential
- Most patients can return to full sport in 3–6 months with structured rehab
- Don’t leave it to chance — structured physio makes the difference
👉 Give us a call today on 9806 3077, or book online — just CLICK HERE.
FAQs
Q: How long does it take to recover from a kneecap dislocation?
Most people recover in 3–6 months with physiotherapy, depending on severity and commitment to rehab.This can vary significantly.
Q: Can you walk after a kneecap dislocation?
Initially walking may be painful and unstable. With bracing and early physiotherapy, most patients regain normal walking within 2–4 weeks.
Q: Do all kneecap dislocations need surgery?
No — many are successfully managed with physiotherapy alone. Surgery is considered if repeat dislocations occur or structural damage is present.
Q: How can I stop it happening again?
Strengthening quads and glutes, improving balance, and correcting movement patterns with physiotherapy significantly reduce recurrence risk.
References & Further Reading
- Physiopedia: Patellar Dislocation physio-pedia.com
- Healthline: Kneecap Dislocation Guide healthline.com
- Cleveland Clinic: Patellar Dislocation my.clevelandclinic.org
- Sports Medicine Australia: Knee Injuries sma.org.au
- PhysioWorks: Patella Dislocation Rehab physioworks.com.au