
Abdominal surgery is no small thing—it takes a toll on your body, your mobility, and even your confidence in movement. Whether it’s an appendectomy, hernia repair, caesarean section, or bowel surgery, getting back to normal isn’t as simple as just waiting it out. This is where physiotherapy comes in.
A good recovery plan can help you regain strength, prevent complications, and get back to doing what you love sooner rather than later. In this guide, we’ll walk you through the role of physiotherapy after abdominal surgery and give you practical tips to help you on your way. We have had many patients walk through the door who had been told by their surgeon that they will be fine in time, but they saw notable improvements with our guidance.
Why Is Physiotherapy Important After Abdominal Surgery?
Abdominal Surgery in the abdominal area can have a range of effects on your body, including:
- Pain and discomfort: Surgical wounds, muscle tension, and internal healing can all cause discomfort.
- Reduced mobility: Simple tasks like getting out of bed, bending down, or even breathing deeply can feel difficult.
- Muscle weakness: The core muscles play a huge role in movement, and surgery can disrupt their function.
- Breathing difficulties: Pain and stiffness can make deep breathing harder, increasing the risk of lung infections.
- Risk of complications: Without proper movement and rehab, there’s a higher chance of issues like blood clots, adhesions, or ongoing weakness.
Physiotherapy aims to restore function, improve mobility, and prevent long-term problems.

The Early Days: Hospital Physiotherapy
Most people see a physiotherapist soon after abdominal surgery while still in hospital. The main focus during this stage is:
- Deep Breathing Exercises – To prevent lung infections and keep the lungs clear.
- Gentle Movements – To reduce stiffness and encourage circulation.
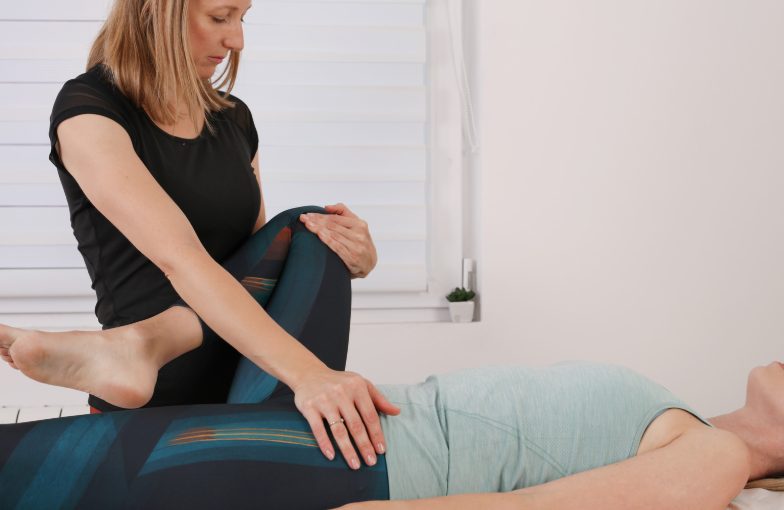
- Safe Mobilisation – Learning how to get in and out of bed, stand up, and walk safely without straining the abdominal area.
A common technique is the log roll method—rolling onto your side first before pushing up into a seated position. This reduces strain on the healing tissues.
What Happens When You Go Home?
Once you’re discharged, the real work begins. Recovery can take weeks to months, depending on the type of abdominal surgery and your overall health. Here’s what to focus on:
1. Gentle Movement and Walking
As soon as you’re able, walking should become a daily habit. It promotes circulation, prevents stiffness, and helps restore confidence in movement. Start with short walks around the house and gradually increase the distance.
2. Core and Pelvic Floor Activation
Your abdominal muscles and pelvic floor may be weakened post-surgery. Simple, controlled exercises help to re-engage these muscles without putting too much strain on the area:
- Pelvic tilts – Lying down, gently tilt your pelvis back and forth to activate the deep core muscles.
- Diaphragmatic breathing – Breathe deeply into your belly, focusing on slow, controlled movements.
- Gentle pelvic floor contractions – Engaging these muscles helps with stability and support.
3. Scar and Tissue Management
Once your incision is healing well (usually after 2-3 weeks), gentle scar massage can help prevent adhesions and improve mobility. Use light circular motions with a non-irritating lotion.

When Can You Return to Exercise?
Returning to exercise depends on the type of surgery and your recovery speed. A rough guide is:
- Weeks 1-2: Focus on light walking, deep breathing, and gentle activation exercises.
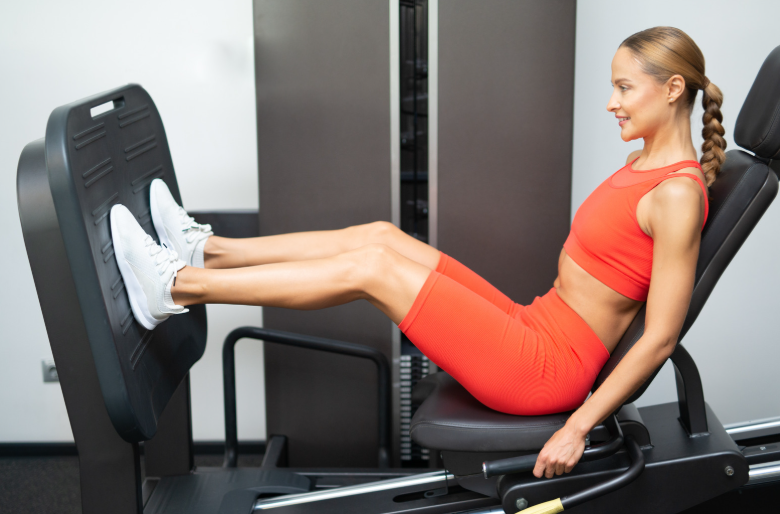
- Weeks 3-6: Progress to more structured movement like bodyweight exercises and stretching.
- After 6 weeks: Depending on healing, you may start strength training, low-impact cardio, and core work.
Avoid high-impact activities (like running, heavy lifting, or abdominal crunches) until you get the all-clear from your physiotherapist or surgeon.
A Case Study: Emily’s Recovery From Abdominal Surgery
Emily, a 38-year-old office worker, underwent surgery for an umbilical hernia repair. She was fit before surgery but struggled with pain, stiffness, and the fear of moving incorrectly during recovery.
Her physiotherapy plan included:
- Week 1-2: Gentle breathing exercises, walking inside the house, and learning safe bed mobility.
- Week 3-4: Light core activation work, improving posture, and increasing walking distance.
- Week 5-8: Graduating to bodyweight exercises, light yoga, and scar massage.
Exercise Program for Week 5-8:
At this stage, Emily’s physiotherapist introduced a structured program focusing on rebuilding core strength, stability, and overall mobility. Her program included:
- Pelvic tilts (Emily tends to tilt anteriorly at her hips so we introduced this for awareness, lying down, 10 reps x 2 sets)
- Banded Bridging (gentle glute bridges with hip abduction, 10 reps x 2 sets)
- Standing banded hip flexions (standing against a wall, marching with band around feet, 10 reps per side)
- Wall push-ups (gentle upper body activation, 10 reps x 2 sets)
- Side plank on knees with or without leg lifts (to engage the hips and core, 10 reps per side)
- Gentle standing squats (half-depth, focusing on control, 10 reps x 2 sets)
- Walking for 20-30 minutes daily

This program helped Emily regain her strength safely without putting too much strain on her healing abdominal muscles. By 12 weeks, Emily was back to her pre-surgery fitness routine with modifications. Her recovery was smooth thanks to early rehab and consistent progressions.
Common Mistakes to Avoid
- Ignoring pain – While some discomfort is normal, sharp or increasing pain needs to be checked.
- Rushing into exercise too soon – Overdoing it can lead to complications like hernias or muscle tears.
- Neglecting core and pelvic floor activation – These are crucial for long-term recovery and stability.
- Skipping follow-ups – Seeing a physiotherapist ensures you’re progressing safely.
Final Thoughts
Physiotherapy plays a key role in your recovery after abdominal surgery. The right exercises, movement strategies, and gradual progressions can help you return to normal life feeling stronger and more confident. If you’ve had abdominal surgery, working with a physiotherapist ensures you’re moving safely and preventing long-term issues.Give us a call today if you have any questions 02 9806 3077
References:
- Better Health Channel. (n.d.). “Recovering from surgery.” Retrieved from https://www.betterhealth.vic.gov.au
- Australian Physiotherapy Association. (n.d.). “Physiotherapy and post-surgical care.” Retrieved from https://australian.physio
- The Royal Women’s Hospital. (n.d.). “Caring for your body after abdominal surgery.” Retrieved from https://www.thewomens.org.au
If you’re recovering from surgery and need guidance, book a session with a physiotherapist to ensure a smooth and safe recovery!
Rotator cuff related pain is one of those frustrating issues that can creep into daily life, making simple tasks like hanging out the washing or reaching for a high shelf feel like a struggle.
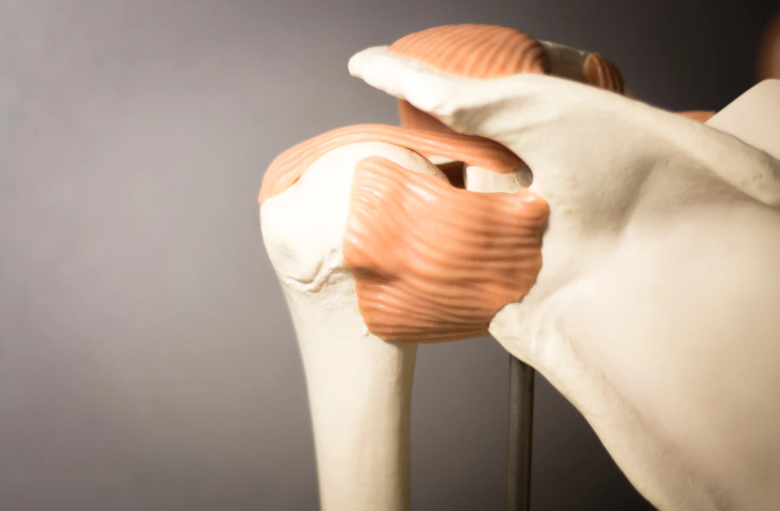
The rotator cuff is a group of four muscles and their tendons that stabilise the shoulder joint. The shoulder joint is very mobile with the ability to move in many directions, therefore these muscles must work all together to keep the ball in the socket throughout movement. These muscles work hard to keep your shoulder moving smoothly, but they’re also prone to injury. Whether it’s from repetitive overhead movements, a sudden fall, or simply wear and tear over time, rotator cuff injuries are incredibly common.
In this blog, we’ll break down the most common rotator cuff injuries, their symptoms, how they’re treated, and what you can do to keep your shoulders strong and pain-free. Plus, we’ll share a recent success story of a patient who turned things around with physiotherapy.
Common Rotator Cuff Injuries
1. Rotator Cuff Tendinopathy
This is a fancy term for irritation or degeneration of the rotator cuff tendons. It’s common in people who perform repetitive shoulder movements, such as tradies, painters, swimmers, and tennis players. Over time, the tendons become overloaded, leading to pain, weakness, and difficulty lifting the arm.
Symptoms:
- Pain when lifting the arm or reaching overhead
- Shoulder stiffness, especially in the morning
- Weakness in the affected arm
- Often with repeated movements, the symptoms can warm up and improve
Treatment:
- Rest from aggravating activities (but not total immobilisation!)
- Strengthening exercises prescribed by a physiotherapist
- Manual therapy to improve shoulder mobility
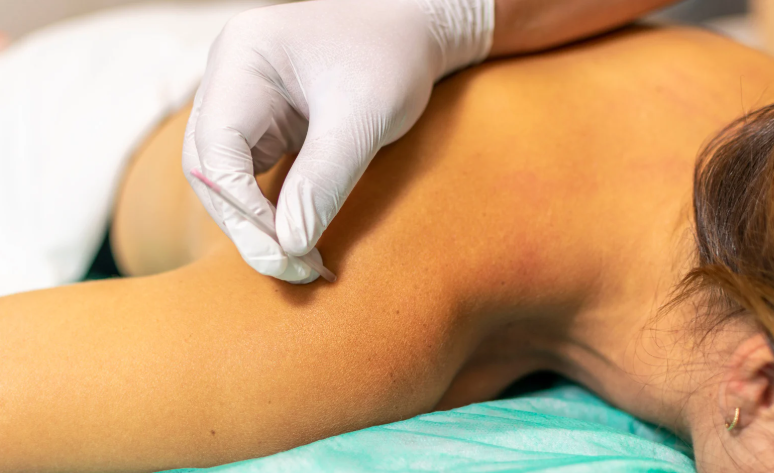
- Deep tissue massage or dry needling to reset the tone of muscle and improve biomechanics
- Ice or heat therapy to manage pain
2. Rotator Cuff Tears
A rotator cuff tear can be partial (where only part of the tendon is damaged) or full-thickness (where the tendon is completely torn). These injuries can happen suddenly from trauma, such as a fall or lifting something too heavy, or they can develop gradually from long-term wear and tear.
Symptoms:
- Sharp or deep pain in the shoulder, especially at night
- Significant weakness when lifting or rotating the arm
- With a full thickness tear, it might not be possible to lift the arm
- Clicking or cracking noises with movement
Treatment:
- Physiotherapy exercises to restore strength and function
- Hands-on treatment to reduce pain and stiffness
- Shockwave therapy can be used to bring blood to the area for healing
- Platelet rich plasma (PRP) injections can help with accelerating healing of a tear
- Surgery in severe cases, but many people recover well with rehab alone
3. Shoulder Impingement Syndrome
Shoulder impingement occurs when the rotator cuff tendons get pinched between the bones of the shoulder, leading to pain and inflammation. This is common in people who do a lot of overhead movements, such as swimmers, weightlifters, and tradespeople.
Symptoms:
- Pain when reaching overhead or behind the back
- A catching sensation in the shoulder
- Difficulty sleeping on the affected side
Treatment:
- Postural corrections and movement retraining
- Strengthening the rotator cuff and scapular muscles
- Soft tissue release and stretching to reduce tension
- Activity modifications to avoid irritating movements
- Cortisone injections for persistent inflammation (if necessary)
4. Calcific Tendinitis
This condition occurs when calcium deposits build up in the rotator cuff tendons, leading to severe pain and restricted movement. The cause isn’t fully understood, but it’s more common in people aged 30–50 and can come on quite suddenly.
Symptoms:
- Intense, often sharp shoulder pain
- Difficulty moving the arm due to stiffness
- Pain that worsens at night
Treatment:
- Physiotherapy to maintain movement and strength
- Shockwave therapy to break down the calcium deposits
- Anti-inflammatory medications
- In rare cases, needle aspiration or surgery
Physiotherapy: Your First Line of Defence
Many people worry that a rotator cuff injury means surgery, but the good news is that most cases respond well to physiotherapy. A structured rehab program can help reduce pain, restore movement, and prevent future injuries.
Physiotherapy treatment typically includes:
- Manual therapy to reduce tone in muscles and improve joint mobility
- Exercise-based rehab to strengthen the rotator cuff and surrounding muscles
- Postural correction to prevent excessive strain on the shoulder
- Activity modification to reduce aggravation while still keeping active
- Shockwave therapy to promote healing and break down calcifications in chronic cases
- Dry needling to release tight muscles and improve blood flow
- Joint mobilisations to restore normal movement patterns
- Biomechanical assessments to identify and correct movement dysfunctions that may be contributing to shoulder pain

Case Study: A Journey Back to Shoulder Health
James, a 52-year-old carpenter, came to our clinic with ongoing right shoulder pain that had been getting worse over the past six months. He struggled with lifting tools overhead and even had trouble putting on his shirt in the mornings. An ultrasound confirmed he had a partial rotator cuff tear.
Initially, James was worried he’d need surgery, but after a chat with our physiotherapist, he committed to a structured rehab program. Over 10 weeks, we worked on:
- Progressive strengthening exercises to rebuild his shoulder stability
- Manual therapy to release tight surrounding muscles
- Shockwave therapy to accelerate tendon healing
- Dry needling to reduce muscle tension
- Joint mobilisations to restore pain-free range of motion
- Education on movement patterns to avoid further aggravation
By the end of his rehab, James was pain-free, back to full function, and lifting tools again with no issues. Best of all, he avoided surgery and is now maintaining his shoulder health with a home exercise program.
Preventing Rotator Cuff Injuries
Here are some simple ways to protect your shoulders and keep them strong:
- Strength training: Keep your rotator cuff and shoulder muscles strong with targeted exercises.
- Posture awareness: Avoid slouching, especially if you work at a desk.
- Warm-up before activity: Stretch and activate your shoulders before workouts or heavy lifting.
- Listen to your body: Don’t push through pain—rest and modify activities as needed.
Final Thoughts
Rotator cuff injuries can be frustrating, but with the right treatment, most people make a full recovery without needing surgery. Physiotherapy is a game-changer when it comes to reducing pain, restoring function, and preventing future issues.
If you’re struggling with shoulder pain, don’t wait—book an appointment with X Physio and get on the path to recovery!
References and Further Reading:
- Physio Works – Rotator Cuff Injuries: https://www.physioworks.com.au
- Australian Physiotherapy Association – Shoulder Pain: https://australian.physio
- Sports Medicine Australia – Rotator Cuff Rehabilitation: https://sma.org.au
What is a Meniscus Injury?
A meniscus injury is one of the most common knee problems, affecting people of all ages, from weekend warriors to professional athletes. The meniscus is a piece of cartilage that acts as a cushion between your thigh bone (femur) and shin bone (tibia). It helps absorb shock, stabilise the knee joint, and distribute weight evenly when you move.
Meniscus injuries usually occur when you twist or pivot suddenly. Alternatively, if your knee over bends suddenly, this can often compress and damage the meniscus at the back of your knee. Whereas if the knee hyper extends or straightens suddenly, the meniscus at the front of your knee becomes compressed and possibly damanged. The mechanisms of injury can occur during sports like soccer, netball, or skiing. However, they can also develop gradually due to wear and tear, particularly as we age.
Signs and Symptoms
If you’ve hurt your meniscus, you may experience:
- Pain, especially when twisting or squatting
- Swelling that develops within hours or over a couple of days
- A catching or locking sensation in the knee
- Stiffness and difficulty fully straightening or bending the knee
- A feeling like the knee might give way
How is a Meniscus Injury Diagnosed?
A physiotherapist can often diagnose a meniscus injury based on your mechanism of injury, symptoms and a series of clinical tests. These may involve bending, straightening, and rotating your knee to see if it reproduces your pain. In some cases, an MRI may be needed to confirm the diagnosis and assess the severity of the tear.
Can a Meniscus Heal on Its Own?
It depends on where the tear is located. The outer third of the meniscus has a good blood supply, meaning it has a better chance of healing naturally. However, the inner two-thirds have limited blood flow, making it harder for the body to repair the damage. Even if the tear doesn’t fully heal, many people can manage their symptoms effectively with physiotherapy and avoid surgery altogether.
Physiotherapy Treatment for Meniscus Injuries
1. Reducing Pain and Swelling
In the early stages, managing pain and inflammation is a priority. This may involve:
- Rest and avoiding aggravating activities
- Ice therapy
- Compression and elevation
- Taping or bracing for support
- Crutches are sometimes required to reduce weight bearing
2. Restoring Knee Movement
A stiff knee can make daily activities difficult. Gentle exercises and hands-on therapy help restore flexibility and prevent long-term movement restrictions. This should be replicated at home with a home exercise program that is taught by your physiotherapist.
3. Strengthening the Knee
This is where physiotherapy makes the biggest impact. Strengthening the muscles around the knee, particularly the quadriceps and hamstrings, provides better support and stability to the joint. Below is an example of a structured 16-week strength program:
Weeks 1-4: Foundation Phase (Bodyweight and Low Resistance)
- Bodyweight Squats – 3 sets of 10 reps
- Step-ups (low step) – 3 sets of 10 reps per leg
- Hamstring Bridges – 3 sets of 10 reps
- Calf Raises – 3 sets of 12 reps
- Balance Exercises (Single-leg stand) – 30 seconds per leg
Weeks 5-8: Progression Phase (Introducing Resistance)
- Goblet Squats (Light Dumbbell) – 3 sets of 10 reps
- Step-ups (Higher Step, Weighted if Comfortable) – 3 sets of 10 reps per leg
- Hamstring Curls (Resistance Band or Machine) – 3 sets of 12 reps
- Calf Raises (Weighted) – 3 sets of 12 reps
- Single-leg Balance on Wobble Board – 30 seconds per leg
Weeks 9-12: Strength Phase (Moderate to Heavy Resistance Training)
- Barbell Squats or Leg Press – 3 sets of 8 reps
- Weighted Step-ups (Dumbbells) – 3 sets of 8 reps per leg
- Hamstring Curls (Gym Machine) – 3 sets of 10 reps
- Calf Raises (Smith Machine or Dumbbells) – 3 sets of 10 reps
- Single-leg Deadlifts (Dumbbells) – 3 sets of 8 reps per leg
Weeks 13-16: Advanced Strength & Plyometrics Phase
- Back Squats (Challenging Weight) – 3 sets of 6 reps
- Bulgarian Split Squats (Weighted) – 3 sets of 8 reps per leg
- Romanian Deadlifts (Barbell or Dumbbells) – 3 sets of 8 reps
- Box Jumps or Depth Jumps – 3 sets of 6 reps
- Lateral Hops and Agility Drills – 3 sets of 10 reps
4. Improving Proprioception and Stability
Your knee relies on tiny receptors to sense movement and position. After a meniscus injury, these receptors can be affected, increasing the risk of re-injury. Balance exercises, such as single-leg stands and wobble board drills, help retrain these receptors.
5. Gradual Return to Sport or Activity
Once strength and stability improve, we gradually reintroduce sport-specific movements to ensure you can return safely without risking further injury. For instance, if you played soccer, we would get you on a soccer pitch and attempt to create various drills that mimic a game of soccer to best prepare you before returning to training with your team.
Case Study: How Strength Training Kept the Knee Stable
A recent patient at our clinic, 42-year-old Peter, came in with persistent knee pain after a hiking trip. An MRI showed a degenerative meniscus tear. Initially, Peter struggled with pain and swelling, making it difficult to squat or climb stairs. He was worried that surgery was the only option.
With a structured physiotherapy program, Peter saw gradual improvements. We focused on:
- Reducing swelling with ice, compression, and hands-on treatment
- Gentle range-of-motion exercises to restore movement
- Progressive strength training targeting his quadriceps, hamstrings, and glutes
- Balance and proprioception drills
After three months of consistent rehab, Peter noticed a huge improvement. He was able to return to hiking with minimal discomfort. However, the biggest game-changer was introducing strength training at our gym. Peter now trains regularly, and he’s found that keeping up with his strength program is the only thing keeping his knee symptoms stable. Without it, his pain starts creeping back.

Do You Need Surgery for a Meniscus Tear?
Surgery isn’t always necessary. In fact, research suggests that many people with meniscus injuries recover just as well with physiotherapy compared to surgery (Katz et al., 2013). Surgery may be needed if:
- The knee is locked and won’t straighten
- The tear is large and causing persistent symptoms
- Physiotherapy hasn’t improved symptoms after several months
For most people, strengthening the knee and managing symptoms conservatively leads to great long-term outcomes.

Key Takeaways
- Meniscus injuries are common and can be managed without surgery in most cases.
- Physiotherapy focuses on reducing pain, restoring movement, and strengthening the knee.
- Strength training plays a crucial role in keeping symptoms stable.
- A structured rehab program, like the one Mark followed, can help you return to your normal activities without needing surgery.
If you’re struggling with knee pain and suspect a meniscus injury, book an appointment with our physiotherapists today. We can assess your condition and create a personalised rehab plan to get you back to doing what you love! Give us a call at XPhysio on (02) 9806 3077.
References
- Katz JN, Brophy RH, Chaisson CE, et al. Surgery versus physical therapy for a meniscal tear and osteoarthritis. N Engl J Med. 2013;368(18):1675-1684. Link
- Logerstedt DS, Snyder-Mackler L, Ritter RC, Axe MJ. Knee pain and mobility impairments: meniscal and articular cartilage lesions. J Orthop Sports Phys Ther. 2010;40(6):A1-A35. Link
- American Academy of Orthopaedic Surgeons. Meniscus tears. Link
Back pain is something most of us will experience at some point in life, and one of the more common culprits is a spinal disc herniation. It sounds dramatic, but don’t worry – while it can be painful and even scary when it causes nerve symptoms, physiotherapy plays a huge role in recovery. In fact, many people get better without needing surgery, even in cases where it initially seems like an option.
In this blog, we’ll break down what a spinal disc herniation is, why it happens, common symptoms, and how physiotherapy can help. We’ll also share a real-life case of a patient who was initially referred to a neurosurgeon but ended up avoiding surgery with a solid physiotherapy plan.
What is a Spinal Disc Herniation?
Your spine is made up of 24 vertebrae, stacked up like building blocks. Between these vertebrae are little cushions called intervertebral discs, which act as shock absorbers and help keep everything moving smoothly.
Each spinal disc has a soft, jelly-like centre (nucleus pulposus) and a tougher outer layer (annulus fibrosus). A spinal disc herniation occurs when the inner jelly pushes through a tear or weak spot in the outer layer. This can irritate nearby nerves, causing pain, numbness, tingling, or even weakness in the arms or legs, depending on which part of the spine is affected.
Why Do Disc Herniations Happen?
Herniated discs are usually the result of gradual wear and tear, known as disc degeneration. Over time, our discs lose some of their water content, making them less flexible and more prone to tearing or rupturing, even with minor strains or twisting movements. However, certain factors increase the risk:
- Aging – The older we get, the more our discs wear down.
- Repetitive Movements – Jobs or sports that involve a lot of bending, lifting, or twisting can add stress to the discs.
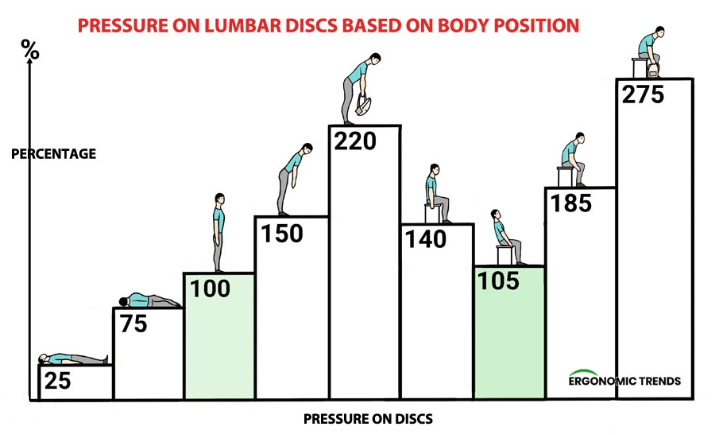
- Poor Posture – Sitting for long periods, especially with bad posture, can increase disc pressure.
- Lack of Exercise – Weak core and back muscles mean the spine gets less support.
- Heavy Lifting – Incorrect lifting techniques put excessive strain on the lower back.
- Smoking – Reduces blood flow to the discs, speeding up degeneration.

Symptoms of a Spinal Disc Herniation
The symptoms depend on where the spinal disc herniation occurs:
Lumbar Spine (Lower Back)
- Pain in the lower back, buttocks, and legs (often one side more than the other)
- Sciatica – shooting pain down the leg, sometimes into the foot
- Numbness, tingling, or burning sensations
- Muscle weakness in the leg or foot
- Difficulty standing, walking, or sitting for long periods
Cervical Spine (Neck)
- Neck pain, sometimes radiating into the shoulders and arms
- Numbness, tingling, or weakness in the arms or hands
- Headaches
- Limited range of motion in the neck
If the compression is severe, it can even lead to bowel or bladder dysfunction – a medical emergency known as cauda equina syndrome.
Physiotherapy: The Key to Recovery
Many people fear they’ll need surgery for a spinal disc herniation, but in most cases, conservative management (like physiotherapy) is incredibly effective. Here’s how physio helps:
1. Pain Relief and Symptom Management
- Manual Therapy: Hands-on techniques such as joint mobilisations, soft tissue massage, and myofascial release can help reduce muscle tension, improve joint mobility, and relieve nerve irritation. These techniques are particularly effective in easing pain and restoring function in the early stages of recovery.
- Taping & Bracing: In some cases, taping or bracing can help provide external support to reduce strain on the affected area. This can be useful in the acute phase of injury or when specific movements need to be restricted to allow healing. We personally stock the Immostrap back brace from Enovis, we have trialled many different braces over the years and we keep coming back to this one as it does the best job of deloading the spine in the acute phase only.
https://enovis-medtech.eu/en_US/Immostrap-74340.html
- Education: Understanding how to manage pain effectively is crucial. Physiotherapists provide guidance on posture, ergonomics, activity modifications, and pain relief strategies such as heat or ice application. This knowledge empowers patients to take control of their recovery.
2. Restoring Movement and Strength
- McKenzie Exercises: A specialised form of exercise therapy that focuses on repeated movements or sustained postures to help centralise pain and relieve nerve compression. These exercises are particularly beneficial for those with disc-related sciatica.
- Core Strengthening: Strengthening the deep stabilising muscles of the core helps offload stress from the spine, reducing the likelihood of further injury. Exercises such as planks, bird-dogs, and pelvic tilts are commonly used to build core endurance and support spinal stability.
- Stretching & Mobility Work: Stretching tight muscles (such as hamstrings, hip flexors, and lumbar paraspinals) and improving spinal mobility can help alleviate stiffness and promote more natural movement patterns. This reduces compensatory movements that might contribute to pain and dysfunction.
3. Addressing Underlying Causes
- Postural Training: Poor posture can contribute to ongoing spinal stress and discomfort. Physiotherapists work with patients to improve posture in daily activities, including sitting, standing, and lifting mechanics, to reduce excessive strain on the discs.
- Workplace Ergonomics: Many people spend hours at desks or in repetitive job roles that contribute to back pain. Physiotherapists offer ergonomic assessments and modifications, such as chair adjustments, monitor positioning, and movement breaks, to prevent future flare-ups.
- Gradual Return to Activity: A structured return-to-work or sports program ensures that the patient builds strength and endurance without overloading the spine too quickly. Physiotherapists create progressive exercise plans tailored to individual needs, helping patients regain confidence and function in their everyday lives.
Case Study: Avoiding Surgery Through Physiotherapy
One of our recent patients, let’s call him Mark, came to us with severe lower back pain as a result of a spinal disc herniation and worsening leg weakness. He had been struggling for months and was initially sent for a neurosurgeon opinion because his symptoms suggested nerve compression that might need surgery.
Mark had significant weakness in his leg, making it hard to walk properly. The neurosurgeon was concerned but suggested continuing physiotherapy for a few more weeks before deciding on surgery. We took that opportunity and worked on reducing his symptoms and improving his strength through targeted physiotherapy.
Over time, his pain decreased, his leg strength improved, and he regained confidence in his movement. Now, Mark trains at Plus Fitness in Frenchs Forest, focusing on strengthening his back and core to prevent future issues. He’s thrilled with his outcome, and best of all – no surgery was needed!
When is Surgery Necessary?
While physiotherapy is effective for most cases, some situations do require surgery. Surgery may be considered if:
- Symptoms persist despite months of conservative treatment
- There’s significant muscle weakness that worsens over time
- There’s loss of bowel or bladder control (cauda equina syndrome)
- The pain is so severe it affects quality of life
Spinal disc herniation surgery, also called a discectomy, removes the herniated part of a spinal disc. The goal is to relieve pressure on the nerves. Fortunately, these cases are the minority, and most people improve with a solid rehab plan.
Final Thoughts
A spinal disc herniation might sound like a big deal, but it doesn’t have to mean surgery. With the right physiotherapy approach, many people recover fully and return to their normal activities without going under the knife. If you or someone you know is struggling with back pain or sciatica, don’t wait – getting assessed early can make all the difference.
Need help? Book in with X Physio physio today and start your journey to a stronger, pain-free back! Our number is 9806 3077.
References
- Physiopedia. “Intervertebral Disc Herniation.” Available at: https://www.physio-pedia.com/Intervertebral_Disc_Herniation
- Spine-Health. “Herniated Disc Treatment.” Available at: https://www.spine-health.com/conditions/herniated-disc/herniated-disc-treatment
- Australian Physiotherapy Association. “Managing Back Pain.” Available at: https://australian.physio/injury-list/back-pain
If you’ve been feeling a deep, aching pain on the side of your hip, especially when lying on it, walking up stairs, or after a long day of activity, you might be dealing with hip bursitis. This frustrating condition can make even simple movements painful and can linger if not treated properly. The good news? Physiotherapy can be incredibly effective at resolving hip bursitis, and in many cases, patients can avoid more invasive treatments like cortisone injections.
Let’s take a deep dive into what hip bursitis is, why it happens, and how you can get on top of it with the right physiotherapy approach.
What is Hip Bursitis?
Hip bursitis refers to inflammation of the bursa, a small fluid-filled sac that sits between your bones and soft tissues to reduce friction. The most common type is trochanteric bursitis, which affects the bursa on the outer side of the hip, near the bony prominence called the greater trochanter.
When this bursa becomes irritated, it can swell and cause pain, making activities like walking, running, or even sleeping on your side quite uncomfortable.
What Causes Hip Bursitis?
There’s no single cause of hip bursitis, but it often results from one or more of the following:
- Overuse or repetitive movement – Activities like long-distance running, cycling, or stair climbing can place excessive strain on the hip bursa.
- Weakness in the hip muscles – Weak glutes and other hip stabilisers can lead to poor movement patterns, increasing strain on the bursa.
- Tight IT band – The iliotibial (IT) band, which runs along the outer thigh, can become tight and rub against the bursa, causing irritation.
- Direct trauma – A fall onto the side of your hip can lead to bursitis.
- Postural Issues – The most common position that causes hip bursitis is sitting with legs crossed or sleeping with the knee crossing the mid line of the body.
- Gait Abnormalities – If you walk with an altered gait due to knee or back pain, this can overload the hip bursa.
- Arthritis or other inflammatory conditions – Conditions like rheumatoid arthritis can increase the risk of bursitis.

Symptoms of Hip Bursitis
- Pain on the outer side of the hip, which may radiate down the thigh.
- Pain when lying on the affected side, especially at night.
- Discomfort when walking, climbing stairs, or standing up after sitting for a while.
- Swelling or tenderness over the greater trochanter.
Physiotherapy Treatment for Hip Bursitis
Physiotherapy plays a key role in treating hip bursitis by addressing the underlying causes of the irritation rather than just the symptoms. A good physio-led rehab program will focus on reducing pain, improving mobility, and strengthening the surrounding muscles to prevent recurrence.
1. Reducing Pain and Inflammation
In the early stages, treatment may involve:
- Activity modification – Avoiding aggravating activities like prolonged standing or crossing your legs.
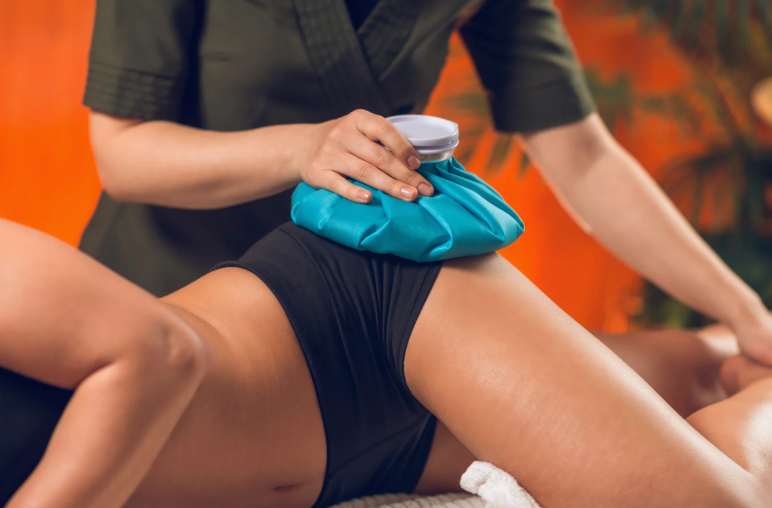
- Ice therapy – Applying an ice pack for 15-20 minutes can help reduce inflammation.
- Soft tissue massage and dry needling – These techniques can help release tight muscles around the hip.
2. Hip Strengthening Exercises
Weak glutes and hip stabilisers are often a culprit in hip bursitis, so a targeted strength program is crucial.
Some key exercises include:
- Isometric External Rotation – using a belt or resistance band around knees, trying to separate the knees from eachother with out any movement.
- Side-lying hip abductions – Lifting the leg while lying on your side helps strengthen the glutes.
- Clamshells – Activates the gluteus medius, an important stabiliser of the hip.
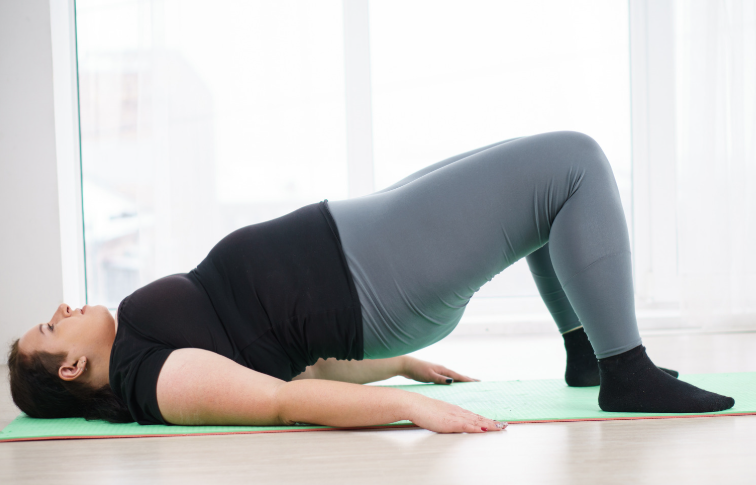
- Bridges – Helps build strength in the glutes and core.
- Standing hip hikes – Improves pelvic control and stability.
3. Improving Hip Mobility and Flexibility
Tight hip structures, like the IT band and hip flexors, can contribute to bursitis. Physiotherapy often includes:
- Foam rolling the IT band
- Stretching the hip flexors and quadriceps
- Gentle yoga-style movements to promote mobility
4. Gait and Postural Correction
Your physiotherapist will assess how you move and walk to determine if any biomechanical issues need addressing. Correcting poor movement patterns can significantly reduce strain on the hip over time.
5. Gradual Return to Activity
Once pain levels have improved, your physio will guide you through a progressive return to activities, ensuring that your hip is strong and ready to handle the demands of exercise and daily life.
Case Study: Avoiding a Cortisone Injection Through Physiotherapy
A recent patient, Karen came into our clinic with persistent lateral hip pain that had been troubling her for months. She had been to her GP, who recommended a cortisone injection, but she was hesitant as she had a severe needle phobia.
When Karen arrived at our clinic, she was struggling with pain at night, especially when lying on her left side. She also experienced sharp pain walking up hills and during long walks. After a thorough assessment, we identified that her glute medius was significantly weak, and she had a very tight IT band contributing to her bursitis.
We started her on a structured physiotherapy program that included:
- Soft tissue release techniques to ease tightness in her lateral hip muscles.
- Hip strengthening exercises focusing on glute activation.
- Postural awareness training to reduce excessive hip drop during walking.
- Gradual activity modification – we encouraged her to take breaks during long walks and avoid crossing her legs while sitting.
After six weeks of treatment, Karen reported a significant reduction in pain. By the eight-week mark, she was back to pain-free walking and sleeping on her side. She was thrilled to have avoided the cortisone injection and felt more confident in managing her symptoms long-term.
When is a Cortisone Injection Needed?
While physiotherapy is the best long-term solution for hip bursitis, there are some cases where a cortisone injection may be beneficial. If a patient has severe pain that is not responding to treatment, an injection may help provide short-term relief, allowing them to participate in rehab exercises. However, it’s important to remember that cortisone is not a cure—it simply reduces inflammation temporarily. Cortisone will only remain in the area it is injected for six weeks.

Final Thoughts: Why Physiotherapy is the Best Option for Hip Bursitis
Hip bursitis can be stubborn, but the right approach can make a world of difference. Rather than relying on short-term fixes like cortisone injections, a solid physiotherapy plan focuses on addressing the root cause of the issue, ensuring that you not only get pain relief but also reduce the chances of the problem coming back.
If you’ve been struggling with hip pain, don’t put off getting help. Physiotherapy can be a game-changer in getting you back to comfortable, pain-free movement! Find out today by calling XPhysio on 9806 3077.
References & Further Reading:
- Australian Physiotherapy Association: https://australian.physio/
- Health Direct Australia on Bursitis: https://www.healthdirect.gov.au/bursitis
- Running Physio Blog on Hip Bursitis: https://www.running-physio.com/trochanteric-bursitis/
Hip pain can be a real pain in the… well, hip! Whether you’re an active runner, a weekend warrior, or just someone who enjoys a good walk around the block, hip pain can creep in and mess with your daily routine. The good news? Physiotherapy can make a world of difference.
In this blog, we’ll cover the common causes of hip pain, how physiotherapy can help, and share a real-life example of a recent patient who turned things around with the right treatment.
Why Does My Hip Hurt?
There are many reasons why you might be feeling hip pain, but here are some of the most common culprits:
1. Hip Osteoarthritis
As we age, the cartilage in our joints starts to wear down, and the hip is no exception. This can lead to stiffness, pain, and reduced mobility. If you notice that your hip feels stiff in the morning or after sitting for a while, osteoarthritis could be to blame.
2. Hip Bursitis
Bursae are little fluid-filled sacs that cushion the joints. When they get inflamed, it leads to a sharp, burning pain on the outside of the hip. This is common in people who do a lot of repetitive movements like running or cycling. Someone who falls on the outside of their hip can also suffer from bursitis.
3. Hip Labral Tear
The labrum is the cartilage that surrounds the hip socket, and when it tears, it can cause pain, clicking, and instability. This often happens in athletes or those who do a lot of twisting movements.
4. Gluteal Tendinopathy
This is a fancy way of saying that the tendons in your butt muscles (glutes) are irritated. It’s a common cause of lateral hip pain, particularly in middle-aged women. Pain is often worse when lying on your side or after standing for long periods.
5. Referred Pain from the Lower Back
Sometimes, hip pain isn’t actually coming from the hip at all! Issues like sciatica or lower back problems can refer pain into the hip area, making it tricky to pinpoint the real cause.
6. Muscle Strains and Imbalances
Weakness or tightness in the surrounding muscles (like the hip flexors or glutes) can lead to pain and discomfort. This is common in people who sit a lot or have poor posture.
7. Hip Impingement
A stiff hip can often lead to hip impingement, where the socket and the leg bone compress together and begin to cause a bruise deep within the hip. Pain is often felt deep in the groin when the knee is brought towards the chest. There are various causes with muscle spasm and structural changes to the bone being the most common.

How Can Physiotherapy Help?
Physiotherapy isn’t just about stretching and massage (though those can be part of it). A physio will assess the root cause of your hip pain and create a treatment plan that’s tailored to your needs. Here’s how we approach it:
1. Thorough Assessment
We start by figuring out what’s really going on. This involves looking at your movement patterns, testing muscle strength, and checking for any joint stiffness or imbalances.
2. Pain Relief Strategies
Depending on the cause of your pain, we might use techniques like:
- Manual therapy to improve joint movement
- Dry needling to release tight muscles
- Taping to support the area and reduce strain
- Ice or heat therapy for pain relief
3. Strength and Mobility Exercises
Once the pain is under control, we focus on strengthening the right muscles and improving hip mobility. Exercises might include:
- Glute bridges for strengthening the hip stabilisers
- Clamshells to activate the glute medius
- Hip flexor stretches to relieve tightness
- Core strengthening to improve overall stability
- Foam Rolling to reduce the spasm in the muscles
- Banded Marching to strengthen hip flexor muscles
4. Gait and Movement Retraining
If poor movement patterns are contributing to your pain, we’ll work on correcting them. This might mean adjusting how you walk, run, or squat to reduce stress on the hip joint.
5. Education on Activity Modification
Sometimes, small changes in your daily routine can make a huge difference. We’ll provide guidance on things like:
- The best sleeping positions for hip pain
- How to sit properly to reduce discomfort
- When to push through pain and when to rest

Real-Life Success Story: Meet Sarah
Sarah, a 52-year-old avid walker, came to our clinic complaining of nagging pain on the outside of her hip. She loved her daily 5km walks but had recently started feeling a sharp pain, especially at night when lying on her side. The pain was stopping her from sleeping and making her walks unbearable.
After a thorough assessment, we diagnosed her with gluteal tendinopathy. Her hip muscles weren’t as strong as they needed to be, and excessive walking without proper muscle support was irritating the tendons.
We started her on a treatment plan that included:
- Manual therapy to ease muscle tension
- Targeted strengthening exercises like side-lying leg lifts and resisted clamshells
- Activity modification, reducing long walks temporarily and replacing them with shorter, pain-free walks
- Taping for extra support
Within four weeks, Sarah reported a huge improvement. By eight weeks, she was back to her daily walks—pain-free!
Final Thoughts
Hip pain doesn’t have to slow you down. Whether it’s arthritis, bursitis, or just weak muscles, physiotherapy can help you get back to doing what you love. If you’re experiencing hip pain, don’t ignore it—book an appointment with your physiotherapist and take the first step towards pain-free movement!
References & Further Reading:
- Better Health Channel – Hip Pain – https://www.betterhealth.vic.gov.au
- Physiopedia – Gluteal Tendinopathy – https://www.physio-pedia.com
- Australian Physiotherapy Association – Hip Conditions – https://australian.physio
Need help with your hip pain? Book a consultation today and let’s get you moving again! Call XPhysio on 9806 3077.
A groin sprain is one of those injuries that can really catch you off guard. One moment you’re sprinting down the field or twisting for that perfect kick, and the next, you’re doubled over, clutching your inner thigh. Groin sprains are surprisingly common, particularly in sports like soccer, AFL, and cricket, which demand quick changes in direction, sudden acceleration, or kicking.
In this blog, we’ll dive into what a groin sprain is, the typical symptoms, and how physiotherapy can help you recover. To make it relatable, we’ll also share the story of a recent patient who came to our clinic with a groin sprain suffered during pre-season soccer training. Let’s get into it!
What Exactly Is a Groin Sprain?
A groin sprain occurs when the muscles in your inner thigh—specifically the adductor muscles—are overstretched or torn. These muscles are responsible for bringing your legs together and stabilising your pelvis during movement. The severity of the injury can vary:
- Grade 1: A mild strain with minimal tearing. You might feel discomfort but can usually walk without too much trouble.
- Grade 2: A moderate strain with more significant tearing and noticeable pain, swelling, and difficulty walking or performing daily activities.
- Grade 3: A severe tear or complete rupture of the muscle, often accompanied by intense pain, bruising, and an inability to bear weight on the affected leg.
What Causes a Groin Sprain?
Groin sprains are usually caused by:
- Sudden Direction Changes: Common in sports like soccer and basketball, where you’re constantly pivoting or side-stepping.
- Overuse: Repeated stress on the adductors without adequate recovery can make them more susceptible to injury.
- Poor Warm-Up: Jumping into high-intensity activity without properly warming up can increase your risk of injury.
- Muscle Imbalance: Weak or tight adductor muscles in comparison to other muscle groups can lead to poor biomechanics.

Symptoms of a Groin Sprain
If you’ve strained your groin, you might notice:
- Sharp pain in the inner thigh during activity.
- Swelling or bruising around the groin area.
- Stiffness and difficulty moving the leg.
- Weakness or a feeling of instability.
- Pain when squeezing your legs together or stretching the inner thigh.

How Physiotherapy Can Help
When it comes to recovering from a groin sprain, physiotherapy is essential. It’s not just about getting you back on your feet but ensuring you return stronger, with a lower risk of re-injury. Here’s how we approach treatment:
- Initial Assessment:
- We’ll evaluate the severity of the injury and identify contributing factors like muscle imbalances, poor biomechanics, or tightness in surrounding areas.
- Pain Management:
- Techniques like soft tissue massage, gentle stretching, and even dry needling can help reduce pain and muscle tension. We might also use exercises like isometric holds or heat therapy for relief.
- Strengthening Exercises:
- Progressive strengthening exercises for the adductors, core, and surrounding muscles are introduced. These might include side-lying leg lifts, bridges, and controlled lunges.
- Range of Motion Work:
- Gentle stretches and mobility drills ensure the muscles regain their full length and flexibility.
- Functional Training:
- As you improve, we’ll incorporate sport-specific drills to prepare your body for the demands of your activity. For soccer players, this might include lateral shuffles, ball drills, and kicking movements.
- Education:
- Prevention is key! We’ll teach you proper warm-up techniques, stretching routines, and strengthening exercises to minimise the risk of future injuries.
Case Study: Liam’s Road to Recovery
Let’s talk about Liam, a 27-year-old soccer player who came to our clinic a few months ago. Liam was gearing up for the upcoming season with his local club and had been pushing hard during pre-season training. During a sprint and pivot drill, he felt a sharp pain in his inner thigh and immediately knew something wasn’t right.
Liam hobbled off the field and iced the area, but the pain persisted. After a couple of days of rest, he noticed significant bruising and stiffness, so he booked an appointment with us.
Initial Assessment:
During his first session, we diagnosed Liam with a Grade 2 groin strain. He had swelling and tenderness along his left adductor muscle, limited range of motion, and difficulty walking without pain. He was frustrated about potentially missing the start of the season, but we reassured him that with the right plan, he’d be back on the field soon.
Phase 1: Rest and Pain Relief
In the first week, our focus was on reducing pain and inflammation. Liam followed a modified rest plan—avoiding any activities that aggravated his symptoms—and we used gentle soft tissue work, ultrasound therapy, and heat packs. We also gave him some basic isometric exercises, like squeezing a ball between his knees while seated, to maintain some muscle activation without overloading the injury.
Phase 2: Regaining Mobility and Strength
By week two, Liam’s pain had decreased significantly. We introduced gentle stretching exercises for the adductors and hip flexors, along with light strengthening drills. These included side-lying hip adduction and mini squats. He also started some pool-based exercises to reduce weight-bearing stress while improving mobility.
Phase 3: Building Functional Strength
At around four weeks post-injury, Liam was ready to start more dynamic work. We focused on strengthening his core, glutes, and adductors with exercises like planks, side planks, and resisted lateral band walks. Controlled lunges and step-ups helped prepare him for sport-specific movements.
Phase 4: Return to Sport
By the six-week mark, Liam was back to running drills. We gradually increased his intensity with sprinting, side-stepping, and cutting movements. He also practised ball drills and kicking to regain confidence in his abilities. To ensure he stayed on track, we implemented a tailored warm-up and cool-down routine for his training sessions.
By week eight, Liam was back at full training with his team. He’s now playing matches again and reports feeling stronger and more confident than before the injury. Most importantly, he’s sticking to his prevention plan to avoid future setbacks.
Tips to Prevent Groin Sprains
Prevention is always better than cure. Here are some tips to keep your groin muscles healthy:
- Warm Up Properly:
- Spend at least 10–15 minutes warming up before training or matches. Include dynamic stretches and movements that mimic your sport.
- Strengthen Your Core and Adductors:
- Regularly include exercises like planks, side planks, and resisted hip adduction in your routine.
- Improve Flexibility:
- Stretch your adductors, hamstrings, and hip flexors daily to maintain good mobility.
- Gradual Progression:
- Avoid jumping into high-intensity training too quickly. Gradually increase your load to give your body time to adapt.
- Listen to Your Body:
- If you feel tightness or discomfort in your groin, don’t ignore it. Rest and address the issue before it worsens.
Final Thoughts
Groin sprains can be frustrating, but with the right approach to treatment and prevention, you can make a full recovery and even come back stronger. Physiotherapy plays a crucial role in not only healing the injury but also addressing underlying factors to prevent recurrence.
If you’re dealing with a groin sprain or any other injury, don’t hesitate to book an appointment with us today. Call us on 9806 3077. Whether you’re an elite athlete or a weekend warrior, we’re here to help you get back to doing what you love.
References:
- Serner, A., Tol, J. L., Jomaah, N., et al. (2015). “Mechanisms of acute adductor longus injuries in male football players: A systematic video analysis”. British Journal of Sports Medicine, 49(20), 1458-1462.
- Tyler, T. F., Nicholas, S. J., Campbell, R. J., et al. (2001). “The effectiveness of a preseason exercise program to prevent adductor muscle strains in professional ice hockey players.” American Journal of Sports Medicine, 29(5), 659-663.
- Weir, A., Brukner, P., Delahunt, E., et al. (2015). “Doha agreement meeting on terminology and definitions in groin pain in athletes.” British Journal of Sports Medicine, 49(12), 768-774.
Wrist tendinitis—it’s one of those pesky injuries that can creep into your life and wreak havoc on your daily routine. Whether you’re an office worker typing away for hours on end, an athlete smashing out reps at the gym, or just someone who’s been doing repetitive tasks a bit too much, wrist tendinitis can strike. But don’t worry, mate—we’ve got you covered. Let’s dive into what wrist tendinitis is, why it happens, and most importantly, how a physio can help you get back on track.
What Is Wrist Tendinitis?
First off, let’s clear up what we’re dealing with. Wrist tendinitis is the inflammation of the tendons in your wrist. Tendons are the thick cords that attach your muscles to your bones, and they’re responsible for helping you move. When these tendons get irritated or inflamed, you’ll feel pain, stiffness, and sometimes swelling around the wrist.
While tendinitis can occur in any tendon, the wrist is particularly vulnerable because it’s involved in so many movements—from gripping and typing to lifting and twisting. The tendons most commonly affected in wrist tendinitis are those that control wrist and finger movement, like the flexor and extensor tendons.
Common Causes of Wrist Tendinitis
Wrist tendinitis often stems from repetitive strain or overuse. Here are some common culprits:
- Repetitive Tasks: Typing, using a mouse, or playing musical instruments for long periods.
- Sports: Activities like tennis, golf, or weightlifting can put stress on the wrist tendons.
- Poor Technique: Using improper form during exercise or while performing tasks can increase strain on the tendons.
- Sudden Increase in Activity: Jumping into a new activity or increasing intensity without proper conditioning.
- Underlying Conditions: Arthritis or diabetes can make you more prone to tendinitis.

Symptoms to Watch For
How do you know if it’s wrist tendinitis? Look out for these tell-tale signs:
- Pain around the wrist, especially during movement.
- Swelling or tenderness.
- Stiffness, making it hard to move your wrist or fingers.
- A “creaking” sensation when moving the wrist.
- Weak grip strength.
If you’re experiencing these symptoms, it’s time to take action.
How Physios Help with Wrist Tendinitis
Here’s the good news: wrist tendinitis is treatable, and physiotherapists are experts at managing it. Let’s go through some of the most common treatments you can expect when you visit a physio.
1. Assessment and Diagnosis
Your physio will start by assessing your wrist to confirm the diagnosis and rule out other conditions like carpal tunnel syndrome, arthritis, a ganglion, tenosynovitis or a cartilage injury. They’ll ask about your daily activities, work habits, and exercise routines to pinpoint the cause of your tendinitis.
2. Rest and Activity Modification
The first step in recovery is often giving your wrist a break. Your physio might recommend modifying your activities to reduce strain on the tendons. For example, you might need to:
- Take frequent breaks from typing or other repetitive tasks.
- Adjust your workstation to ensure good ergonomics.
- Avoid heavy lifting or high-impact sports temporarily.
3. Pain Management
Managing pain is a priority, especially in the early stages of tendinitis. Your physio might use techniques like:
- Ice Therapy: Applying ice packs to reduce inflammation and numb the area.
- Electrotherapy: TENS (transcutaneous electrical nerve stimulation) to ease pain and promote healing.
- Brace: A brace could be used to protect the wrist from further aggravation
4. Stretching and Strengthening Exercises
Once the pain subsides, your physio will guide you through specific exercises to improve flexibility and build strength in your wrist. Some examples include:
- Wrist Flexor Stretch: Extend your arm with your palm facing up and gently pull your fingers back with your other hand.
- Wrist Extensor Stretch: Do the same stretch with your palm facing down.
- Grip Strengthening: Use a stress ball or grip trainer to improve hand strength.
- Eccentric Exercises: These involve controlled lengthening of the tendons, which can help with recovery.
Your physio will tailor these exercises to your condition and gradually increase intensity as your wrist heals.
5. Manual Therapy
Physios often use hands-on techniques to help with wrist tendinitis, such as:
- Soft Tissue Massage: To release tension in the tendons and surrounding muscles.
- Joint Mobilisation: Gentle movements to improve wrist mobility.
- Trigger Point Therapy: Targeting specific areas of tightness to relieve pain.
6. Taping or Bracing
Your physio might recommend taping or using a wrist brace to provide support and limit movements that aggravate your tendons. Taping can also help with proprioception—your body’s sense of joint position—to ensure you’re using your wrist correctly.
7. Shockwave Therapy Shockwave therapy
Shockwave therapy is an effective treatment for wrist tendinitis, particularly for cases that don’t respond to traditional methods. This non-invasive technique uses acoustic waves to stimulate blood flow and promote tissue healing. The increased circulation helps reduce inflammation and break down calcifications in the tendons. Additionally, shockwave therapy can alleviate pain by desensitising nerve endings around the affected area. Most patients report significant improvement after a few sessions, making it a viable option for accelerating recovery. Your physio can discuss whether this treatment is suitable for you.

8. Education and Prevention
One of the most valuable aspects of physio treatment is learning how to prevent wrist tendinitis from recurring. Your physio will teach you:
- Proper posture and ergonomics for work or sports.
- Warm-up and cool-down routines for physical activities.
- Techniques to avoid overloading your wrist.
Home Care Tips
In addition to physio sessions, there are steps you can take at home to support your recovery:
- Rest: Give your wrist time to heal by avoiding aggravating activities.
- Ice Packs: Apply ice for 15-20 minutes every few hours during the initial stages of inflammation.
- Over-the-Counter Pain Relief: Anti-inflammatory medications like ibuprofen can help, but check with your doctor first.
- Stretch Regularly: Incorporate gentle stretches into your daily routine to keep your wrist flexible.
When to Seek Help
If your wrist pain doesn’t improve with rest and home care or if it’s impacting your ability to work or enjoy daily activities, it’s time to see a physio. Delaying treatment can lead to chronic pain or even tendon degeneration (tendinosis), which is much harder to treat.
Wrapping It Up
Wrist tendinitis might be a pain (literally), but with the right approach, you can recover and get back to doing what you love. Physiotherapy offers a comprehensive solution, addressing the root cause of your tendinitis while helping you manage pain and prevent future issues.
Remember, early intervention is key. So, if your wrist is giving you grief, don’t hesitate to book an appointment with your local physio. They’ll have you back to your best in no time. Cheers to healthier, happier wrists!
Sources:
- Better Health Channel – Tendinitis
- Mayo Clinic – Tendinitis
- Harvard Health – Tendinitis Treatment
- Healthdirect Australia – Wrist Pain
Hey there! Today, I want to chat about an injury that I have recently seen in the clinic which involved the cubital tunnel. If you’ve never heard of it before, the cubital tunnel is a narrow passageway on the inner side of your elbow where the ulnar nerve runs through. You might know the ulnar nerve better as the “funny bone” – though, let’s be honest, there’s nothing funny about it when it’s irritated!
Let’s break it down and go through what can go wrong in this area, and what we can do to get you back on track if you’re having any trouble with it.
What Is Cubital Tunnel Syndrome?
Cubital tunnel syndrome happens when there’s pressure or stretching of the ulnar nerve as it passes through the cubital tunnel. This can cause a range of symptoms, like tingling or numbness in your ring and pinky fingers, weakness in your hand, or even pain along the inside of your elbow.
It’s a bit like when you accidentally lean on your elbow for too long, and your fingers go all tingly and weird. But with cubital tunnel syndrome, that feeling doesn’t go away as quickly, and it might even start affecting your daily life.
Common Causes of Cubital Tunnel Issues
So, what causes cubital tunnel problems? Here are some of the usual suspects:
Repetitive Elbow Movements: If you’re someone who bends and straightens your elbows a lot (think tradies, tennis players), you’re putting more stress on the ulnar nerve.
Prolonged Elbow Flexion: Do you spend heaps of time with your elbows bent? Maybe you’re a desk worker who leans on your elbows while typing, or you’re scrolling through your phone in bed. Both habits can compress the nerve. (Think gamers or office workers)

Direct Pressure on the Elbow: Leaning on hard surfaces can compress the nerve and irritate it over time. (Think truck drivers)
Previous Elbow Injuries: Fractures or dislocations around the elbow can make you more prone to cubital tunnel syndrome.
Anatomical Variations: Some people just naturally have a tighter cubital tunnel, which can make them more susceptible.
Real-Life Example: Meet Sam
Let me tell you about a patient I treated not long ago. We’ll call him Sam. Sam is a 35-year-old electrician who came to me complaining of tingling in his ring and pinky fingers, especially after a long day on the tools. He’d also started noticing that his grip strength wasn’t what it used to be.
Sam’s job required him to use his hands and arms in repetitive movements, like bending his elbows to work on overhead wires. He’d also developed a habit of leaning on his elbows during his smoko breaks, which was making things worse.
After a chat and a physical assessment, it was clear Sam had cubital tunnel syndrome. His symptoms weren’t severe enough to need surgery, but he did need to make some changes and commit to physio exercises.
Symptoms to Watch Out For
Whether you’re an electrician like Sam or just someone who spends too much time on their phone, here are the main signs of cubital tunnel syndrome:
- Tingling or Numbness: Usually in the ring and pinky fingers, especially when your elbow is bent for a while.
- Weakness: You might find it harder to grip objects or do fine motor tasks like buttoning your shirt.
- Pain: Often felt on the inside of the elbow and sometimes radiating down the forearm.
- Clumsiness: Dropping things more often because your hand feels weaker or less coordinated.
- If these symptoms sound familiar, don’t ignore them! The earlier we tackle the problem, the easier it is to manage.
How We Treat Cubital Tunnel Syndrome
The good news is that most cases of cubital tunnel syndrome can be treated conservatively – meaning without surgery. Here’s what we might do:
- Activity Modification: This is step one. If you’re doing something that’s irritating the nerve, we’ll figure it out and make some changes. For Sam, that meant taking more breaks from repetitive tasks and avoiding leaning on his elbows.
- Stretching and Strengthening: Gentle stretches can help take the pressure off the ulnar nerve, while strengthening exercises can stabilise the area and prevent future issues.
- Nerve Gliding Exercises: These are designed to keep the nerve moving freely through the cubital tunnel.
- Forearm and Hand Strengthening: Building up the muscles around your elbow and hand can reduce strain on the nerve.
- Splinting: Sometimes, we’ll recommend a splint to keep your elbow in a slightly extended position, especially at night when you might unknowingly sleep with your arm bent.
- Manual Therapy: This involves hands-on techniques to release tightness in the surrounding muscles and improve joint mobility.
- Education: we will consider someone’s ergonomics and how to set up a workspace or change your habits to protect the elbow.

When Surgery Is Needed
In some cases, conservative treatment might not be enough. If the nerve compression is severe or if there’s significant muscle wasting, surgery might be the best option. The two most common surgical procedures are:
- Ulnar Nerve Decompression: This involves releasing the pressure on the nerve.
- Ulnar Nerve Transposition: In this procedure, the nerve is moved to a new position to prevent further compression.
The good news? Even if you need surgery, physio plays a crucial role in your recovery to get you back to full function.
Tips to Prevent Cubital Tunnel Problems
- Prevention is always better than cure, right? Here are some simple tips to keep your elbows and nerves happy:
- Take Regular Breaks: If you’re doing repetitive tasks or holding your elbows in one position for a long time, take short breaks to stretch and move.
- Avoid Leaning on Your Elbows: Use a cushion or avoid resting on hard surfaces for too long.
- Keep Good Posture: Whether you’re at a desk or on the tools, good posture reduces unnecessary strain on your body.
- Strengthen Your Arms and Hands: Regular exercises can help build resilience and prevent overuse injuries.
- Be Mindful of Symptoms: If you notice tingling, numbness, or weakness, don’t wait to get it checked out.
Back to Sam’s Story
So, what happened with Sam? After a few weeks of physio, he started noticing big improvements. The nerve gliding exercises helped reduce the tingling in his fingers, and the strengthening exercises improved his grip. Most importantly, he’d become more aware of his habits – no more leaning on his elbows during smoko!
By sticking to his treatment plan and making a few lifestyle changes, Sam was able to avoid surgery and get back to doing what he loves without pain or weakness holding him back.
Final Thoughts
Cubital tunnel syndrome might sound daunting, but with the right approach, it’s totally manageable. Whether it’s making small changes to your daily routine, committing to physio, or even undergoing surgery in more severe cases, there’s always a way forward.
If you’re experiencing any symptoms or just want to chat about keeping your elbows healthy, don’t hesitate to reach out. Together, we can keep you moving, working, and living your best life without pesky nerve problems getting in the way. Our number at Xphysio is (02) 9806 3077, give us a call today to get your rehab journey started.
Resources:
American Academy of Orthopaedic Surgeons (AAOS)
- Cubital Tunnel Syndrome: Surgical Treatment (Ulnar Nerve Decompression and Transposition)
- This resource discusses the surgical options for treating ulnar nerve entrapment, including decompression and transposition.
- URL: AAOS – Cubital Tunnel Syndrome
Mayo Clinic
- Cubital Tunnel Syndrome
- Mayo Clinic provides detailed information about cubital tunnel syndrome, including ulnar nerve decompression and transposition as treatment options.
- URL: Mayo Clinic – Cubital Tunnel Syndrome
Johns Hopkins Medicine
- Ulnar Nerve Transposition Surgery
- Johns Hopkins explains ulnar nerve transposition, detailing how the procedure moves the nerve to reduce compression and prevent recurring issues.
- URL: Johns Hopkins – Ulnar Nerve Surgery
MedlinePlus (National Library of Medicine)
URL: MedlinePlus – Cubital Tunnel Syndrome
Cubital Tunnel Syndrome – Treatment
This resource provides an overview of cubital tunnel syndrome, with a section focused on decompression and transposition procedures.
If you’ve ever woken up with a very stiff and deep ache in your shoulder, then you might have experienced a condition we physiotherapists know as adhesive capsulitis — or more commonly, frozen shoulder. It’s one of those sneaky conditions that can slowly creep up on you, making even the simplest tasks, like brushing your hair or reaching for a coffee cup, a real challenge. Let’s get into what frozen shoulder is, who it affects, and how physiotherapy can help you unfreeze that shoulder and get back to living your life.
What is Adhesive Capsulitis?
Adhesive capsulitis is a condition characterised by stiffness and pain in the shoulder joint. It happens when the connective tissue surrounding your shoulder joint (the capsule) becomes thickened and tight. This leads to a significant reduction in movement and, as the name suggests, makes your shoulder feel “frozen”.
The exact cause isn’t always clear, but it’s believed to involve inflammation and scar tissue development within the shoulder capsule. This makes the joint less flexible and limits its range of motion. Adhesive capsulitis typically progresses through three stages:
Freezing Stage: Pain gradually increases, and shoulder movement becomes restricted. This stage can last anywhere from six weeks to nine months.
Frozen Stage: The pain might subside slightly, but stiffness becomes more pronounced, making everyday activities harder. This stage can last four to six months.
Thawing Stage: Movement begins to improve as the shoulder slowly regains its range. This stage can take six months to two years.
Learn more about adhesive capsulitis stages.
Who is Most at Risk?
Frozen shoulder doesn’t discriminate, but there are some groups of people who are more prone to it.

- Age: It’s most common in people aged 40 to 60 years old, with a slight preference for women.
- Diabetes: People with diabetes are two to four times more likely to develop adhesive capsulitis. The exact link isn’t fully understood, but it’s thought to involve changes in collagen or blood sugar levels affecting joint tissues.
- Thyroid Conditions: Those with thyroid disorders, like hypothyroidism or hyperthyroidism, are also at higher risk.
- Immobilisation: If your shoulder has been immobilised for a while due to injury or surgery, you’re more likely to develop frozen shoulder.
- Other Conditions: Cardiovascular disease and Parkinson’s disease can also increase the likelihood of experiencing adhesive capsulitis.
Read about risk factors for frozen shoulder.
Common Symptoms and Presentation
Frozen shoulder often presents with:
- Pain: It’s usually a deep, aching pain in the outer shoulder and upper arm, which can be worse at night or with certain movements.
- Stiffness: The shoulder feels tight and hard to move, making daily tasks like dressing, cooking, or even sleeping difficult.
- Reduced Range of Motion: Simple actions, like reaching behind your back or overhead, become nearly impossible
Check out mobility exercises for frozen shoulder.
Many people describe the condition as incredibly frustrating because it feels like progress is painstakingly slow, even with treatment.
The Role of Physiotherapy in Treating Frozen Shoulder
Physiotherapy is a cornerstone of treatment for adhesive capsulitis. While the condition can resolve on its own over time, physiotherapy can significantly reduce pain, improve range of motion, and speed up recovery. Here’s how:
1. Pain Management
Your physio might use modalities like heat packs, ice therapy, or gentle massage to help manage pain. Dry needling or TENS (transcutaneous electrical nerve stimulation) may also be employed. Often there can be associated pain in surrounding joints and muscles due to the change in movement patterns. Patients will often present with pain in the upper trapezius region which responds well to physiotherapy treatment. Furthermore, the physio is likely to discuss the pro’s and con’s of other treatments such as a corticosteroid injection or Hydrodilatation at this point.
2. Improving Mobility
Specific stretches and exercises are designed to gently improve the range of motion without aggravating the joint. These might include:
- Pendulum Swings: Small, circular movements to loosen up the shoulder.
- Cross-Body Stretch: Stretching the affected arm across the chest to improve flexibility.
- Wall Crawls: Using your fingers to “climb” a wall, helping to extend your arm overhead.
3. Strengthening the Shoulder
As mobility improves, strengthening exercises are introduced to support the shoulder joint and prevent future issues. This might involve resistance bands, light weights and body weight exercises.
4. Education and Guidance
Your physio will teach you about posture, activity modifications, and how to avoid overloading your shoulder. They’ll also keep you motivated throughout the often-lengthy recovery process.
5. Hands-On Techniques
Manual therapy, such as joint mobilisation or soft tissue release, can help loosen tight structures and improve mobility.
What Does a Physiotherapy Program Look Like?
Treatment is tailored to each person’s stage of adhesive capsulitis. Here’s a general outline:
- Freezing Stage: Focus on managing pain and maintaining as much movement as possible without aggravating the shoulder. Treatment is focussed upon surrounding joints and muscles.
- Frozen Stage: Gentle stretches and exercises to improve mobility while minimising pain.
- Thawing Stage: More aggressive stretches and strengthening exercises to fully restore function.
Your physiotherapist will monitor your progress and adjust your program as needed. Consistency is key — recovery might feel slow, but steady work pays off.
A Real-Life Example: Meet Sarah
Sarah is a 52-year-old teacher who loves gardening and yoga. She first noticed pain in her right shoulder a few months ago, but she shrugged it off, thinking it was just a strain. Over time, her shoulder became stiffer, and soon she struggled to put on her jumper or reach for items on the top shelf. The pain disrupted her sleep, leaving her exhausted and frustrated.
Sarah visited her GP, who diagnosed her with adhesive capsulitis and referred her to us at XPhysio. At her first appointment, we explained the condition and reassured her that recovery was possible with patience and commitment.
The Treatment Plan
- Pain Management: Sarah started with heat packs and gentle massage to ease her discomfort. We also taught her relaxation techniques to manage night-time pain. A corticosteroid injection made a significant improvement in her pain levels allowing for more sleep.
- Gentle Stretches: In the freezing stage, Sarah focused on pendulum swings alongside trigger point self-releases which was taught so she could do this in her own time. By gaining more range in her upper back, she found a huge improvement in her shoulder mobility.
- Progressive Exercises: As she moved into the frozen stage, her exercises were upgraded to wall crawls and resistance band exercises to gradually improve her range of motion and strength.
- Home Program: at each phase, Sarah was provided a customised home exercise plan and encouraged her to stay consistent.
The Outcome
After six months of physiotherapy, Sarah’s range of motion improved significantly, and her pain was under control. By the nine-month mark, she was back to her yoga classes and tending to her beloved garden. We continued to monitor her progress, ensuring she had the tools to prevent future issues.
Final Thoughts
Adhesive capsulitis might be a slow and frustrating condition, but with the right guidance and perseverance, it doesn’t have to be a permanent roadblock. Physiotherapy plays a vital role in not only easing the pain but also helping you regain your strength, mobility, and confidence.
If you’re struggling with a frozen shoulder, reach out to XPhysio today. Remember, you don’t have to face this challenge alone — help is just a phone call away.