
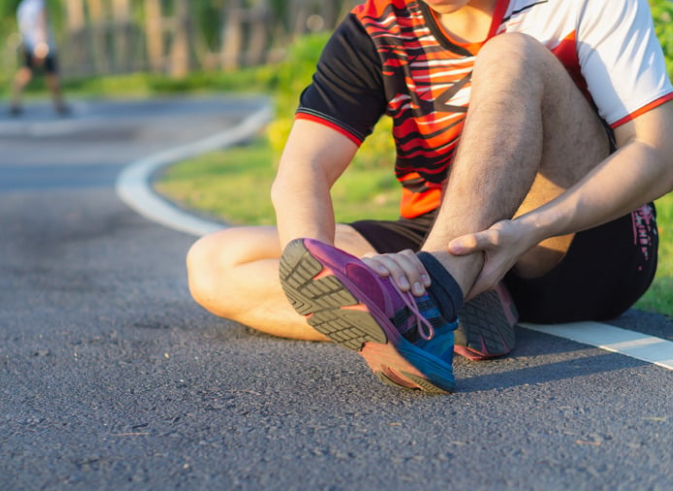
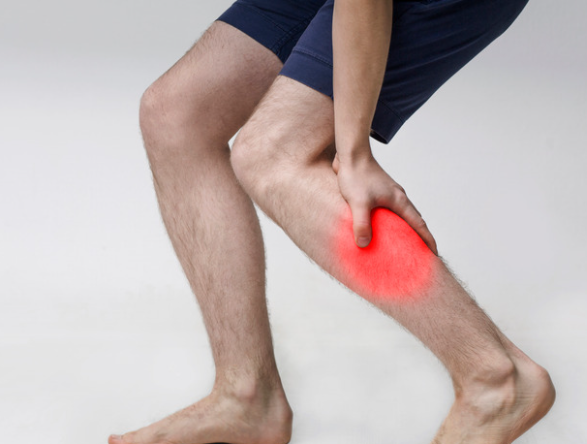
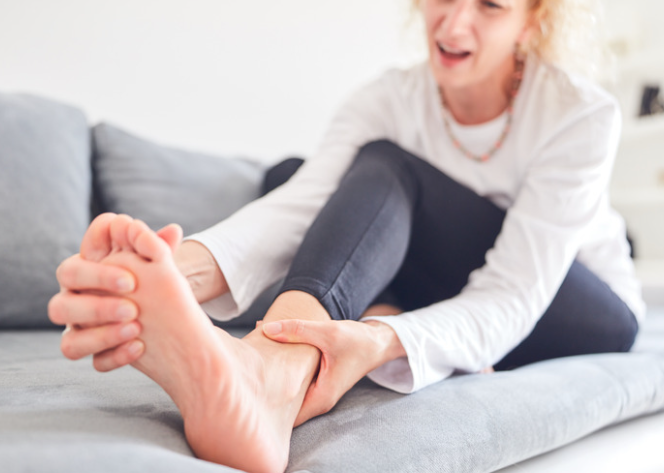
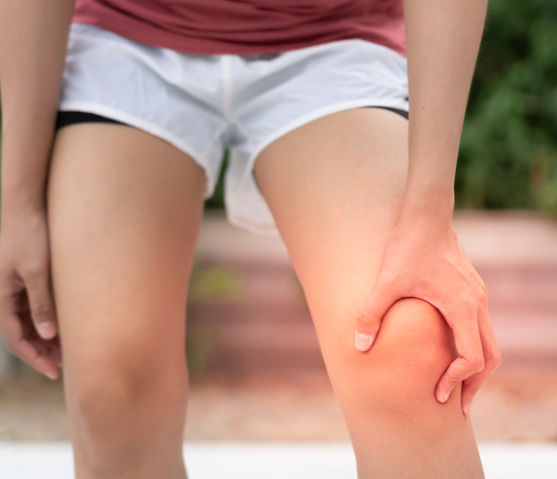
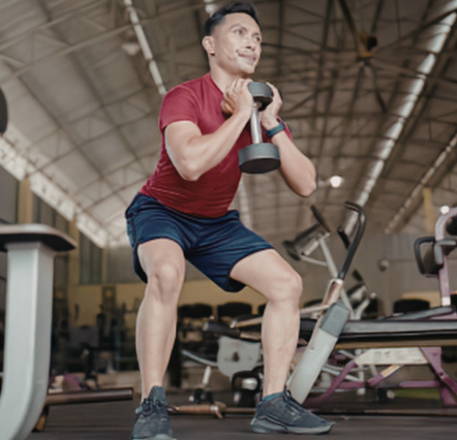
Heel Fat Pad Syndrome Pain doesn’t always mean plantar fasciitis — and getting the diagnosis wrong means the treatment won’t work. If your heel pain feels like you’re walking on a bruise, especially first thing in the morning or after being on your feet all day, heel fat pad syndrome could be the real culprit. Here’s what it is, why it happens, and how our physios in Frenchs Forest treat it.
Heel Fat Pad Syndrome Treatment in Frenchs Forest
At X Physio in Frenchs Forest, NSW, heel fat pad syndrome is one of those conditions we see regularly — and one that’s regularly misdiagnosed. We treat a wide range of patients dealing with this: running groups from Forestville, tradies and construction workers who spend long hours on hard surfaces, teachers, retail workers, and anyone who’s recently ramped up their activity levels.
It might surprise you to hear that this condition can look almost identical to plantar fasciitis from the outside — but the treatment approach is quite different. Getting the right diagnosis early is what separates a quick recovery from months of ongoing discomfort.
If you think you might be dealing with heel fat pad syndrome in Frenchs Forest or the surrounding area, our team is here to help you get back on your feet faster. You can also explore our physio in Frenchs Forest services to learn more about what we offer.
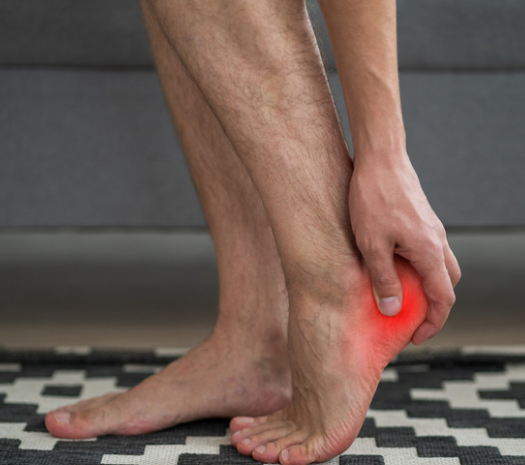
What Is Heel Fat Pad Syndrome?
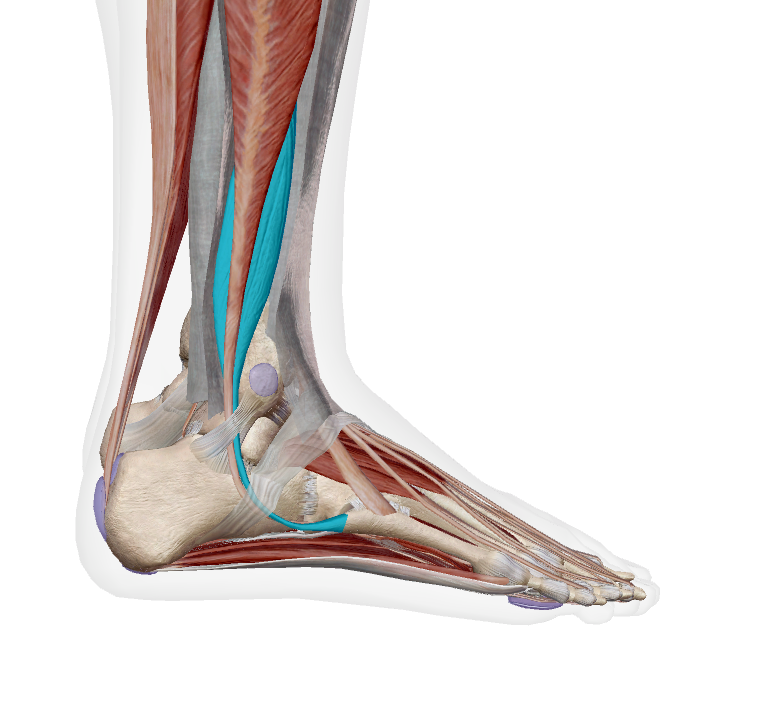
Under your heel sits a specialised cushion of fat — nature’s built-in shock absorber. It’s made up of tightly packed fat cells held together by fibrous tissue, and it’s designed to take the massive forces your heel experiences with every step.
Heel fat pad syndrome occurs when this cushion becomes damaged, thinned, or displaced. When that happens, the heel bone (calcaneus) no longer has adequate protection, and the result is a deep, aching, bruised sensation in the centre of your heel.
Unlike plantar fasciitis, which tends to hurt at the inner edge of the heel and along the arch, fat pad pain sits smack in the middle of the heel and tends to be more persistent throughout the day rather than easing as you warm up.
Symptoms of Heel Fat Pad Syndrome
- Deep, aching or bruised pain in the centre of the heel
- Pain that worsens with prolonged standing, walking on hard floors, or going barefoot
- Tenderness when pressing directly on the middle of the heel
- Discomfort in shoes with thin soles or no cushioning
- Pain that doesn’t improve much after warming up (unlike plantar fasciitis)
- A sensation of “walking on bone”
What Causes It?
General Causes
Heel fat pad syndrome usually comes down to one of a few common factors: repetitive impact loading, a sudden increase in activity on hard surfaces, advancing age (the fat pad naturally thins over time), carrying extra body weight, or wearing shoes that simply don’t offer enough heel cushioning.
What We See in Our Clinic
In our experience, the most common cause we see is a combination of hard surfaces and inadequate footwear. We’ll often have a patient come in convinced they have plantar fasciitis, and when we assess them properly, it becomes clear the pain is sitting dead-centre on the heel — not along the fascia at all.
A mistake we often see is patients self-treating with heel stretches and calf exercises — which are the right treatment for plantar fasciitis — but doing nothing for the fat pad itself. That’s weeks of treatment that doesn’t address the actual problem.
Most patients are surprised that age plays such a significant role. The fat pad loses elasticity and thickness as we get older, which is why we see this more frequently in patients over 40, even in those who haven’t dramatically changed their activity.
We also see it pop up frequently in people who’ve recently switched to minimalist shoes or started barefoot-style training without a proper transition period. The heel just isn’t ready for that level of impact exposure.
If this sounds like what you’re dealing with, getting on top of it early with physio can make a huge difference — the sooner the load is managed, the less damage accumulates in the fat pad tissue.
Can You Keep Training?
The short answer: it depends — but pushing through without modification is almost always a mistake.
For most people, complete rest isn’t necessary and can actually slow recovery. But continuing to train at the same volume on the same surfaces without addressing footwear, load, and technique? That will keep the fat pad irritated and extend your recovery considerably.
The smarter option is working with a physio who can help you modify your training to keep you moving while the fat pad recovers. We do this regularly with runners and gym-goers who simply can’t — or won’t — stop entirely. There’s usually a version of your training we can keep you doing while we manage the heel.
How Physio Treats Heel Fat Pad Syndrome
Step 1: Assessment We start by confirming the diagnosis. This means assessing exactly where the pain is, what aggravates it, your footwear, your activity levels, and your loading patterns. In some cases, we may recommend imaging to rule out other causes of heel pain.
Step 2: Pain Reduction Early treatment focuses on offloading the fat pad. This typically includes heel cushioning and padding, footwear advice, activity modification, and in some cases taping techniques that help reposition the fat pad under the heel bone to restore its protective function.
Step 3: Strength and Rehabilitation Once pain is under control, we work on the surrounding structures. This includes foot intrinsic strengthening, calf and lower limb loading work, and addressing any biomechanical factors (like gait or foot posture) that may be contributing to excessive heel loading.
Step 4: Return to Activity We build a gradual return-to-activity plan tailored to your goals — whether that’s getting back to running, returning to work, or simply being able to walk around without wincing. Surface exposure and footwear are reintroduced progressively to avoid flare-ups.

Why Rest Alone Won’t Fix It
This is something most general advice gets wrong. Rest reduces pain — but it doesn’t restore the structural integrity of the fat pad. If the tissue has been damaged or displaced, passive rest doesn’t fix the underlying issue.
What actually makes a lasting difference is a combination of appropriate load management (not zero load), footwear optimisation, and progressive strengthening of the surrounding structures to better share the impact forces. We often see patients who’ve rested for weeks, felt better, gone back to their normal activities, and immediately relapsed — because nothing had actually changed in how the heel was being loaded.
A Real Patient Example
We recently treated a patient who came to us from Belrose after weeks of heel pain that her GP had labelled as plantar fasciitis. She’d been stretching and icing with no improvement.
When we assessed her, the pain was centralised on the heel — not along the arch — and pressing on the fat pad reproduced her symptoms immediately. She was also a keen walker who’d recently started doing longer distances on footpaths in flat, unsupportive shoes.
We used a combination of heel padding and taping in the short term to offload the fat pad, gave her clear footwear guidance, and progressed her through a foot strengthening programme over six weeks. By the end, she was back to her long walks pain-free — and understood exactly what to look for if symptoms started creeping back.
Common Mistakes People Make
1. Treating it like plantar fasciitis The two conditions can feel similar, but the treatment is different. Fascia stretches and arch massage won’t help a damaged fat pad.
2. Going barefoot to “let it breathe” Without cushioning, the heel bone takes even more direct impact. Barefoot walking on hard floors is one of the worst things you can do during a flare-up.
3. Relying on rest without rehab Pain settles with rest, but the fat pad hasn’t recovered. Jumping back into normal activity without rehab is a fast track to relapse.
4. Ignoring footwear Thin-soled, worn-out, or unsupportive shoes are often the biggest contributor. This is one of the easiest things to fix and one of the most commonly overlooked.
5. Waiting too long to get it assessed The longer you load a damaged fat pad without intervention, the more the tissue degrades. Early management leads to faster, more complete recovery.
How Long Does Recovery Take?
Honestly, it varies — and we’d rather give you a realistic picture than an overly optimistic one.
Mild cases with early intervention can settle within 4–6 weeks, particularly when footwear is sorted quickly and activity is appropriately modified.
More established cases — where the fat pad has been loaded heavily for months — can take 3–6 months of consistent management. In older patients where fat pad thinning is a significant factor, ongoing footwear and cushioning management may be a long-term strategy rather than a short-term fix.
What we can tell you is that patients who engage with physio early, follow the footwear advice, and commit to the rehab exercises consistently get better outcomes. Those who try to push through without any changes tend to drag it out.
Book Your Heel Pain Assessment in Frenchs Forest
If you’re dealing with heel fat pad syndrome in Frenchs Forest or nearby suburbs like Belrose, Forestville, Davidson, or Killarney Heights, our physios can help you get a clear diagnosis and a treatment plan that actually addresses the cause.
You might also find our article on running injury treatment useful if you’re a runner trying to understand what’s going on with your heel.
Give us a call today on 9806 3077, or book online, just CLICK HERE.
Frequently Asked Questions
Is heel fat pad syndrome the same as plantar fasciitis? No — they’re two separate conditions that can feel similar. Plantar fasciitis involves inflammation of the connective tissue along the arch and inner heel edge, while heel fat pad syndrome involves damage or thinning of the cushioning pad directly under the heel bone. Treatment for each condition is quite different, which is why getting the right diagnosis matters.
How do I know if I have heel fat pad syndrome? The most telling signs are deep, central heel pain that feels like bruising, pain that doesn’t ease as you warm up, and significant discomfort walking barefoot on hard surfaces. A physio can confirm the diagnosis through clinical assessment and, if needed, imaging.
Can I still exercise with heel fat pad syndrome? In most cases, yes — with modifications. Complete rest is rarely necessary and can actually slow your recovery. A physio can help you identify what you can continue doing safely while the heel is managed.
Does it go away on its own? Minor cases may settle with footwear changes and rest, but without addressing the underlying causes — load, footwear, and foot strength — recurrence is common. Physio helps you get to the root of the problem and reduce the chances of it coming back.
What’s the best footwear for heel fat pad syndrome? Shoes with firm heel cushioning and good overall support are generally recommended. We advise patients to avoid flat, thin-soled shoes, worn-out trainers, and going barefoot on hard surfaces during recovery. Our physios can give you specific footwear guidance based on your feet and lifestyle.
How many physio sessions will I need? This depends on the severity and how long the issue has been present. Mild cases may only need 3–4 sessions alongside a home exercise programme, while more established cases may require 8–12 sessions over several months. We’ll give you a clearer timeframe after your initial assessment.
Give us a call today on 9806 3077, or book online, just CLICK HERE.
References
- Wearing, S.C. et al. (2014). “Plantar fasciitis and the windlass mechanism: A biomechanical link to clinical practice.” Journal of Athletic Training.
- Prichasuk, S. (1994). “The heel pad in plantar heel pain.” Journal of Bone and Joint Surgery.
- Australian Physiotherapy Association – www.choose.physio
- Sports Medicine Australia – www.sma.org.au
- Healthdirect Australia – Heel Pain Overview – www.healthdirect.gov.au
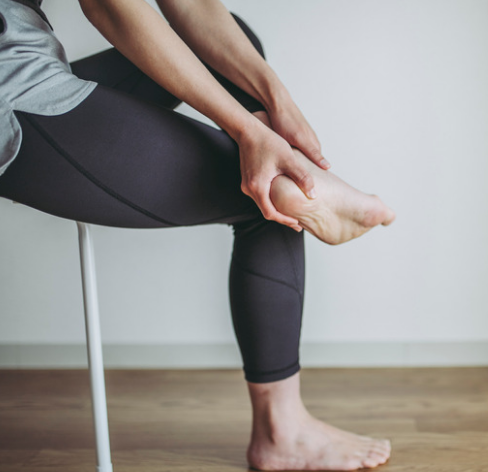
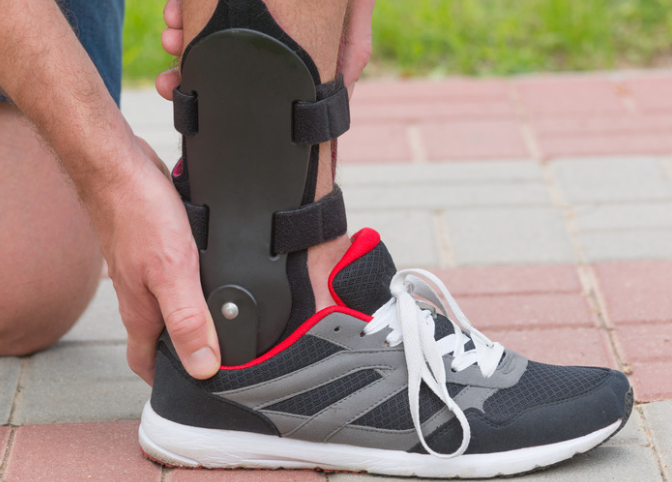
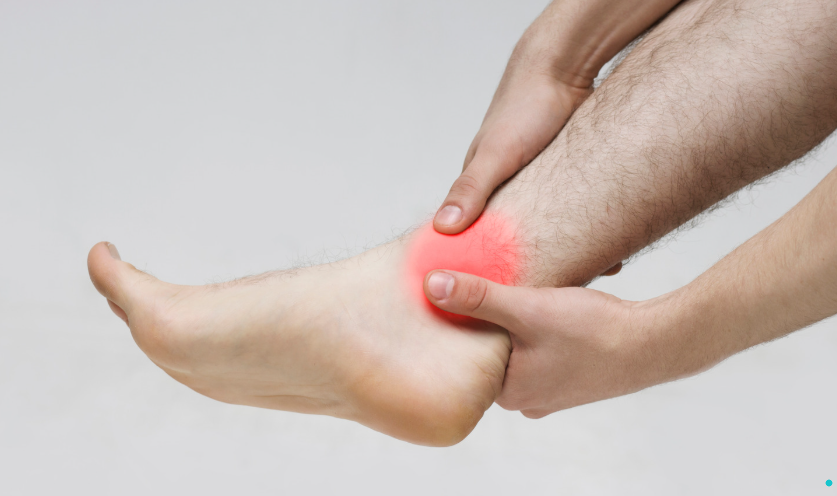
That deep, pinching pain at the front of your ankle when you squat, lunge, or push off during a run isn’t something you should just push through. It’s a classic sign of anterior ankle impingement — and the good news is, with the right physio treatment, most people recover well. If it sounds familiar, keep reading, or book in with our team today.
Anterior Ankle Impingement Treatment in Frenchs Forest
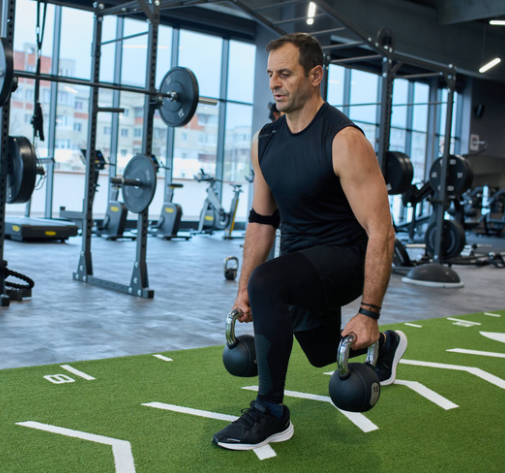
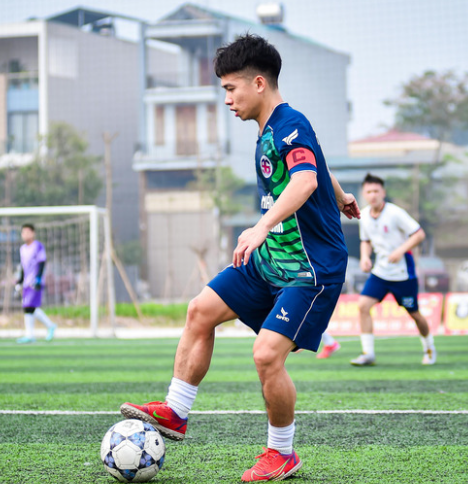
At our clinic in Frenchs Forest, NSW, anterior ankle impingement is something we see regularly. Our patients include local runners training on the trails around Garigal National Park, gym-goers who squat and deadlift, tradies spending hours on uneven ground, and footballers whose ankles cop a beating week in, week out.
It’s one of those injuries that often gets dismissed as “just a sore ankle” — but left untreated, it can drag on for months and genuinely affect your performance and quality of life. If you’re in Frenchs Forest or nearby suburbs like Belrose, Davidson, or Forestville, we can help you get to the bottom of it quickly.

What Is Anterior Ankle Impingement?
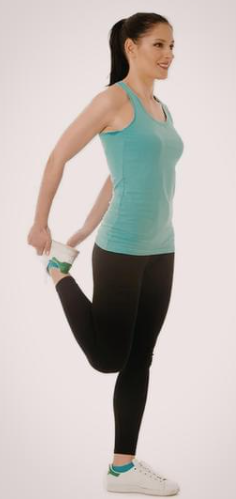
Anterior ankle impingement happens when soft tissue or bony growths get pinched between the front of the shin bone (tibia or fibular) and the top of the foot (talus) during movement. It’s sometimes called “footballer’s ankle” because it’s common in sports that involve repeated dorsiflexion — that’s the motion of bringing your foot up toward your shin, like when you squat, climb stairs, or push off the ground when sprinting.
Over time, repetitive compression in this part of the joint can cause inflammation, scar tissue build-up, or even small bony spurs that make the problem worse. The result? A nagging, pinching pain at the front of the ankle that just won’t go away.
Common Symptoms
- A sharp or pinching pain at the front of the ankle, especially during squatting or deep lunging
- Pain or stiffness when walking downhill or descending stairs
- Reduced ankle range of motion — your heel comes up earlier than it should in a squat
- A sensation of something “blocking” at the end of ankle range
- Swelling or tenderness along the front of the joint
- Pain that eases with rest but flares up again with activity
What Causes It?
General causes
Anterior ankle impingement usually develops from a combination of:
- Overuse — repeated high-load activity that stresses the front of the ankle joint
- Load changes — suddenly increasing training volume or intensity without adequate build-up
- Previous ankle sprains — scar tissue and instability after sprains are a major contributor
- Muscle weakness or tightness — particularly in the calf and ankle stabilisers
Our clinic insights
In our experience, the most common cause we see in Frenchs Forest isn’t actually from a single dramatic injury — it’s the cumulative result of multiple old ankle sprains that were never properly rehabbed. Patients come in thinking they just have a “weak ankle,” but when we assess them properly, there’s a clear pattern of scar tissue and restricted motion that’s been building for years.
A mistake we often see is people blaming their technique when the real problem is a structural restriction. They spend months trying to fix their squat form or adjust their running gait, when the underlying issue is that the ankle joint simply doesn’t have enough range to work with.
Most patients are surprised to learn that bony spurs — while they sound scary — aren’t always the main pain driver. In many cases, it’s actually soft tissue impingement that responds really well to conservative physio treatment without any need for surgery.
Can You Keep Training?
This is one of the first things our patients ask, and the honest answer is: it depends on what’s being aggravated and how much.
For most people, complete rest is not the answer — and can actually slow your recovery by reducing circulation and allowing more scar tissue to form. That said, continuing to train through full-range squats or heavy running loads without any modification is likely to make things worse.
In our clinic, we generally recommend staying active but intelligently modifying your training. That might mean temporarily reducing squat depth, swapping runs for cycling, or adjusting loads while we work on restoring ankle mobility and strength. The goal is to keep you moving while giving the joint a chance to settle.
Getting a clear physio assessment early means you’ll know exactly what you can and can’t do — instead of guessing and potentially setting yourself back further.
How Physio Treats Anterior Ankle Impingement
Step 1: Assessment
We start with a thorough assessment of your ankle mobility, joint mechanics, strength, and movement patterns. We’ll identify whether there’s a bony or soft tissue component, assess the degree of restriction, and look at contributing factors like calf tightness, hip strength, and foot mechanics. This gives us a clear picture of what’s actually going on before we start treating.
Step 2: Pain reduction
The early phase focuses on reducing inflammation and pain so you can move more freely. This might include hands-on joint mobilisation to restore ankle range, soft tissue work on the calf and surrounding structures, dry needling if appropriate, and activity modification to avoid aggravating positions.
Step 3: Strength and rehab
Once pain settles, the real work begins. We target the specific weaknesses that are loading the joint — usually the calf, peroneals, and hip stabilisers — and progressively build the ankle’s capacity to handle load again. This stage is often where people see the biggest improvements.
Step 4: Return to activity
We don’t just discharge you when the pain is gone. We make sure you can actually do the things that matter to you — whether that’s squatting at full depth, running a half marathon, or getting back on the footy field — without the problem coming back.
If you would like to explore more about how we prescribe exercise, CLICK HERE
If this sounds like what you’re dealing with, getting on top of it early with physio can make a huge difference. Book an appointment online here or give us a call on 9806 3077.
Why Rest Alone Won’t Fix Anterior Ankle Impingement
Here’s something most blogs won’t tell you: resting an impinged ankle without addressing the underlying cause is one of the least effective strategies. Pain might ease temporarily, but the restricted joint mechanics, scar tissue, and muscle imbalances that caused the problem in the first place are still there — waiting for you to load the ankle again.
We often see patients who’ve rested for weeks, felt better, then had symptoms return within days of getting back to training. That cycle is frustrating and unnecessary.
Effective recovery requires active intervention — restoring range of motion, improving joint mechanics, and building the strength to protect the ankle under load. Rest has a role in the early, acute phase, but it’s a starting point, not a treatment plan. This is exactly why working with a physio in Frenchs Forest who understands load management and ankle mechanics makes such a difference.

A Recent Patient Story
One of our recent patients — a tradie from Forestville — came in with eight months of nagging pain at the front of his right ankle. He’d tried resting it twice, bought new work boots, and even seen a GP who’d suggested it might be “just arthritis.” He was starting to resign himself to it being a permanent issue.
When we assessed him, we found severely restricted ankle dorsiflexion on that side, significant calf tightness, and a clear pattern of impingement pain at end range. There was no bony spur visible on imaging — it was a soft tissue impingement compounded by years of undertreated ankle sprains.
We worked on joint mobilisation, targeted calf and posterior chain loading, and gave him a progressive home program. Within six weeks he was pain-free on the tools. By week ten, he was back playing weekend cricket without any issues. He was genuinely shocked it could be resolved without surgery.
Common Mistakes That Slow Recovery
1. Ignoring it and training through full pain Pushing through sharp, pinching pain doesn’t build resilience — it drives more inflammation and can cause bony changes that complicate treatment. If it hurts, it’s telling you something.
2. Only resting without any rehab As we covered above, rest alone doesn’t address the root cause. Pain settles, then comes straight back when you reload.
3. Foam rolling and stretching the ankle aggressively Well-intentioned, but repeatedly forcing range in an already irritated joint can increase inflammation. Mobility work needs to be done strategically and progressively.
4. Self-diagnosing and skipping assessment Ankle pain has a number of causes — impingement, tendinopathy, syndesmosis issues, and more. Treating the wrong thing wastes time. A proper assessment takes the guesswork out.
5. Stopping rehab as soon as pain goes away Pain resolution is not the same as full recovery. Stopping too early leaves the underlying weakness in place and sets you up for recurrence. Check out our blog on running injury treatment to understand why completing your rehab matters.
How Long Does Recovery Take?
Most people with anterior ankle impingement see meaningful improvement within 4–8 weeks of consistent physio treatment. More complex cases — particularly where there’s a bony component or the injury has been present for a long time — can take 12 weeks or more.
We’ll always give you a realistic timeline based on your specific presentation at your first appointment. Some patients are back doing everything they want within a month; others with longer-standing issues need a more gradual approach. What we can say with confidence is that early treatment consistently leads to faster, more complete recovery.
Book In With Our Frenchs Forest Physios
If you’re dealing with anterior ankle impingement in Frenchs Forest or nearby areas — whether you’re in Belrose, Davidson, Forestville, Terrey Hills, or anywhere on the Northern Beaches — our physios can help you recover faster and prevent it from coming back.
We’ll give you a clear diagnosis, an honest outlook, and a practical plan to get you back to the activities you love.
Give us a call today on 9806 3077, or book online, just CLICK HERE.
Frequently Asked Questions
What does anterior ankle impingement feel like? The most common description is a pinching or deep aching pain at the very front of the ankle, particularly when you bring your foot up toward your shin — like at the bottom of a squat, walking downhill, or pushing off when running. Some people also notice a reduced range of motion and a feeling of something blocking in the joint.
Is anterior ankle impingement the same as an ankle sprain? No — though old ankle sprains are often a contributing cause. Impingement refers to soft tissue or bone being compressed between the joint surfaces, whereas a sprain involves stretching or tearing of ligaments. They’re different problems that require different treatment approaches.
Do I need a scan to diagnose ankle impingement? Not always. An experienced physio can make a strong clinical diagnosis based on your history, symptoms, and physical assessment. Imaging can be useful to identify bony spurs or rule out other pathology, but it’s not always necessary — and a positive impingement test in clinic is often more informative than an X-ray.
Can anterior ankle impingement heal on its own? In mild cases with adequate rest and load modification, symptoms can settle — but without addressing the underlying joint restriction and muscle weakness, the problem tends to return. Physio treatment significantly improves the speed and completeness of recovery.
Will I need surgery for ankle impingement? The vast majority of cases respond well to conservative physio treatment and don’t require surgery. Surgery (arthroscopic debridement) is generally only considered when conservative management has been thorough and hasn’t worked, or when there’s a significant bony spur causing the problem.
How many physio sessions will I need? This varies depending on how long you’ve had the problem and how complex it is. Most patients with straightforward impingement require between 4–8 sessions combined with a home exercise program. We’ll give you a clearer estimate after your initial assessment.
Give us a call today on 9806 3077, or book online, just CLICK HERE.
References
- Donnenwerth, M.P. & Roukis, T.S. (2012). Soft-tissue and osseous impingement syndromes of the ankle: role of imaging in diagnosis and management. Orthopedic Clinics of North America. https://doi.org/10.1016/j.ocl.2012.07.014
- Australian Physiotherapy Association (2024). Clinical guidelines for ankle and foot conditions. https://www.physiotherapy.asn.au
- Hess, G.W. (2011). Ankle impingement syndromes: a review of etiology and related implications. Foot & Ankle Specialist. https://doi.org/10.1177/1938640011415183
- Sports Medicine Australia (2023). Ankle injuries in sport: prevention and management. https://sma.org.au
- Tol, J.L. & van Dijk, C.N. (2004). Etiology of the anterior ankle impingement syndrome: a descriptive anatomical study. Foot & Ankle International. https://doi.org/10.1177/107110070402500212
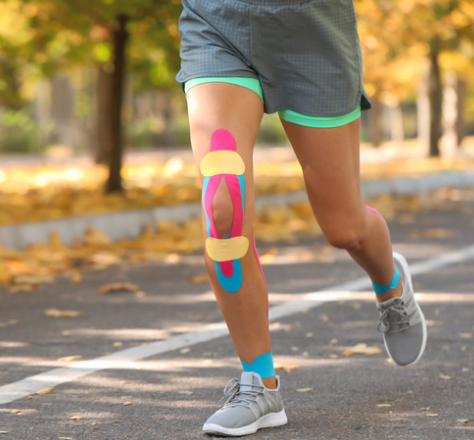
Anterior knee pain is one of the most common reasons people feel pain going up and down stairs. If your knees ache, click, or feel weak with steps, you’re not alone—and the good news is it’s very treatable. Here’s what’s going on and how physio can help.
Anterior Knee Pain Treatment in Frenchs Forest
At our physiotherapy clinic in Frenchs Forest NSW, anterior knee pain is something we treat every single week. It affects a wide range of people—runners, gym-goers, tradies, office workers, and even parents constantly up and down stairs carrying kids.
We often see patients who’ve been putting up with knee pain for months, thinking it’ll settle on its own. In reality, the earlier you address it, the quicker and easier the recovery tends to be.
If you’re searching for anterior knee pain Frenchs Forest, you’re in the right place.
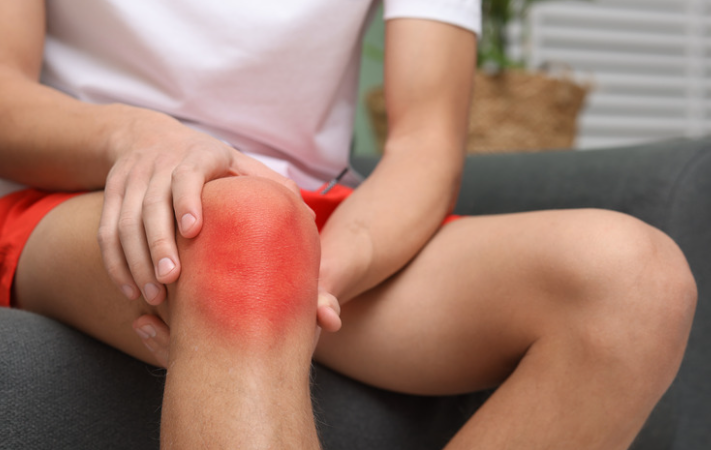
What Is Anterior Knee Pain?
Anterior knee pain refers to pain felt at the front of the knee, typically around or behind the kneecap (patella). It’s commonly linked to how the kneecap moves over the joint when you bend and straighten your knee.
When movement patterns, strength, or loading aren’t quite right, the joint becomes irritated—especially during activities like stairs, squatting, or running.
Most patients are surprised that it’s not usually a “damage” issue, but more of a load management and movement control problem.
Common Symptoms
Anterior knee pain often presents as:
- Pain going up or down stairs
- Discomfort when squatting or lunging
- Pain after sitting for long periods (the “movie theatre sign”)
- Clicking or grinding sensations in the knee
- A dull ache around or behind the kneecap
- Stiffness when getting up from sitting

What Causes Anterior Knee Pain?
A. General Causes
There are a few common contributors:
- Overuse: Doing too much too soon (e.g. increasing running or gym load)
- Load changes: Sudden spikes in training or activity
- Muscle weakness: Especially in the quads, glutes, and hips
- Movement patterns: Poor knee tracking or control
B. Clinic Insights
In our experience, the most common cause we see isn’t just “weak quads”—it’s actually poor control through the hip and pelvis.
A mistake we often see is people focusing only on the knee itself. They’ll stretch or foam roll the knee, but ignore the real driver.
Most people think it’s a structural issue like “cartilage damage,” but actually, it’s usually a load and control issue that responds really well to the right rehab.
We also see a lot of people resting completely. While that might reduce pain short-term, it doesn’t fix the underlying problem—which is why the pain comes back as soon as activity resumes.

Can You Keep Training?
Short answer: it depends—but usually yes, with modification.
In most cases, you don’t need to stop training completely. What you do need is to adjust your load so the knee settles while still maintaining strength.
For example:
- Reducing running volume temporarily
- Avoiding deep knee bending early on
- Modifying gym exercises
This is where seeing a physio makes a big difference. Instead of guessing, you get a clear plan that keeps you moving safely.
If this sounds like what you’re dealing with, getting on top of it early with physio can make a huge difference.
Why Rest Alone Doesn’t Fix Anterior Knee Pain
This is something most blogs miss.
Rest might reduce pain temporarily—but it doesn’t improve strength, control, or load tolerance.
That means:
- You feel better → return to activity → pain comes back
We often see patients stuck in this cycle for months.
The key is active rehab, not just rest.
How Physio Treats Anterior Knee Pain
1. Assessment
We look at:
- Your movement patterns (especially squatting, stairs, running)
- Strength in the quads, glutes, and hips
- Load history and training habits
This helps identify the real cause—not just the symptoms.
2. Pain Reduction
Early on, we aim to settle irritation by:
- Modifying aggravating activities
- Taping if needed
- Adjusting exercise technique
3. Strength & Rehab
This is where real change happens.
Your program may include:
- Quad strengthening
- Glute and hip stability work
- Controlled loading exercises (step-ups, split squats)
In our experience, consistency here is what separates fast recoveries from lingering pain.
4. Return to Activity
We gradually build you back to:
- Running
- Gym training
- Sport
With better control and load tolerance than before.
Real Patient Example
We recently had a patient from Dee Why come into our Frenchs Forest clinic with ongoing knee pain going downstairs.
They had stopped running completely for 6 weeks, but the pain was still there.
After assessing them, we found:
- Weak glute control
- Poor knee tracking during step-downs
- Over-reliance on quads
We started a targeted strength program and adjusted their training load.
Within 2 weeks, stairs were significantly better. By 6 weeks, they were back running pain-free.
Most patients are surprised how quickly things improve when the right areas are addressed.
Common Mistakes
- Resting too long
Leads to weakness and recurring pain - Only treating the knee
Ignores the real driver (hips/glutes) - Pushing through sharp pain
Often makes symptoms worse - Skipping strength work
This is the key to long-term recovery - Returning to sport too quickly
Without proper progression
Recovery Time
Recovery varies depending on:
- How long symptoms have been present
- Activity levels
- Strength deficits
As a general guide:
- Mild cases: 2–4 weeks
- Moderate cases: 4–8 weeks
- Persistent cases: 8–12+ weeks
In our experience, patients who start physio early recover significantly faster.

Need Help with Anterior Knee Pain in Frenchs Forest?
If you’re dealing with anterior knee pain in Frenchs Forest or nearby areas, our physios can help you recover faster and prevent it from coming back.
Whether you’re a runner, gym-goer, or just struggling with stairs, we’ll create a plan tailored to you.
You can learn more about our approach to physio in Frenchs Forest here:
https://www.xphysio.com.au/
You might also find these helpful:
- Running injury treatment: https://www.xphysio.com.au/blog
- Knee pain rehab strategies: https://www.xphysio.com.au/blog
Give us a call today on 9806 3077, or book online, just CLICK HERE:
https://x-physio.au4.cliniko.com/bookings#service
FAQs
Why does my knee hurt more going downstairs than upstairs?
Going downstairs places more load through the kneecap, increasing stress on the joint and making symptoms more noticeable.
Is anterior knee pain serious?
Most cases are not serious and respond well to physiotherapy. It’s usually a load and strength issue rather than structural damage.
Should I wear a knee brace?
In some cases it can help short-term, but it doesn’t fix the underlying cause. Rehab is still essential.
Can running cause anterior knee pain?
Yes—especially if there’s a sudden increase in volume or poor movement control.
Will it go away on its own?
Sometimes mild cases settle, but most people find it returns without proper rehab.
References
- Australian Physiotherapy Association – Knee Pain Resources
- Sports Medicine Australia – Patellofemoral Pain Guidelines
- British Journal of Sports Medicine – Patellofemoral Pain Consensus Statement
- Journal of Orthopaedic & Sports Physical Therapy – Knee Pain Management
Give us a call today on 9806 3077, or book online, just CLICK HERE
https://x-physio.au4.cliniko.com/bookings#service
Muscle knots can feel like tight, painful lumps that just won’t go away—no matter how much you stretch or massage them. If you’re dealing with persistent tension, this guide explains what’s going on and how physio can actually fix it properly.
Muscle Knots Treatment in Frenchs Forest
If you’re searching for muscle knots treatment Frenchs Forest, you’re definitely not alone. We regularly see this issue in clinic across a wide range of patients—from gym-goers and runners to desk workers and tradies.
In Frenchs Forest NSW, muscle knots are one of the most common complaints we treat. Whether it’s neck tension from long hours at a desk, tight calves from running, or shoulder knots from the gym, this is something we deal with every day—and it’s very treatable with the right approach.
What Are Muscle Knots (Trigger Points)?
Muscle knots, often called trigger points, are small, tight areas within a muscle that become sensitive and painful. They can feel like a hard lump or band and often cause discomfort both locally and in surrounding areas.
In simple terms, a muscle knot is where part of the muscle fibres have become stuck in a contracted state. This reduces blood flow, increases sensitivity, and creates that familiar tight, aching feeling.
Most patients are surprised that these knots aren’t just “tight muscles”—they’re actually dysfunctional muscle tissue that needs targeted treatment, not just stretching.
Common Symptoms of Muscle Knots
- Localised tenderness or a “lump” in the muscle
- Aching or deep muscle pain
- Pain that spreads (referred pain)
- Stiffness or reduced range of motion
- Pain when pressing on the area
- Muscle fatigue or weakness
What Causes Muscle Knots?
A. General Causes
Muscle knots usually develop due to a combination of factors:
- Overuse or repetitive movements
- Sudden increases in training load
- Poor posture (especially desk work)
- Muscle weakness or imbalance
- Stress and tension
B. 🔥 What We See in Clinic
In our experience, the most common cause we see is a combination of overload and poor muscle control—not just “tightness” on its own.
A mistake we often see is people trying to fix knots purely with stretching or massage guns. While that might feel good short-term, it doesn’t address why the knot formed in the first place.
Most people think muscle knots are caused by dehydration or “toxins”—but actually, they’re usually due to mechanical overload and poor muscle function.
We often find that once we improve strength, movement patterns, and load management, the knots stop coming back.
Can You Keep Training?
The short answer: yes, but it depends.
In many cases, you can keep training—but you may need to modify:
- Intensity
- Volume
- Movement patterns
Pushing through severe pain usually makes things worse, especially if the underlying issue isn’t addressed.
This is where physio becomes the smarter option. Instead of guessing, we can guide you on exactly what to continue, what to modify, and what to temporarily avoid—so you don’t lose progress.
If this sounds like what you’re dealing with, getting on top of it early with physio can make a huge difference.
How Physio Treats Muscle Knots (Step-by-Step)
1. Assessment
We start by identifying:
- Where the trigger points are
- What’s causing them
- Movement or strength issues contributing to the problem
This is key—because treating the knot without fixing the cause usually leads to recurrence.
2. Pain Reduction
We use a combination of:
- Hands-on release techniques
- Dry needling (if appropriate)
- Targeted soft tissue work
This helps reduce pain and relax the muscle quickly.
3. Strength & Rehab
This is where long-term change happens.
We focus on:
- Strengthening weak muscles
- Improving control and coordination
- Fixing posture and movement patterns
In our experience, this is the step most people skip—and it’s why their knots keep coming back.
4. Return to Activity
We guide you back to:
- Gym training
- Running
- Work tasks
…in a way that prevents flare-ups and builds resilience.
Why Rest Alone Doesn’t Fix Muscle Knots
One of the biggest misconceptions is that rest will solve the problem.
While rest might reduce symptoms temporarily, it doesn’t address:
- Muscle weakness
- Movement dysfunction
- Load issues
We often see patients who’ve rested for weeks, only for the knot to return as soon as they resume activity.
The real fix comes from combining treatment with proper rehab.
Real Patient Example
We recently treated a patient from Belrose who came into our Frenchs Forest clinic with persistent upper back and shoulder knots.
He was a desk worker who also trained at the gym 4–5 times per week. He’d tried massage and stretching, but the knots kept coming back.
On assessment, we found:
- Poor upper back strength
- Overactive neck and shoulder muscles
- Limited thoracic mobility
We treated the trigger points with hands-on therapy and dry needling, then introduced a targeted strength program.
Within 3–4 weeks, his pain significantly reduced—and more importantly, the knots stopped recurring.
Most patients are surprised that fixing the cause makes such a big difference compared to just treating the symptoms.
Common Mistakes People Make
- Only using massage or foam rolling
These help temporarily but don’t fix the underlying issue - Ignoring strength training
Weak muscles are a major contributor to trigger points - Training through sharp pain
This can worsen the problem and delay recovery - Poor posture all day
Especially common with desk workers - Not addressing workload
Sudden spikes in activity often trigger knots
Recovery Time
Recovery depends on:
- How long the knot has been there
- Severity
- Underlying causes
Generally:
- Mild cases: 1–2 weeks
- Moderate cases: 3–6 weeks
- Chronic cases: 6+ weeks
In our experience, patients who combine treatment with rehab recover faster and are less likely to have the issue return.
If you’re dealing with muscle knots in Frenchs Forest or nearby areas, our physios can help you recover faster and prevent it from coming back.
Give us a call today on 9806 3077, or book online, just CLICK HERE:
https://x-physio.au4.cliniko.com/bookings#service
FAQs
What is the fastest way to get rid of muscle knots?
The fastest way is a combination of hands-on treatment (like physio or dry needling) and targeted exercises to fix the underlying cause.
Do muscle knots go away on their own?
Some mild knots may settle, but many persist if the root cause isn’t addressed.
Are muscle knots dangerous?
No, but they can become chronic and affect movement, performance, and comfort.
Is massage enough to fix muscle knots?
Massage helps temporarily, but without rehab, the knots often return.
Should I stretch a muscle knot?
Stretching can help, but it’s usually not enough on its own. Strength and control are key.
Internal Links
For more help, explore our physio in Frenchs Forest services:
https://www.xphysio.com.au
You can also read more about related injuries like:
https://xphysio.com.au/10-running-tips-from-a-physio-to-avoid-injury/
References
- Australian Physiotherapy Association – www.physio.asn.au
- Sports Medicine Australia – www.sma.org.au
- Better Health Channel (Victoria) – www.betterhealth.vic.gov.au
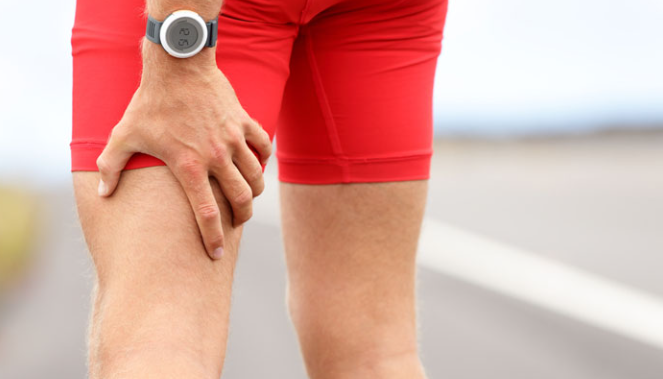
Outer ankle pain that just won’t settle can be frustrating—especially when it limits walking, running, or even standing comfortably. Peroneal tendonitis is a common cause we treat in clinic, and the good news is it responds well to the right care. Here’s how physiotherapy can help you recover properly.
Peroneal Tendonitis Treatment in Frenchs Forest
If you’re searching for peroneal tendonitis physiotherapy Frenchs Forest, you’re not alone. We regularly see this condition in runners, gym-goers, tradies, and even people who’ve simply increased their walking or activity levels.
Based in Frenchs Forest NSW, our clinic treats outer ankle pain every week. In our experience, this issue is often misdiagnosed or left too long, which is why early physio can make a big difference.
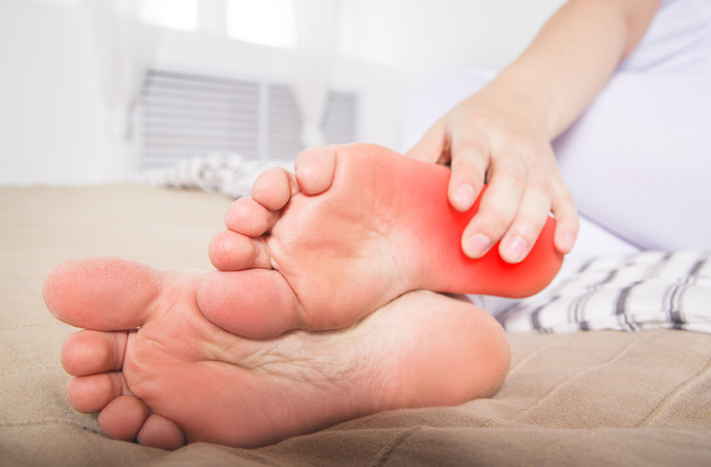
What is Peroneal Tendonitis?
Peroneal tendonitis refers to irritation or overload of the peroneal tendons, which run along the outside of your ankle and foot. These tendons help stabilise your ankle and control side-to-side movements.
When they become overloaded—often from repetitive stress or sudden changes in activity—they can become painful and inflamed. Most patients are surprised that this condition isn’t just a “sprain” but a load-related issue that needs proper rehab, not just rest.
Symptoms of Peroneal Tendonitis
- Pain on the outside of the ankle (especially with walking or running)
- Tenderness behind the ankle bone
- Swelling or stiffness along the outer ankle
- Pain that worsens with activity and eases with rest
- Feeling of weakness or instability in the ankle
What Causes Peroneal Tendonitis?
A. General Causes
- Overuse or repetitive loading
- Sudden increase in training or activity
- Poor footwear or support
- Weakness in ankle or foot muscles
- Previous ankle injuries
B. Clinic Insights
In our experience, the most common cause we see is a sudden spike in activity—like returning to running too quickly or ramping up gym sessions.
A mistake we often see is people treating it like a simple ankle sprain and just resting. While rest can settle symptoms temporarily, it doesn’t address the underlying weakness or loading issue.
Most people think it’s just inflammation, but actually, it’s often a load management problem combined with poor ankle control.
To learn more about ankle sprains CLICK HERE
Can You Keep Training?
The honest answer: it depends.
You don’t always need to stop completely—but you do need to modify. Continuing to push through pain usually prolongs recovery.
In our clinic, we guide patients on how to reduce aggravating movements while keeping them active in safer ways. This is where peroneal tendonitis physiotherapy Frenchs Forest becomes valuable—you’re not guessing what to do.

How Physio Treats Peroneal Tendonitis
1. Assessment
We assess your ankle strength, movement patterns, footwear, and training load. Often, the issue isn’t just the tendon—it’s how your whole lower limb is working.
2. Pain Reduction
This may include:
- Load modification
- Taping or bracing
- Manual therapy
- Advice on footwear
3. Strength & Rehab
This is the most important phase. We focus on:
- Peroneal muscle strengthening
- Calf and foot control
- Balance and stability work
Most patients are surprised that improving strength—not just resting—is what actually fixes the problem.
If this sounds like what you’re dealing with, getting on top of it early with physio can make a huge difference.
4. Return to Activity
We gradually reintroduce running, gym work, or sport with a structured plan. In our experience, this step is often rushed—which is why many people get recurring pain.
Why Rest Alone Doesn’t Fix Peroneal Tendonitis
This is something most blogs miss.
Rest might reduce pain short-term, but it doesn’t improve tendon capacity. Without rebuilding strength and tolerance, the pain often comes straight back when activity resumes.
We often see patients who rested for weeks, felt better, then flared up again immediately when returning to exercise. Proper rehab is what breaks that cycle.
Real Patient Example
We recently treated a runner from Dee Why who came into our Frenchs Forest clinic with persistent outer ankle pain.
They had stopped running for three weeks, but the pain kept returning whenever they tried to get back into it.
On assessment, we found:
- Weak peroneal muscles
- Poor ankle control during running
- A recent increase in training load
We guided them through a structured strengthening program, adjusted their running load, and improved their movement mechanics.
Within 4–6 weeks, they were back to running pain-free—and more importantly, confident it wouldn’t return.
Common Mistakes
- Ignoring the pain early
Waiting too long often makes it harder to settle - Resting without rehab
Symptoms improve, but the problem remains - Returning to sport too quickly
Leads to flare-ups and frustration - Wearing unsupportive footwear
Adds unnecessary stress to the tendon - Trying random exercises online
Without guidance, this can make things worse
Recovery Time
Recovery varies depending on severity and how early treatment starts.
- Mild cases: 2–4 weeks
- Moderate cases: 4–8 weeks
- Longer-standing cases: 8–12+ weeks
In our experience, patients who start physio early tend to recover faster and avoid long-term issues.
Physio in Frenchs Forest – How We Can Help
If you’re dealing with peroneal tendonitis in Frenchs Forest or nearby areas, our physios can help you recover faster and prevent it from coming back.
We focus on not just settling pain, but fixing the underlying cause—so you can get back to running, training, or work without setbacks.
You can learn more about our approach to physio in Frenchs Forest or explore our advice on running injury treatment to stay injury-free.
Give us a call today on 9806 3077, or book online, just CLICK HERE:
https://x-physio.au4.cliniko.com/bookings#service
FAQs
1. What is the fastest way to recover from peroneal tendonitis?
The fastest way is a combination of load management and targeted strengthening through physiotherapy—not just rest.
2. Should I stop running with peroneal tendonitis?
Not always. In many cases, running can be modified rather than stopped completely, depending on pain levels.
3. Can peroneal tendonitis heal on its own?
It can improve, but without addressing the underlying cause, it often returns.
4. Is peroneal tendonitis the same as an ankle sprain?
No. While symptoms can feel similar, tendonitis is usually a load-related issue rather than a ligament injury.
5. Do I need scans for peroneal tendonitis?
Most cases don’t require imaging. A thorough physio assessment is usually enough to diagnose and treat it.
References
- Australian Physiotherapy Association – www.physiotherapy.asn.au
- Sports Medicine Australia – www.sma.org.au
- Better Health Channel (Victoria) – www.betterhealth.vic.gov.auAmerican Academy of Orthopaedic Surgeons – www.aaos.org
Give us a call today on 9806 3077, or book online, just CLICK HERE
https://x-physio.au4.cliniko.com/bookings#service
Bone spurs can be painful, frustrating, and often misunderstood. The good news? Most don’t need surgery. With the right bone spur treatment, you can reduce pain and stay active. If you’re dealing with ongoing joint or tendon pain, this guide will help you understand what’s going on—and what to do next.
Bone Spur Treatment in Frenchs Forest
If you’re searching for bone spur treatment Frenchs Forest, you’re not alone. We regularly treat runners, gym-goers, tradies, and office workers from across Frenchs Forest, NSW dealing with bone spurs in the heel, shoulder, knee, and spine.
In our clinic, this is a very common presentation—especially in people who stay active but have gradually increasing pain. The key thing most patients don’t realise is that the spur itself is rarely the real problem.
What Is a Bone Spur?
A bone spur (also called an osteophyte) is an extra bit of bone that forms along the edges of joints or where tendons attach. It’s your body’s way of responding to stress, friction, or long-term loading.
They often develop over time and are commonly found in the heel (plantar fascia), shoulder, knee, and spine.
Most patients are surprised that bone spurs themselves aren’t always painful. In fact, many people have them without knowing. Pain usually comes from the surrounding tissues becoming irritated—not the spur itself.
Symptoms
Bone spurs can present differently depending on the location, but common symptoms include:
- Localised pain with movement or load
- Stiffness around a joint (especially in the morning)
- Reduced range of motion
- Pain that builds gradually over time
- Tenderness when pressing on the area
- In some cases, nerve-related symptoms (tingling or weakness)
Causes
General Causes
Bone spurs typically develop due to:
- Repetitive loading or overuse
- Sudden increases in training or activity
- Joint wear and tear over time
- Muscle weakness or poor movement patterns
- Age-related changes
What We See in Clinic (Real Insights)
In our experience, the most common cause we see isn’t just “wear and tear”—it’s poor load management over time.
A mistake we often see is people blaming the spur on scans and thinking it needs to be removed. In reality, we frequently treat patients successfully without touching the spur at all.
Most people think it’s the bone causing the pain—but actually, it’s usually irritated soft tissue around it (like tendons or fascia).
We also often see people rest completely, which actually makes things worse long-term. The body needs the right load—not zero load.
Can You Keep Training?
Short answer: yes—but it depends.
You usually don’t need to stop completely. In fact, staying active (with the right modifications) is often better for recovery.
We guide patients to:
- Reduce aggravating activities temporarily
- Modify training intensity or volume
- Keep moving within a safe pain range
- Gradually reload the affected area
This is where physio becomes crucial—guessing often leads to flare-ups.

How Physio Treats Bone Spurs
1. Assessment
We look beyond the scan.
Your physio will assess:
- Movement patterns
- Strength and flexibility
- Load tolerance
- The actual source of pain
In our experience, this is where most of the answers come from.
2. Pain Reduction
Early treatment focuses on calming symptoms:
- Activity modification
- Manual therapy (if needed)
- Taping or temporary support
- Education around load
3. Strength & Rehab
This is the most important stage.
We build:
- Strength in surrounding muscles
- Tendon capacity
- Joint control and stability
Most patients are surprised how much stronger they need to get to truly fix the issue.
If this sounds like what you’re dealing with, getting on top of it early with physio can make a huge difference.
4. Return to Activity
We gradually reintroduce:
- Running, gym, or work demands
- Sport-specific movements
- Higher loads safely
The goal is not just pain relief—but preventing it from coming back.
Why Rest Alone Doesn’t Fix Bone Spurs
One of the biggest myths is that rest will solve the problem.
While short-term rest can reduce pain, it doesn’t address the underlying issue—load capacity.
In our experience, patients who only rest tend to flare up again as soon as they return to activity.
The real solution is progressive loading—done properly.
Real Patient Example
We recently treated a runner from Oxford Falls who came into our Frenchs Forest clinic with persistent heel pain diagnosed as a heel spur.
They had already tried rest, orthotics, and stretching—but nothing worked long-term.
On assessment, we found:
- Weak calf muscles
- Poor load tolerance in the plantar fascia
- Sudden increase in running volume
We focused on:
- Gradual calf strengthening
- Load management strategies
- Progressive return to running
Within 8 weeks, they were back running pain-free—and importantly, confident it wouldn’t return.
Common Mistakes
- Blaming the scan: The spur isn’t always the pain source
- Resting too much: Leads to weakness and recurrence
- Stretching only: Often not enough without strength work
- Returning too quickly: Causes flare-ups
- Ignoring early pain: Makes it harder to treat later
Recovery Time
Recovery varies depending on:
- Location of the spur
- How long symptoms have been present
- Your activity level
- How well rehab is followed
General guide:
- Mild cases: 4–6 weeks
- Moderate cases: 6–12 weeks
- Long-standing cases: 3+ months
We always aim for steady, sustainable progress—not quick fixes that don’t last.

How We Can Help
If you’re dealing with bone spurs in Frenchs Forest or nearby areas, our physios can help you recover faster and prevent it from coming back. We focus on treating the real cause—not just the symptoms.
Give us a call today on 9806 3077, or book online here:
https://x-physio.au4.cliniko.com/bookings#service
Recommended Reading
If you’re looking for expert physio in Frenchs Forest, visit:
https://www.xphysio.com.au
You may also find this blog helpful:
https://xphysio.com.au/tendonitis-vs-tendinopathy-whats-the-difference/
References
- Australian Physiotherapy Association – https://australian.physio
- Better Health Channel – https://www.betterhealth.vic.gov.au
- Sports Medicine Australia – https://sma.org.au
- Mayo Clinic – https://www.mayoclinic.org
- NHS – https://www.nhs.uk
Give us a call today on 9806 3077, or book online, just CLICK HERE: https://x-physio.au4.cliniko.com/bookings#service
Reactive vs Degenerative Tendinopathy pain that keeps coming back is usually more than just “overuse.” Understanding the difference between reactive and degenerative tendinopathy is the key to fixing it properly. In this guide, we break it down simply—and show how the right physio approach can stop the cycle for good.
At our physiotherapy clinic in Frenchs Forest, NSW, we regularly treat tendon injuries in runners, gym-goers, tradies, and office workers alike. Whether it’s an Achilles flare-up, patellar tendon pain, or shoulder tendinopathy, this pattern of recurring pain is something we see every single week.
Most patients come in frustrated—they’ve rested, stretched, and even tried strengthening, but the pain keeps returning. In our experience, that’s usually because they haven’t been told whether their tendon is in a reactive or degenerative stage.
If you’re looking for expert guidance, you can learn more about our approach to physio in Frenchs Forest here:
https://www.xphysio.com.au
What is Reactive vs Degenerative Tendinopathy?
Tendinopathy is a broad term used to describe tendon pain and dysfunction—but not all tendon injuries are the same.
Reactive tendinopathy is the early stage. It happens when a tendon becomes irritated from a sudden increase in load (like ramping up running or gym training too quickly). The tendon thickens slightly and becomes painful but is still structurally healthy.
Degenerative tendinopathy is more chronic. Over time, repeated overload leads to breakdown in the tendon structure. The tissue becomes weaker, less organised, and more prone to flare-ups.
Most patients are surprised that long-term tendon pain often involves a mix of both—this is why it keeps coming back.
Symptoms
- Pain during or after activity
- Morning stiffness or a “tight” feeling in the tendon
- Pain that warms up, then worsens later
- Localised tenderness when pressing the tendon
- Reduced strength or performance
What Causes Tendinopathy?
General Causes
- Sudden increase in training load
- Repetitive overuse
- Muscle weakness or imbalance
- Poor recovery or sleep
- Biomechanical factors
What We See in the Clinic
In our experience, the most common cause we see is poor load management—not just overuse.
A mistake we often see is patients doing too much rest or jumping into strengthening too quickly—both can make things worse.
Most people think tendon pain is purely inflammatory and needs rest. But actually, tendons respond best to gradual, progressive loading—not complete rest.
We also often find that the pain isn’t just at the tendon. There are usually contributing factors like weak calves, poor hip control, or stiffness elsewhere that keep driving the issue.
Can You Keep Training?
Short answer: it depends—but usually yes, with modification.
Completely stopping activity isn’t always the best solution. In fact, too much rest can make tendons weaker and more sensitive.
Instead, we guide patients to:
- Reduce load (not eliminate it)
- Modify exercises
- Stay within a tolerable pain range
This is where physio becomes crucial—because guessing this yourself often leads to setbacks.
How Physio Treats Tendinopathy
Assessment
We identify whether your tendon is reactive, degenerative, or a mix of both. We also assess strength, movement patterns, and load tolerance.
Pain Reduction
For reactive tendons, we calm things down by adjusting load and using targeted isometric exercises.
Strength & Rehab
This is where most blogs oversimplify things.
We progressively load the tendon using:
- Isometric exercises (early stage)
- Slow heavy resistance training
- Plyometrics (later stage)
In our experience, this phase is where long-term success is built.
Return to Activity
We gradually reintroduce sport or gym work with a structured plan—so you don’t fall back into the same cycle.
If this sounds like what you’re dealing with, getting on top of it early with physio can make a huge difference.
You can also read more about running injury treatment here:
https://xphysio.com.au/10-running-tips-from-a-physio-to-avoid-injury/
Why Rest Alone Doesn’t Fix Tendon Pain
Many people are told to just rest until pain settles. The problem? Tendons don’t heal well with rest alone.
Without proper loading:
- Tendons become weaker
- Pain returns quickly when you restart activity
- The cycle repeats
We often see patients who’ve had months of rest—but still can’t run, squat, or train without pain.
The key is the right load at the right time—not no load.
Real Patient Example
We recently treated a runner from Dee Why who came into our Frenchs Forest clinic with ongoing Achilles pain.
He’d been dealing with it for over 8 months—resting, stretching, and trying random exercises he found online. Every time he returned to running, the pain flared up again.
On assessment, we found a mix of degenerative tendon changes with a reactive flare-up. His calf strength was also significantly reduced.
We:
- Modified his running load
- Introduced isometric calf work initially
- Progressed into heavy strength training
- Built him back into running gradually
Within 8 weeks, he was back running consistently—and more importantly, without flare-ups.
Common Mistakes
- Resting too much – weakens the tendon further
- Jumping into heavy exercises too early – aggravates reactive tendons
- Ignoring pain signals – pushing through often worsens things
- Copying generic rehab programs – not tailored to your stage
- Not addressing contributing factors – like strength or movement issues
Recovery Time
Recovery varies depending on the stage:
- Reactive tendinopathy: 2–6 weeks with proper management
- Degenerative tendinopathy: 3–6+ months
Most patients are surprised that tendon rehab takes time—but when done properly, results are long-lasting.
If you’re dealing with reactive vs degenerative tendinopathy in Frenchs Forest or nearby areas, our physios can help you recover faster and prevent it from coming back.
Give us a call today on 9806 3077, or book online here:
https://x-physio.au4.cliniko.com/bookings#service
FAQs
What is the difference between reactive and degenerative tendinopathy?
Reactive tendinopathy is an early-stage overload response, while degenerative tendinopathy involves longer-term structural breakdown.
Can tendinopathy heal on its own?
It can improve, but without proper rehab, it often returns.
Should I stop exercising with tendon pain?
Not completely. Most cases benefit from modified activity rather than full rest.
How do I know what stage my tendon injury is?
A proper physio assessment is the best way to determine this.
What is the best treatment for tendon pain?
Progressive loading exercises tailored to your specific condition and stage.
References
Australian Institute of Sport – Tendinopathy Guidelines
https://www.ais.gov.au
Cook JL, Purdam CR. Is tendon pathology a continuum? A pathology model to explain the clinical presentation of load-induced tendinopathy
https://bjsm.bmj.com
Sports Medicine Australia – Tendon Injuries
https://sma.org.au
Physiopedia – Tendinopathy
https://www.physio-pedia.com
Recurrent hamstring cramps can be frustrating, unpredictable, and often misunderstood. If your hamstrings keep tightening up during runs, workouts, or even at night, there’s usually more going on than just “tight muscles.” In this guide, we break down the real causes—and how physiotherapy can fix it properly.
At our physiotherapy clinic in Frenchs Forest NSW, recurrent hamstring cramps are something we treat every week. Whether you’re a runner hitting the trails, a gym-goer lifting heavy, or someone just trying to stay active, this issue is incredibly common.
We see it across all age groups—from weekend warriors to office workers who sit all day and then train hard. The good news? Once you understand the cause, it’s very treatable.
What Are Recurrent Hamstring Cramps?
Recurrent hamstring cramps are repeated episodes of sudden, involuntary tightening in the muscles at the back of your thigh. These cramps can happen during activity, after exercise, or even at rest (like during sleep).
Unlike a one-off cramp, recurrent cramps usually point to an underlying issue—whether that’s muscle imbalance, fatigue, or irritation of the nervous system. Most patients are surprised that it’s not just about hydration or stretching.
Symptoms of Recurrent Hamstring Cramps
- Sudden tightness or “grabbing” in the back of the thigh
- Cramping during or after exercise
- Night cramps that wake you up
- Ongoing feeling of tight hamstrings despite stretching
- Reduced performance or fear of pushing hard
Causes of Recurrent Hamstring Cramps
General Causes
- Overuse – too much load without enough recovery
- Sudden increases in training or activity
- Muscle weakness (especially glutes and hamstrings)
- Fatigue from repeated or intense exercise
What We See in the Clinic
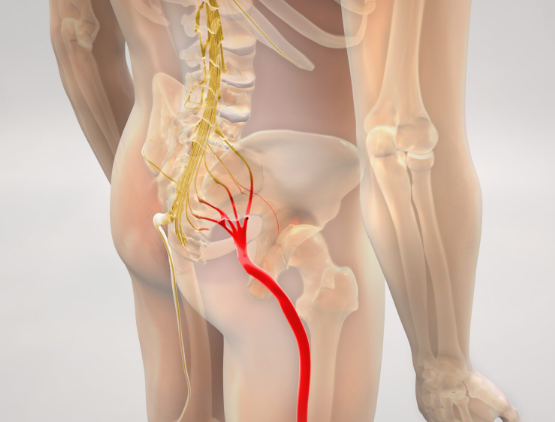
In our experience, the most common cause we see isn’t just “tight hamstrings”—it’s a combination of muscle imbalance and nerve irritation.
Most people come in thinking they just need to stretch more, but the cramping keeps coming back. That’s because the hamstring is often overworking due to weak glutes or poor movement patterns.
We also often see subtle irritation of the sciatic nerve. This can make the hamstring more sensitive and prone to cramping—even if the muscle itself is strong.
A mistake we see all the time is people relying only on magnesium, hydration, or stretching. While these can help, they rarely fix the root cause.
Most patients are surprised that it’s not just a muscle problem—it’s often a coordination issue between your nervous system and muscles, especially under fatigue.
Can You Keep Training?
Short answer: it depends.
In most cases, you can keep training—but you need to modify things:
- Reduce intensity or volume temporarily
- Avoid pushing into cramp territory
- Focus on movement quality
In our experience, completely stopping activity isn’t usually necessary—and can actually slow recovery. The key is getting the right guidance so you don’t keep aggravating the issue.
If this sounds like what you’re dealing with, getting on top of it early with physio can make a huge difference.
How Physio Treats Recurrent Hamstring Cramps
1. Assessment
We look beyond just the hamstring:
- Strength testing (glutes, hamstrings, calves)
- Movement patterns (running, squatting, bending)
- Neural tension (checking for nerve involvement)
This is where we often uncover the real cause.
2. Pain Reduction
- Hands-on treatment to reduce muscle tension
- Gentle mobility work
- Techniques to calm nerve sensitivity
This helps settle symptoms quickly so you can move better.
3. Strength & Rehab
This is the most important stage.
- Targeted hamstring strengthening (not just stretching)
- Glute activation and control
- Core and pelvic stability work
- Gradual exposure to load
In our experience, this is where long-term results happen.
4. Return to Activity
- Gradual return to running, sport, or gym
- Load progression planning
- Technique correction
We make sure you don’t just feel better—you stay better.
Why Rest Alone Doesn’t Fix Hamstring Cramps
Rest might reduce symptoms short-term, but it doesn’t fix:
- Muscle weakness
- Poor movement patterns
- Nerve sensitivity
That’s why cramps often come straight back when you return to activity. Real recovery comes from fixing the underlying cause—not just waiting it out.
Real Patient Example
We recently treated a runner from Dee Why who came into our Frenchs Forest clinic with ongoing hamstring cramps during long runs.
He’d tried stretching daily and taking magnesium, but nothing changed.
After assessing him, we found:
- Weak glutes causing overloading of the hamstrings
- Increased neural tension through the sciatic nerve
We worked on:
- Glute strength and control
- Hamstring loading exercises
- Nerve mobility work
Within 4–6 weeks, his cramping had completely resolved, and he was back to running without fear.
Common Mistakes
- Stretching too much – feels good short-term but doesn’t fix the cause
- Ignoring strength work – weak muscles cramp more easily
- Training through severe cramps – often worsens the issue
- Relying only on supplements – doesn’t address biomechanics
- Missing nerve involvement – a key factor we often see overlooked
Recovery Time for Recurrent Hamstring Cramps
Recovery depends on the cause and how long it’s been going on.
- Mild cases: 2–4 weeks
- Moderate: 4–8 weeks
- Long-standing issues: 8–12+ weeks
In our experience, patients who address the root cause early recover much faster.
Physio in Frenchs Forest for Recurrent Hamstring Cramps
If you’re dealing with recurrent hamstring cramps in Frenchs Forest or nearby areas, our physios can help you recover faster and prevent it from coming back.
Learn more about our services HERE
Explore more injury advice HERE
Give us a call today on 9806 3077, or book online, just CLICK HERE:
FAQs
Why do my hamstrings cramp even when I stretch regularly?
Stretching doesn’t address strength deficits or nerve irritation, which are two of the most common causes.
Are hamstring cramps a sign of injury?
Not always, but recurrent cramps often indicate an underlying issue that should be assessed.
Does magnesium help with hamstring cramps?
It can help in some cases, but in our experience, it rarely fixes the issue on its own.
Can nerve irritation really cause cramps?
Yes—irritation of the sciatic nerve can increase muscle sensitivity and trigger cramping.
Should I stop running if I get hamstring cramps?
Not necessarily. Modifying your training while addressing the cause is usually the best approach.
References
- Australian Physiotherapy Association
https://australian.physio - Sports Medicine Australia
https://sma.org.au - NSW Health
https://www.health.nsw.gov.au - Journal of Orthopaedic & Sports Physical Therapy
https://www.jospt.org - Brukner & Khan’s Clinical Sports Medicine
https://www.mhmedical.com/book.aspx?bookid=2926
Tight muscles aren’t always the problem—sometimes it’s your nerves. Nerve flossing exercises physio targets irritation and tension within the nervous system to reduce pain, pins and needles, and stiffness. In this blog, we’ll show you how it works, when to use it, and how physio can fast-track your recovery.
Why Your Pain Might Not Be a Muscle Problem
Most people assume pain comes from tight muscles or weak joints. And while that’s often true, there’s another major player that gets overlooked: your nervous system.
Your nerves run from your spine all the way to your fingers and toes. They need to glide and move freely through surrounding tissues. When they don’t—due to irritation, inflammation, or compression—you can experience:
- Sharp or burning pain
- Pins and needles
- Numbness
- Tightness that stretching doesn’t fix
- Pain that travels (like down the arm or leg)
This is where nerve flossing exercises physio comes in.

What Are Nerve Flossing Exercises?
Nerve flossing (also called neural gliding or neural mobilisation) involves gentle, controlled movements that help your nerves slide smoothly through surrounding tissues.
Think of it like this:
Your nerve is like a piece of floss running through tight spaces in your body. If it gets stuck, irritated, or compressed, movement becomes painful. Nerve flossing helps “unstick” it.
Unlike traditional stretching:
- You’re not trying to stretch the muscle aggressively
- You’re encouraging movement of the nerve itself
- The movements are gentle and controlled, not forced
Common Conditions That Benefit from Nerve Flossing
Nerve flossing exercises physio can be incredibly effective for:
1. Sciatica
Pain radiating down the leg from the lower back due to irritation of the sciatic nerve.
2. Cervical Radiculopathy
Neck-related nerve pain travelling into the arm.
3. Carpal Tunnel Syndrome
Median nerve compression at the wrist causing tingling in the hand.
4. Thoracic Outlet Syndrome
Compression of nerves around the shoulder and collarbone.
5. Post-Injury or Post-Surgery Stiffness
Scar tissue can restrict nerve movement.
If you’ve ever said, “Stretching doesn’t help my pain”, there’s a good chance the issue might be neural rather than muscular.
How Physiotherapy Uses Nerve Flossing Exercises
At physio, nerve flossing isn’t just handed out as a random exercise—it’s part of a targeted treatment plan.
A physiotherapist will:
- Assess whether your symptoms are nerve-related
- Identify which nerve is involved
- Determine the level of irritation (important!)
- Prescribe the right type and intensity of movement
There’s a big difference between:
- Nerve sliders (gentle, early-stage exercises)
- Nerve tensioners (more advanced loading)
Getting this wrong can flare symptoms—so this is where expert guidance matters.

Real Patient Example (From Our Clinic)
We recently treated a patient who travelled from Oxford Falls to Frenchs Forest NSW with persistent leg pain.
He’d been dealing with what he thought was “tight hamstrings” for months. He’d tried:
- Stretching daily
- Massage
- Foam rolling
Nothing worked.
On assessment, it became clear his symptoms were actually coming from sciatic nerve irritation, not muscle tightness.
We introduced:
- Gentle nerve flossing exercises
- Lumbar mobility work
- Gradual loading through strength exercises
Within 2 weeks:
- Pain reduced significantly
- Mobility improved
- He stopped feeling that constant “pulling” sensation
By 6 weeks, he was back to full activity—pain free.
The key? Treating the nervous system, not just the muscles.
Example Nerve Flossing Exercises
Important: These should be pain-free or only mildly uncomfortable. Sharp pain = stop.
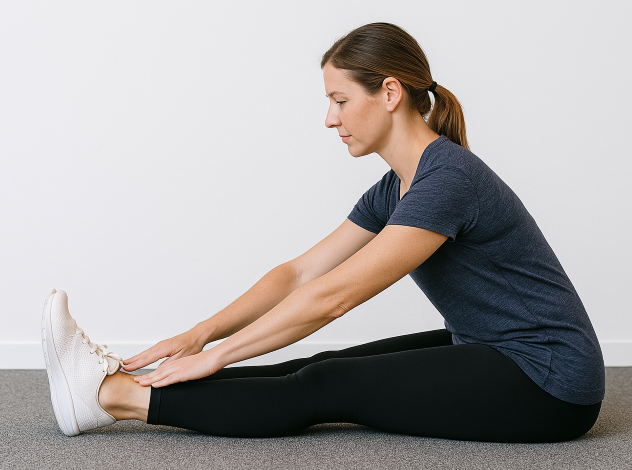
1. Sciatic Nerve Glide (Seated)
- Sit upright
- Straighten one knee while lifting your head up
- Then bend your knee while tucking your chin down
- Repeat 10–15 reps
👉 This creates a sliding motion through the nerve without overloading it.
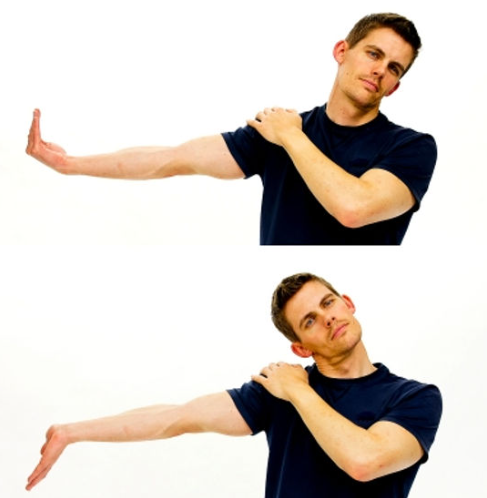
2. Median Nerve Glide (Arm)
- Arm out to the side, palm facing up
- Slowly extend your wrist and fingers
- Tilt your head away from that arm
- Return to neutral
👉 Great for desk workers with wrist or forearm symptoms.
3. Slump Nerve Glide
- Sit slouched
- Straighten one leg
- Look up as you extend the leg
- Look down as you bend it again
👉 Targets neural tension from the spine down the leg.
When Should You Avoid Nerve Flossing?
Nerve flossing is powerful—but not always appropriate.
Avoid or modify if:
- Pain is severe and highly irritable
- Symptoms worsen after each attempt
- You have progressive neurological symptoms (e.g., worsening weakness)
This is why assessment matters—doing the wrong exercise can aggravate things.
If you have severe nerve pain – READ HERE to learn more
Why Nerve Flossing Works (The Science Bit, Made Simple)
Your nerves need to:
- Slide through surrounding tissues
- Tolerate tension and compression
- Receive good blood flow
When a nerve gets irritated:
- Movement becomes restricted
- Sensitivity increases
- Pain signals amplify
Nerve flossing helps by:
- Restoring mobility
- Reducing sensitivity
- Improving circulation around the nerve
Over time, this calms the system down and restores normal function.
Common Mistakes People Make
If you’ve tried nerve flossing before and it didn’t work, it’s often due to:
❌ Going too hard, too soon
Nerves hate aggressive stretching.
❌ Holding stretches too long
These are dynamic movements, not static holds.
❌ Poor technique
Small changes in head or limb position can completely alter the effect.
❌ Not addressing the root cause
Nerve irritation often stems from the spine or surrounding joints.
How Long Until You See Results?
This depends on:
- Severity of the condition
- How long symptoms have been present
- Consistency with exercises
Typically:
- Mild cases → improvement within 1–2 weeks
- Moderate cases → 3–6 weeks
- Chronic issues → longer, but still very manageable
The key is progressive loading, not just doing the same exercise forever.
Nerve Flossing vs Stretching: What’s the Difference?
| Feature | Stretching | Nerve Flossing |
|---|---|---|
| Target | Muscles | Nerves |
| Sensation | Pulling/stretch | Gentle glide |
| Purpose | Lengthen tissue | Restore movement |
| Approach | Static or dynamic | Controlled, repetitive |
Both have their place—but using the wrong one can slow your recovery.
Why You Should See a Physio First
Google can show you exercises—but it won’t tell you:
- Which nerve is involved
- Whether it’s safe to start
- How far to push it
- What else needs to be treated
That’s where physio comes in.
At X Physio, we combine:
- Hands-on treatment
- Targeted exercise prescription
- Movement retraining
- Education so you understand your injury
So you’re not just guessing—you’re progressing.
Final Thoughts
If your pain:
- Travels
- Feels like burning, tingling, or sharp
- Doesn’t improve with stretching
…it might not be a muscle problem.
Nerve flossing exercises physio could be the missing piece in your recovery.
FAQs
What does nerve flossing feel like?
It should feel like a gentle movement or glide—not a strong stretch. You might feel mild tension, but it shouldn’t be painful.
Can nerve flossing make things worse?
Yes, if done incorrectly or too aggressively. That’s why proper assessment and guidance from a physio is important.
How often should I do nerve flossing exercises?
Usually 1–2 times per day, depending on your condition. Your physio will tailor this to you.
Is nerve flossing the same as stretching?
No. Stretching targets muscles, while nerve flossing targets the movement of nerves through surrounding tissues.
How long does it take for nerve pain to settle?
It varies, but many people see improvement within a few weeks with the right treatment.
References
- https://www.physio-pedia.com/Neural_Mobilisation
- https://www.ncbi.nlm.nih.gov/pmc/articles/PMC2565076/
- https://www.healthline.com/health/nerve-flossing
- https://www.physio-network.com/blog/neural-mobilisation-explained/
- https://www.spine-health.com/conditions/sciatica/what-you-need-know-about-sciatica
Ready to fix the real cause of your pain—not just the symptoms?
Give us a call today on 9806 3077, or book online, just CLICK HERE: https://x-physio.au4.cliniko.com/bookings#service
Chest pain is scary—no doubt about it. But not all chest pain is heart-related. Costochondritis is a common, treatable condition involving inflammation of the rib joints. The good news? With the right costochondritis physiotherapy, you can reduce pain, restore movement, and get back to normal life faster.
What Is Costochondritis?
Costochondritis is inflammation of the cartilage where your ribs attach to your breastbone (sternum). These joints—called costochondral joints—play a key role in allowing your chest to expand when you breathe.
When they become irritated or inflamed, you can feel sharp, aching, or pressure-like pain in the chest. It often mimics more serious conditions, which is why it can cause a lot of anxiety.

What Does Costochondritis Feel Like?
Costochondritis pain can vary from person to person, but common symptoms include:
- Sharp or aching pain in the front of the chest
- Pain that worsens with deep breathing, coughing, or sneezing
- Tenderness when pressing on the ribs near the sternum
- Pain that increases with movement (especially twisting or lifting)
- Discomfort that may radiate to the shoulder or upper back
A key feature? The pain is usually reproducible with touch or movement, which helps differentiate it from heart-related chest pain.
If the pain is referring down your arm, please read THIS BLOG instead.
What Causes Costochondritis?
There’s often no single clear cause, but several contributing factors can lead to costochondritis:
1. Repetitive Strain
Activities like heavy lifting, gym training, or repetitive upper body movements can overload the rib joints.
2. Poor Posture
Slouched posture—especially from desk work—can place constant stress on the chest wall.
3. Sudden Increase in Activity
Starting a new workout program or increasing intensity too quickly can trigger symptoms.
4. Trauma or Impact
A fall, sporting collision, or even minor trauma can irritate the costochondral joints.
5. Coughing or Respiratory Illness
Persistent coughing (e.g. after a cold) can strain the rib joints and lead to inflammation.

Why It’s Important to Rule Out Serious Causes
Before assuming it’s costochondritis, it’s critical to rule out more serious conditions like heart or lung issues—especially if you experience:
- Chest tightness or pressure with exertion
- Shortness of breath
- Pain spreading to the arm, jaw, or neck
- Dizziness or nausea
If in doubt, always seek medical attention first. Once serious causes are excluded, costochondritis physiotherapy becomes a highly effective treatment pathway.
How Physiotherapy Helps Costochondritis
Physiotherapy is one of the most effective ways to treat costochondritis because it targets the underlying mechanical and movement-related causes.
Here’s how we approach it:
1. Pain Relief Techniques
We start by settling the pain and inflammation through:
- Manual therapy (gentle joint mobilisation)
- Soft tissue release around the chest, shoulders, and upper back
- Advice on activity modification
2. Improving Thoracic Mobility
Stiffness in the upper back (thoracic spine) is a major contributor. If your upper back doesn’t move well, your ribs take on extra load.
We use:
- Mobility exercises
- Stretching techniques
- Hands-on mobilisation
3. Posture Correction
Poor posture is one of the biggest drivers of ongoing symptoms.
We help you:
- Improve sitting and standing posture
- Set up your workstation properly
- Build awareness of daily habits
4. Strengthening Exercises
Weakness in the upper back and shoulder muscles can overload the chest.
Your program may include:
- Scapular stability exercises
- Postural strengthening
- Gradual return-to-loading programs
5. Breathing Retraining
Many people with costochondritis develop shallow or protective breathing patterns.
We guide you through:
- Diaphragmatic breathing
- Rib expansion exercises
- Relaxation strategies

Real Patient Example from Our Clinic
We recently treated a 34-year-old patient who travelled from Dee Why to our clinic in Frenchs Forest, NSW with persistent chest pain.
They had been to the GP and emergency department—thankfully, all cardiac causes were ruled out. However, the pain lingered for over 6 weeks and was affecting sleep, work, and gym training.
On assessment, we found:
- Significant stiffness through the thoracic spine
- Poor posture from long hours at a desk
- Pain reproduced with rib palpation and rotation
We started a structured costochondritis physiotherapy program including:
- Manual therapy to the rib joints and upper back
- Thoracic mobility exercises
- Postural correction strategies
- Gradual return to gym-based loading
Within 2 weeks, their pain had reduced significantly. By week 5, they were back to full training with no symptoms.
How Long Does Costochondritis Take to Heal?
Recovery time varies depending on the severity and how long it’s been present.
- Mild cases: 2–4 weeks
- Moderate cases: 4–8 weeks
- Persistent cases: 2–3+ months
With guided costochondritis physiotherapy, most people recover faster and reduce the risk of recurrence.
What Makes Costochondritis Worse?
If you’re dealing with this condition, try to avoid:
- Heavy lifting (especially pressing movements like bench press)
- Slouched sitting for long periods
- Sudden increases in training load
- Ignoring pain and pushing through
Small adjustments early can make a big difference.

Can You Still Exercise with Costochondritis?
Yes—but it needs to be modified.
We usually recommend:
- Lower body training
- Light cardio (walking, cycling)
- Avoiding aggravating upper body movements
A physio-guided plan ensures you stay active without delaying recovery.
When Should You See a Physio?
You should consider costochondritis physiotherapy if:
- Pain has lasted more than 1–2 weeks
- It’s affecting your daily activities or sleep
- You’re unsure what movements are safe
- Symptoms keep coming back
Early treatment often means faster recovery and less frustration.
Why Choose Physiotherapy Over Rest Alone?
While rest can help settle symptoms temporarily, it doesn’t address the root cause.
Physiotherapy focuses on:
- Fixing movement dysfunction
- Improving strength and posture
- Preventing recurrence
That’s why it’s the most effective long-term solution.
FAQs About Costochondritis Physiotherapy
What is the fastest way to recover from costochondritis?
The fastest way is a combination of relative rest, avoiding aggravating movements, and starting targeted physiotherapy early to improve mobility, posture, and strength.
Can physio fix costochondritis?
Yes. Physiotherapy is one of the most effective treatments, as it addresses the underlying mechanical causes rather than just masking symptoms.
Is costochondritis serious?
It’s not dangerous, but it can be painful and distressing. Always rule out heart-related causes first before confirming the diagnosis.
Should I stretch or rest with costochondritis?
Both are important. Rest initially, but guided stretching and mobility exercises are essential for recovery.
Can poor posture cause costochondritis?
Yes—poor posture places increased stress on the rib joints and is a common contributing factor.
How do I know if my chest pain is costochondritis?
If the pain is reproducible with touch or movement and worsens with certain activities, it may be costochondritis—but always get it checked by a medical professional first.
References
- https://www.healthdirect.gov.au/costochondritis
- https://www.physio-pedia.com/Costochondritis
- https://www.mayoclinic.org/diseases-conditions/costochondritis
- https://www.arthritis.org/diseases/costochondritis
- https://www.ncbi.nlm.nih.gov/books/NBK532931/
Chest pain doesn’t have to mean the worst—but it does deserve the right attention. If you’re dealing with ongoing rib or chest discomfort, a targeted costochondritis physiotherapy plan can make all the difference.
Give us a call today on 9806 3077, or book online, just CLICK HERE:
https://x-physio.au4.cliniko.com/bookings#service